Free dreamcatcher guide

The dreamcatchers come from Native American mythology. There are different stories about how the dreamcatcher came into being, but for all stories, it is a beautiful story about the magical powers of dreams.
A dreamcatcher is reminiscent of a spider web that can filter out the bad dreams. You dream both good and bad dreams during the night and the dreamcatcher is made to capture the bad dreams in its "web" and filter them so that only the good dreams can pass through the keyhole in the middle. Then the dreams can slowly slide down the feathers to the sleeping person. The bad dreams, on the other hand, will get stuck in the dreamcatcher and will be dissolved by the sun's rays at dawn.
You will need the following materials:
- Infinity Hearts Dahlia textile yarn - white (Alternatively, Hoooked Zpaghetti yarn can be used - white)
- Ring for dreamcatcher 30 cm
- Infinity Hearts Rose 8/4 Cotton yarn - white
- White feathers
- White rocai beads
- Mayflower fake fur yarn - white
- A pair of scissors
- A glue gun to attach the feathers.
Procedure:
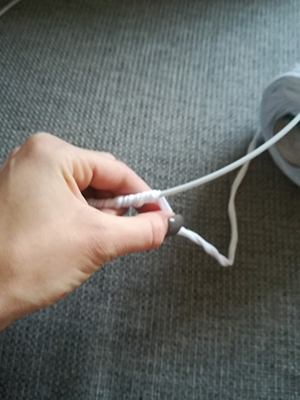
Step 1: Start by tying the fabric yarn around the ring. Tie 2-3 knots without cutting it off the roll.
Step 2: Next, take the roll of fabric yarn and run it through the ring. You continue with this while you hold on to the first knots you made. It is important that you tighten and push the fabric yarn along the way so that it sits tight and the ring is completely covered.

Step 3: Before the ring is completely filled, cut a good length of the fabric yarn roll, so you are sure to have enough for the rest of the ring.
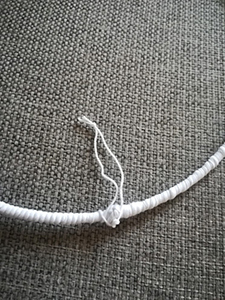
When you have rolled the fabric yarn tight all the way around the ring, you tie a knot with the first string. Here again, it is a good idea to tie 2-3 knots to make sure it stays put. The ends are cut so that they are not in the way.
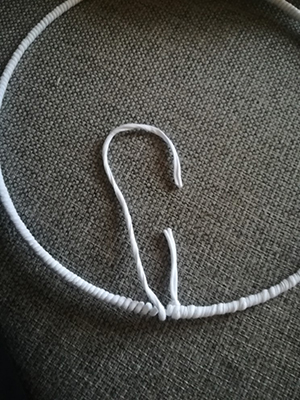

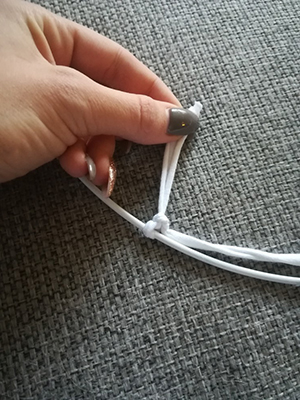
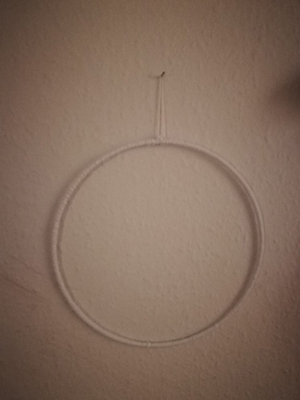
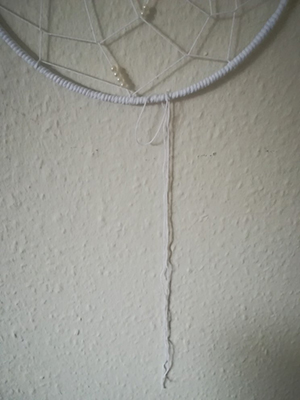
Step 4: Cut a suitable piece of cotton yarn and tie the ends together. Place the string under the ring and pull one end through the other. This is the handle that the dreamcatcher must hang in, so you can determine the length by yourself.
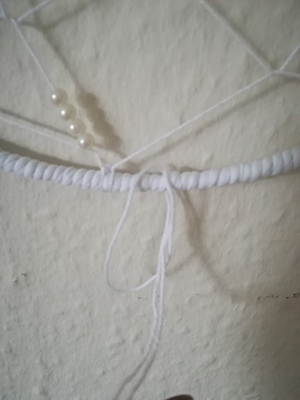
Alternatively step: You can choose to put the beads on the thread now before tying it to the ring, but then be sure to push the beads further forward so that they will not all get stuck on the outer side of the dreamcatcher - Otherwise you can also attach them in step 7 as the pictures show. About 20 beads have been used in this pattern, however, you can decide for yourself how you want to decorate your dreamcatcher.
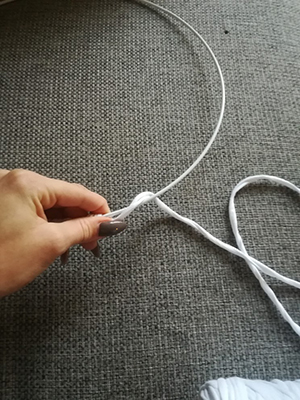
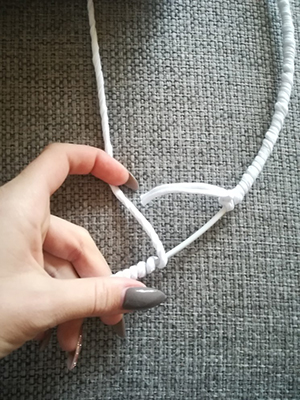
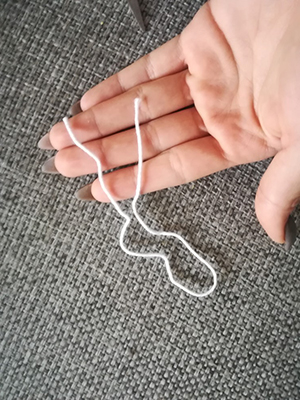
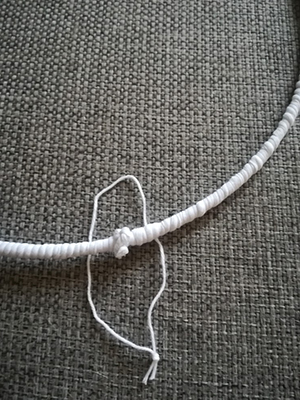
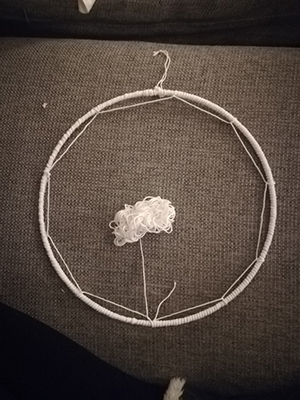
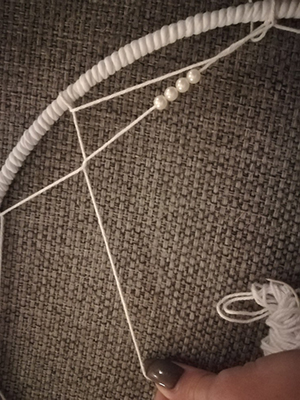
Step 5: Now take the cotton skein and just like before, tie a knot without cutting the thread of the yarn. Next, make a loop with the skein - it must be under the ring. Now you take the skein over the ring and through the loop. The yarn is tightened a bit, not much, but also not too loose.
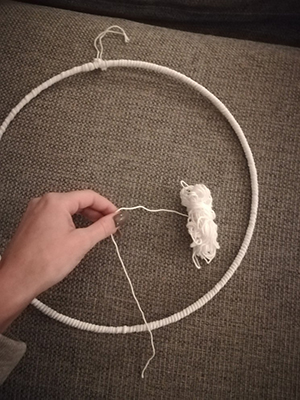
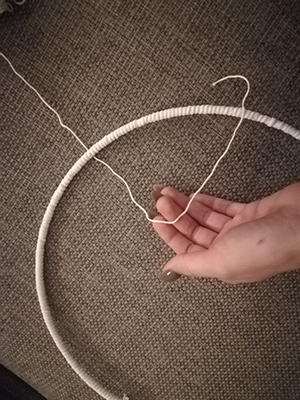
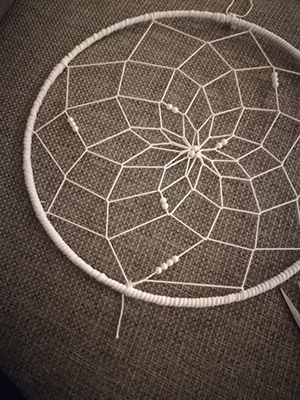
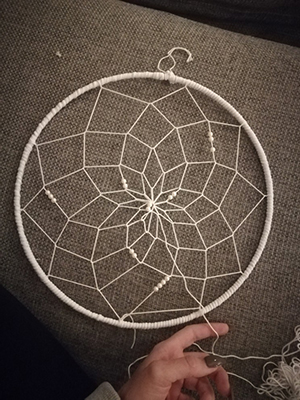
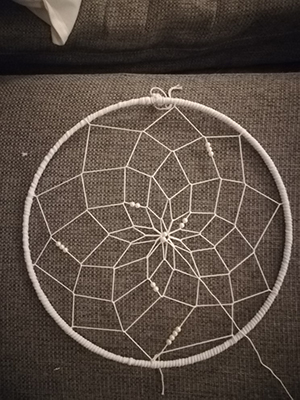
Step 6: You continue to make loops and push the skein through them. This is done all the way around and the end result looks like this:
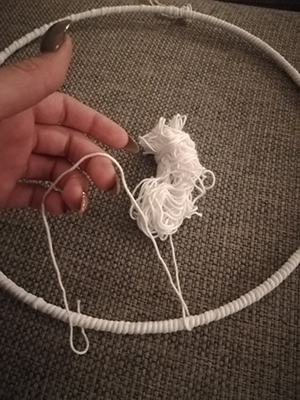
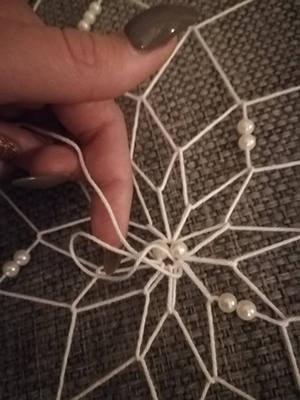
Step 7: Find the end of the yarn skein and attach the number of beads you think it needs. In this patterns, not all loops have beads, but they are distributed throughout the dreamcatcher so it looks a little random. About 20 in the pattern have been used here, but there can easily be more or fewer depending on how decorated you think your dreamcatcher should end up being.
Note: It may be beneficial to use a smaller skein so you do not have to run the beads all the way through. Alternatively, you can also cut a good length of the skein.
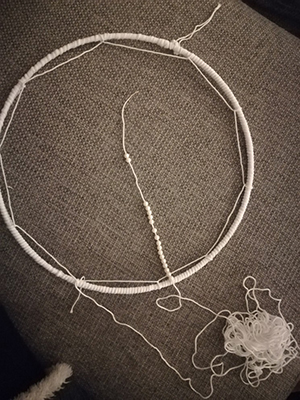
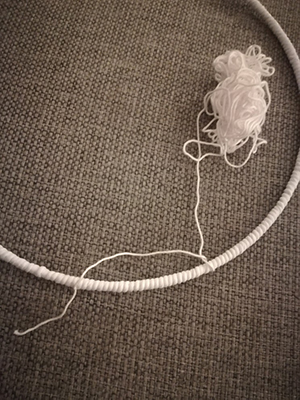
Step 8: Then you take the skein and put it through the loops that are made around the ring. As described in step 7, beads are not meant to be used in each loop, but just as randomly distributed as you think. Here you start with 4 beads you push forward on the thread and the rest is held back and then you tighten the yarn slightly.
Step 9: Along the way, you push the beads forward as you think is needed, while continuing to carry the skein through each loop all the way around the ring.
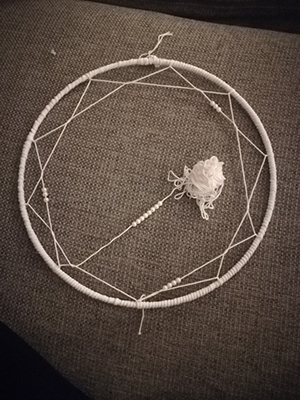
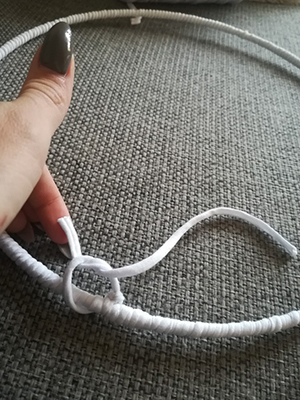
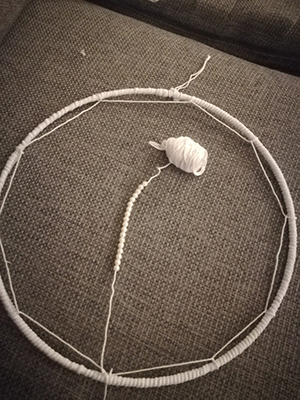
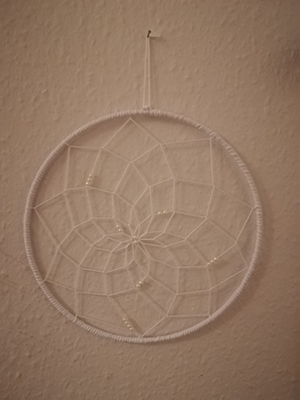
Step 10: You continue to carry the skein through all loops until you think the centre looks well filled.
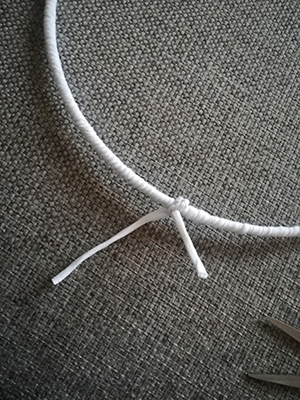
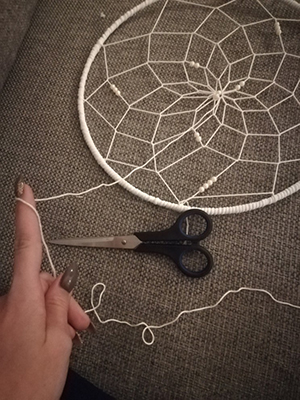
Step 11: When you are satisfied with the amount of yarn in the middle, tighten with the thread. When tightened, cut off a good length from the skein. This piece is used to tie the knot in the middle. Again, it is advantageous to tie 2-3 knots so that you are sure it will last. Then cut the remaining one.
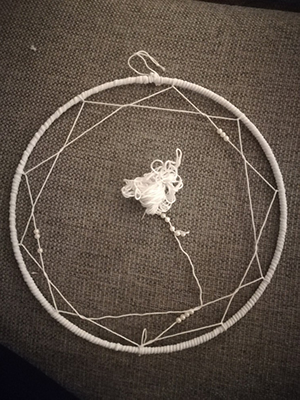
Step 12: If you do not think the center of the dreamcatcher is completely straight, you can just gently adjust the thread a little around the ring until you are satisfied with the result. The same can be done with the beads if you are not completely satisfied with the way they sit.
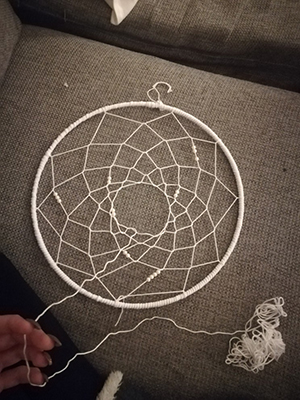
Step 13: Now cut pieces of 90 cm of different types of yarn. The number varies again according to how thick a dreamcatcher you want. About 30-40 pieces have been used in this pattern. You take one piece at a time and fold it the middle and then make a loop in the dreamcatcher. You take the string behind the ring and over the ring where the thread is pulled through the loop you made.
It may be beneficial to start with the thickest yarn first and distribute and work down in size until you think the dreamcatcher is full enough.
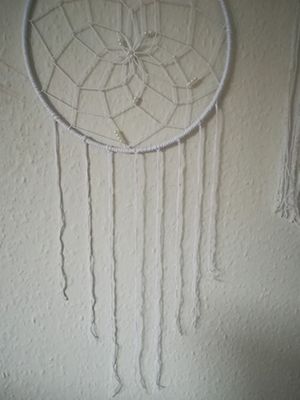
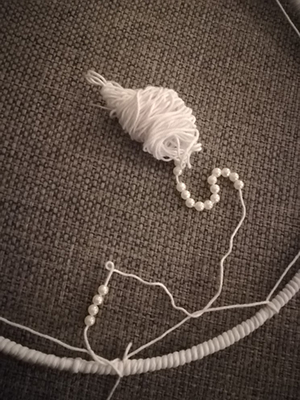
Step 14: When the dreamcatcher has the desired fullness, apply beads to the cotton yarn. Again, it depends on how "decorated" you want it. Here, about 20-25 beads are used in 7 threads. They are applied to the desired thread and then a knot is tied to ensure they stay in the desired place. When this is done, cut the dream catcher to the bottom to get the desired length.
Step 15: The feathers are attached with a glue gun, but it is a good idea to carefully distribute them on the dreamcatcher without glue before, so you get a sense of where they will be placed. When you are satisfied, apply a small amount of glue to the end of the feather and attach it to a piece of fabric yarn.
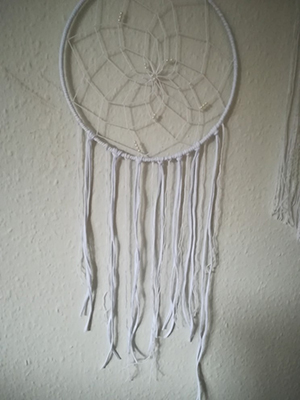
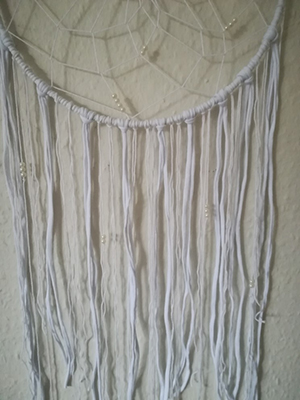
The final result:
Feel free to share
If you make this dreamcatcher, please share it on social media and use the following hashtags:
#loverito
#ritokrea
Design: Kamilla Olsen
 Österreich
  Belgique
  Bosna i Hercegovina
  България
  Κύπρος
  Česká republika
  Danmark
  Eesti
Eesti  Føroyar
  Suomi
Suomi  France
  Deutschland
  Ελλάδα
  Kalaallit Nunaat
  Magyarország
  Ísland
  Ireland
  Italia
  Latvija
  Liechtenstein
  Lietuva
  Lëtzebuerg
  Malta
Malta  Isle of Man
  Nederland
  Norge
Norge  Polska
  Portugal
  România
  Slovensko
  Slovenija
  España
  Sverige
  Schweiz
  Ukraїna
  United Kingdom