Free crochet pattern Activity Toy Ostrich
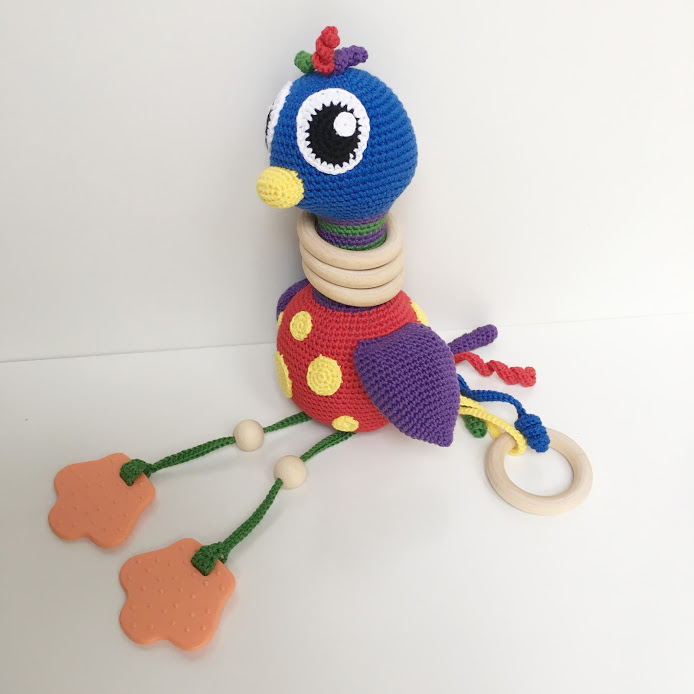
This crochet pattern is designed as an activating and stimulating toy for babies. The idea is to stimulate their senses with the many vibrant colours and the different materials that are fun to touch, as well as the different sounds.
The crochet pattern is made beginner-friendly with many detailed descriptions and pictures to guide you along. The activity toy ostrich is made with Infinity Hearts Rose 8/4 yarn, which is made from 100% cotton with a thickness of 8/4. Find a kit with yarn and content for the activity toy here.
Measurements
The ostrich measures approx. 22 cm + legs of 18 cm incl. feet.
Materials
Infinity Hearts Rose 8/4 yarn colour:
- 50 grams Infinity Hearts Rose 8/4 Yarn Unicolour 19 Red
- 25 grams Infinity Hearts Rose 8/4 Yarn Unicolour 101 Cobalt-Blue
- 25 grams Infinity Hearts Rose 8/4 Yarn Unicolour 56 Dark Purple
- 25 grams Infinity Hearts Rose 8/4 Yarn Unicolour 156 Green
- 25 grams Infinity Hearts Rose 8/4 Yarn Unicolour 179 Yellow
- Small amount of Infinity Hearts Rose 8/4 Yarn Unicolour 02 White
- Small amount of Infinity Hearts Rose 8/4 Yarn Unicolour 01 Black
- 4 x Infinity Hearts Wooden Rings 60 mm
- 1 x Infinity Hearts Rattlebox 21 mm
- 1 x Infinity Hearts Squeaker 60 mm
- 2 x Infinity Hearts Wooden Beads 20 mm
- Wadding/Stuffing
- Cellophane bags or cooking bag for wing-noises.
- 2 x Teether feet
Tools
- Crochet hook size 2.50 mm
- Scissor
- Sewing needle
- (Possibly) Pins for assembly
- (Possibly) Measuring tape
Abbreviations
mr: magic ring
ch: chain stitch
dc: double crochet
sl st: slip stitch
htr: half treble
htr-inc: half treble-increase (2 htr in the same)
tr: treble
tr-inc: treble-increase (2 tr in the same)
inc: increase (2 dc in the same)
dec: decrease (2 dc together)
rd: round (crochet circular)
rw: row (you crochet back and forth)
** x (a number) means repeat from * to * the specified number of times
(x) number of stitches after round finishes
Instructions
The crochet pattern contains photo guides for individual points.
Head + neck + body (crocheted in one)
Begin with blue
Rd. 1: Make 6 dc in mr (6)
Rd. 2: *inc* x6 (12)
Rd. 3: *inc, 1 dc* x6 (18)
Rd. 4: *inc, 2 dc* x6 (24)
Rd. 5: *inc, 3 dc* x6 (30)
Rd. 6: 2 dc, *inc, 4 dc* x5, inc, 2 dc (36)
Rd. 7: *inc, 5 dc* x5 (42)
Rd. 8: 3 dc, *inc, 6 dc* x5, inc, 3 dc (48)
Rd. 9: *inc, 7 dc* x6 (54)
Rd. 10: 4 dc, *inc, 8 dc* x5, inc, 4 dc (60)
Rd. 11.-19: 1 dc in each [9 rounds] (60)
Rd. 20: 4 dc, *dec, 8 dc* x5, dec, 4 dc (54)
Rd. 21: *dec, 7 dc* x6 (48)
Rd. 22: 3 dc, *dec, 6 dc* x5, dec, 3 dc (42)
Rd. 23: *dec, 5 dc* x6 (36)
Rd. 24: 2 dc, *dec, 4 dc* x5, dec, 2 dc (30)
Insert stuffing and rattle box.
Change colour to purple – Now, crochet the neck
Stuff as you go– add extra stuffing between the head and neck in order to stabilize the head.
Rd. 25.-26: 1 dc in each (30)
Change to green – you may want to bring the strands along when crocheting the neck so that you don’t cut the strand by the colour changes.
Rd. 27: *8 dc, dec* x3 (27)
Rd. 28: 1 dc in each (27)
Change to purple
Rd. 29.-30: 1 dc in each (27)
Change to green
Rd. 31.-32: 1 dc in each (27)
Change to purple
Rd. 33.-34: 1 dc in each (27)
Change to green
Rd. 35.-36: 1 dc in each (27)
Change to purple
Rd. 37.-38:1 dc in each (27)
Change to green
Rd. 39: 1 dc in each (27)
Rd. 40: *8 dc, inc* x3 (30)
Change to purple and cut the green yarn.
Rd. 41.-42: 1 dc in each (30)
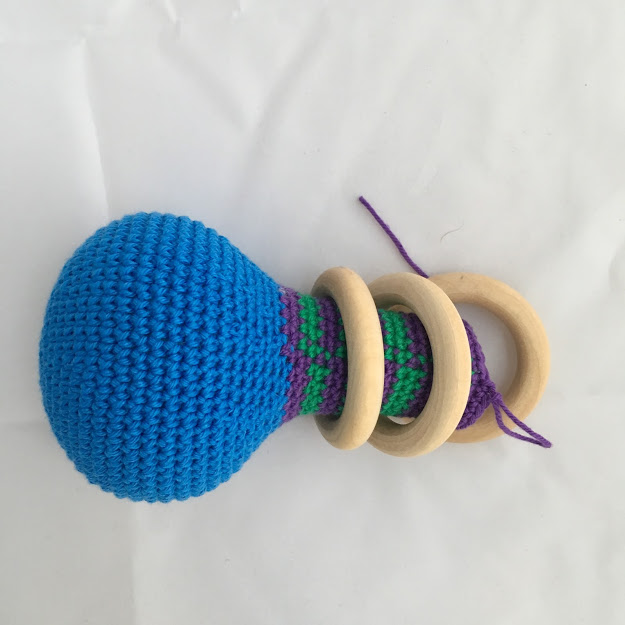
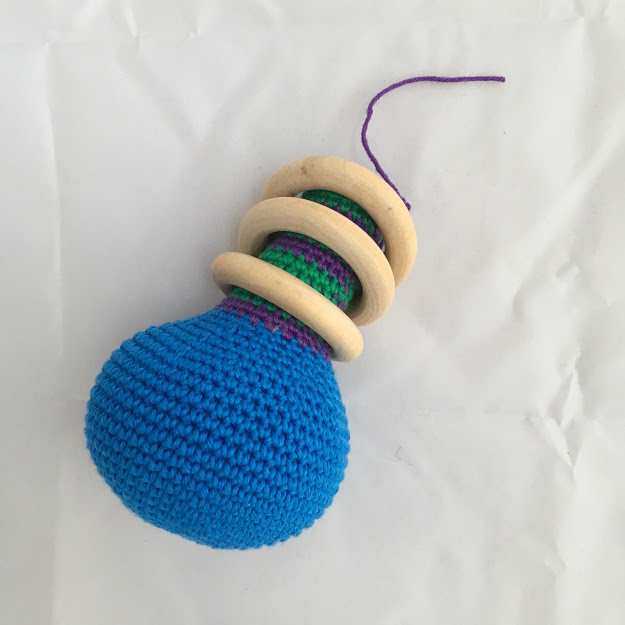
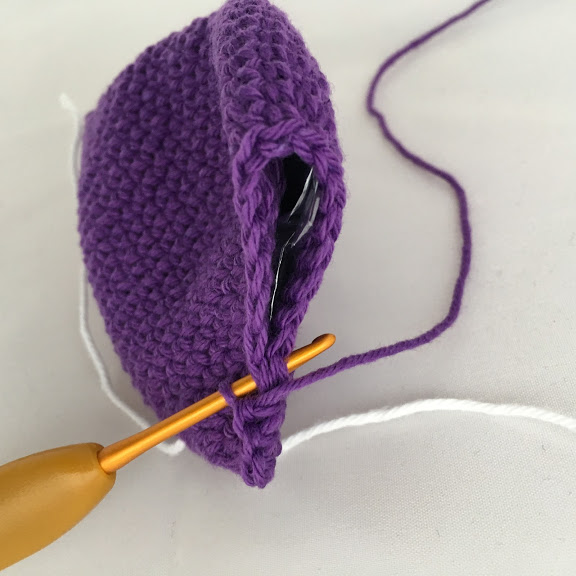
Now cut the purple strand, leaving a long tail so you can add the three wooden rings around the neck.
Photo guide: Once you have cut the purple strand, you put the wooden rings on the neck before switching to the red yarn and crocheting the body.
Change to red – Now, crochet the body
Stuff as you go – Stuff generously between head and neck
Rd. 43: 2 dc, *inc, 4 dc* x5, inc, 2 dc (36)
Rd. 44: *inc, 3 dc* x9 (45)
Rd. 45: 2 dc, *inc, 4 dc* x8, inc, 2 dc (54)
Rd. 46: 4 dc, *inc, 8 dc* x5, inc, 4 dc (60)
Rd. 47: *inc, 9 dc* x6 (66)
Rd. 48: 1 dc in each (66)
Rd. 49: 5 dc, *inc, 10 dc* x5, inc, 5 dc (72)
Rd. 50: 1 dc in each (72)
Rd. 51: *inc, 11 dc* x6 (78)
Rd. 52.-61: 1 dc in each [10 rounds] (78)
Rd. 62: *dec, 11 dc* x6 (72)
Rd. 63: 5 dc, *dec, 10 dc* x5, dec, 5 dc (66)
Rd. 64: *dec, 9 dc* x6 (60)
Rd. 65: 4 dc, *dec, 8 dc* x5, dec, 4 dc (54)
Rd. 66: *dec, 7 dc* x6 (48)
Insert the squeaker in the body.
Rd. 67: 3 dc, *dec, 6 dc* x5, dec, 3 dc (42)
Rd. 68: *dec, 5 dc* x6 (36)
Rd. 69: 2 dc, *dec, 4 dc* x5, dec, 2 dc (30)
Rd. 70: *dec, 3 dc* x6 (24)
Rd. 71: *dec, 2 dc* x6 (18)
Rd. 72: *dec, 1 dc* x6 (12)
Rd. 73: *dec* (6)
Stuff the body generously, cut the strand and weave in end.
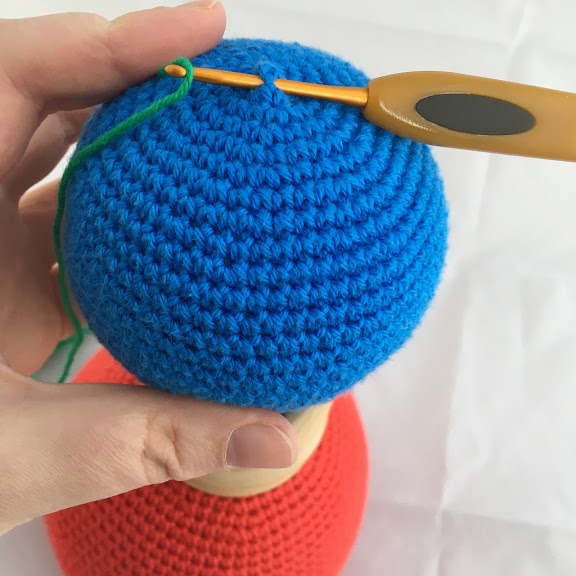
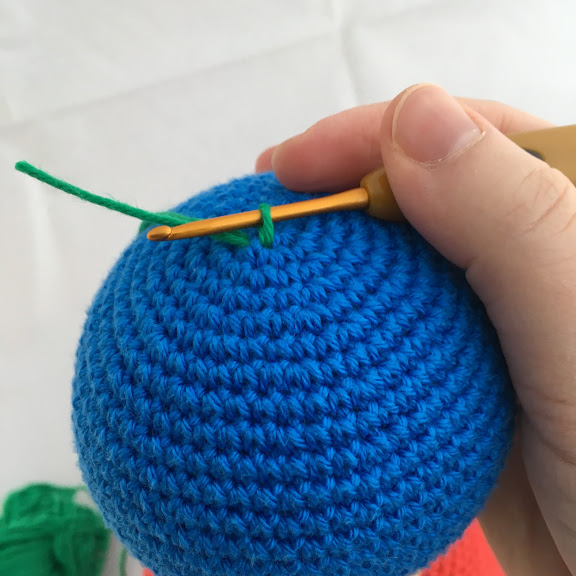
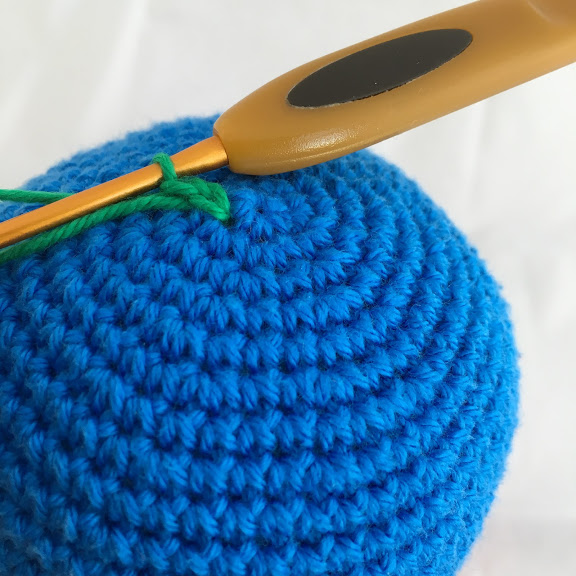
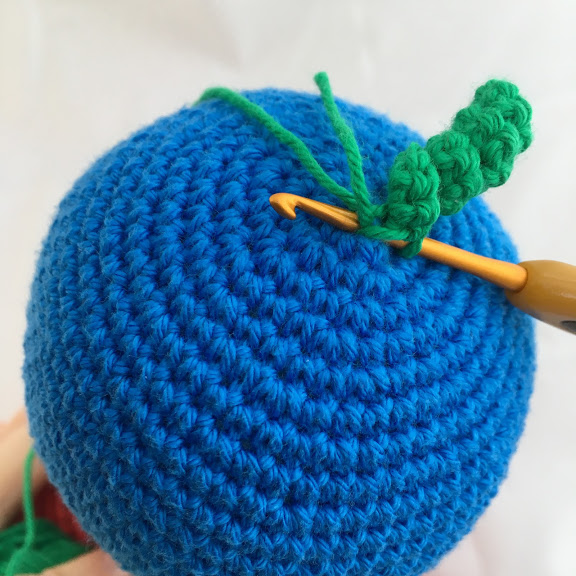
Head feather (make 3 – 1 green, 1 purple, 1 red) – Photo guide
Photo guide: Attach the yarn strand to the head (Figure 3.1 + 3.2) and make 15 ch (Figure 3.3). Then start in 2nd stitch from the hook and make 2 dc in each ch all the way back. Finish the feather by making a sl st in the head (Fig. 3.4). Cut the strand and weave in ends.
Eyes (make 2)
Begin with black
Rd. 1: Make 6 dc in mr (6)
Rd. 2: *inc* x6 (12)
Rd. 3: *inc, 1 dc* x6 (18)
Rd. 4: *inc, 2 dc* x6 (24)
Change to white
Rd. 5: 2 dc, 3 htr, htr-inc, 2 tr, *tr-inc* x3, 2 tr, htr-inc, 3 htr, 7 dc, 1 sl st in first stitch.
Cut and leave long tail for sewing.
Twinkle (make 2)
Make a white twinkle – 6 dc in mr, 1 sl st.
Finish and leave tail for sewing.
Assembly/Finishing
Sew on the eyes between round 5 and 15, see photos for location.
Sew on the little twinkle after the eye and place it wherever you prefer.
Beak
Crochet in yellow
Cast on 6 ch.
Rd. 1: Start with 1 dc in 2nd ch from the hook, make 1 dc in the next 3 ch and make 3 dc in the last ch. Continue around the other side and make 3 dc and 2 dc in the ch you started in (12)
Rd. 2: inc, 3 dc, *inc* x3, 3 dc, *inc* x2 (18)
Rd. 3.-5: 1 dc in each [3 rounds] (18)
Finish with 1 sl st, cut and leave tail for sewing.
Assembly/Finishing
Attach the beak between round 14 and 18 – right between the eyes – add stuffing during assembly.
Wings (make 2)
Crochet using purple
Rd. 1: Make 6 dc in mr (6)
Rd. 2: 1 dc in each (6)
Rd. 3: *inc* x6 (12)
Rd. 4: 1 dc in each (12)
Rd. 5: *inc, 1 dc* x6 (18)
Rd. 6: 1 dc in each (18)
Rd. 7: *inc, 2 dc* x6 (24)
Rd. 8: 1 dc in each (24)
Rd. 9: *inc, 3 dc* x6 (30)
Rd. 10.-11: 1 dc in each (30)
Rd. 12: *inc, 4 dc* x6 (36)
Rd. 13.-18: 1 dc in each [6 rounds] (36)
Rd. 19: *dec, 4 dc* x6 (30)
Rd. 20.-21: 1 dc in each (30)
Cut a piece of a cellophane bag at least 4 times larger than the wing and fold it to fit the largest piece of the wing. The more folded layers you make, the more it crunches.
Rd. 22: *dec, 3 dc* x6 (24)
Press the wing together and crochet with 12 dc. Leave a long tail for sewing.
Assembly – photo guide
Place the wings on each side of the body about 4-5 rounds from the neck and sew on the wings.
Legs (make 2)
Crochet with green
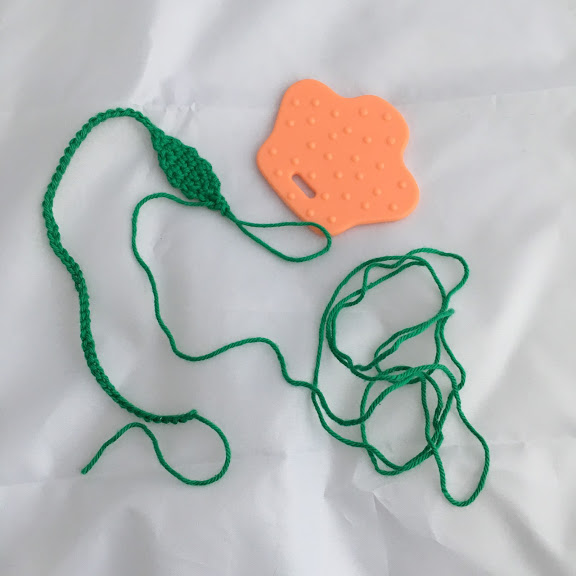
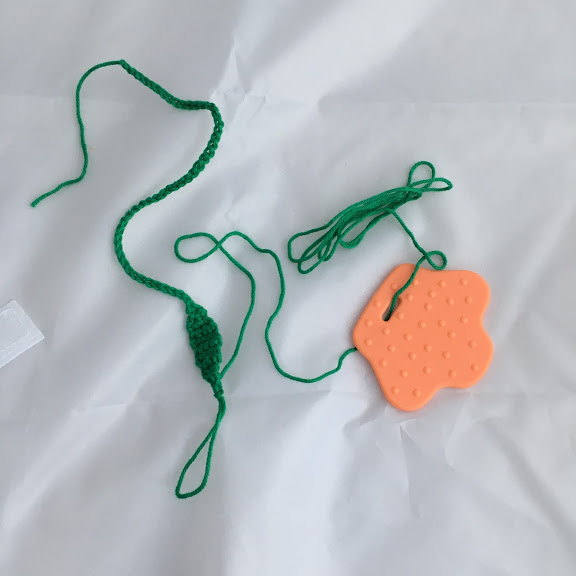
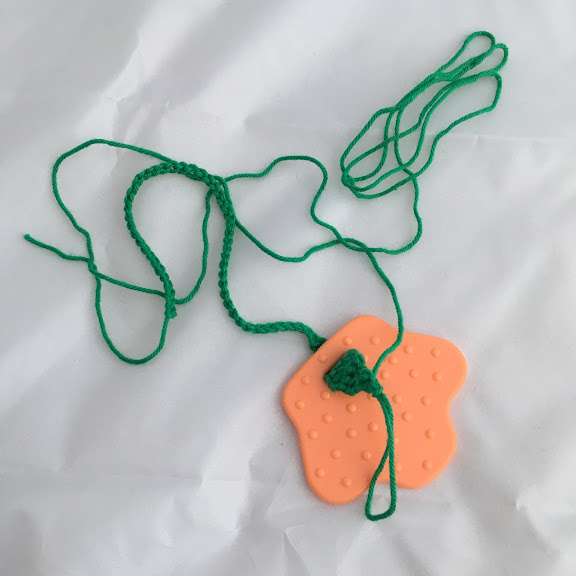
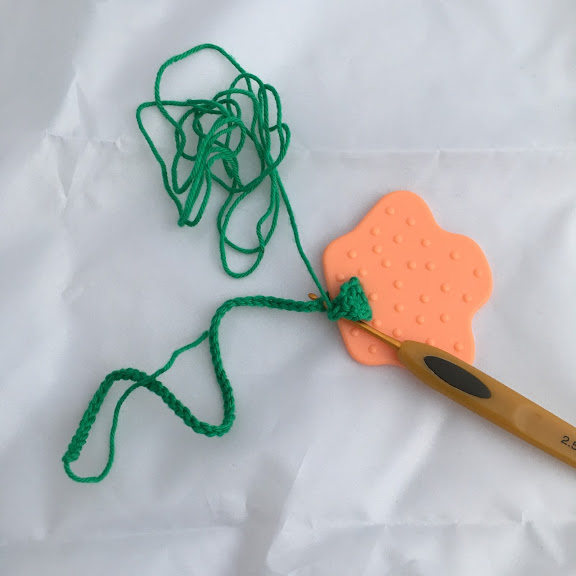
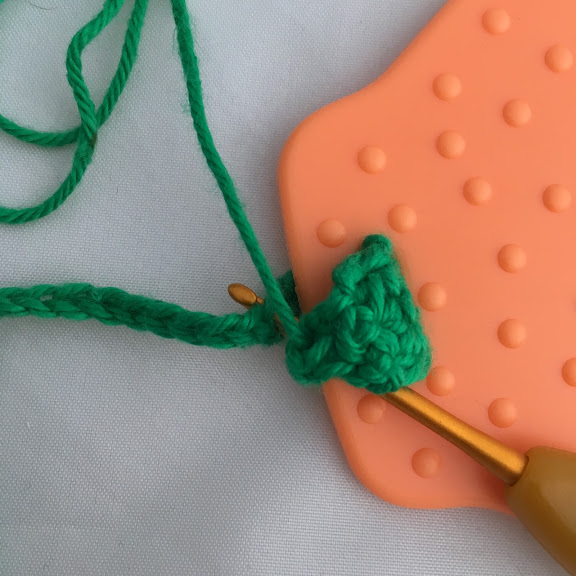
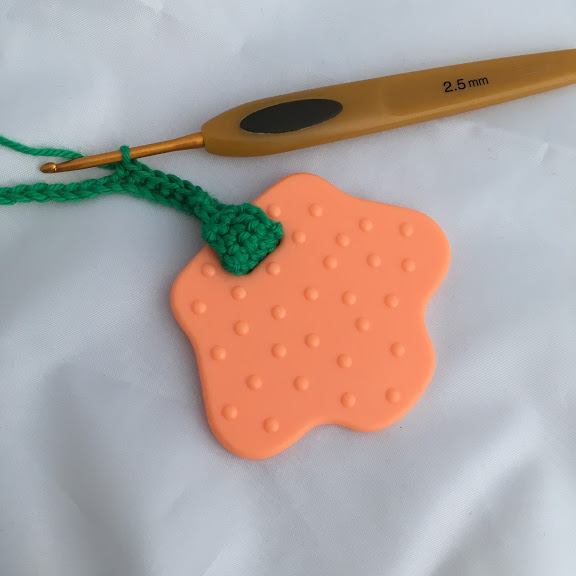
Cast on 41 ch (or so the strand is maximum around 18 cm). Make sure you have some extra yarn on your ch that you can use later for assembly. Now you work in rows, starting in 2nd ch from hook; 1st rw: inc, turn with 1 ch (2) 2nd rw: inc, 1 dc, turn with 1 ch (3) 3rd rw: inc, 2 dc, turn with 1 ch (4) 4.-6. K: 1 dc in each, turn with 1 ch [3 rows] (4) 7. rw: dec, 2 dc, turn with 1 ch (3) 8. rw: dec, 1 dc, turn with 1 ch (2) 9. rw: dec, turn with 1 ch (1) Now make 1 sl st in dc and cut the yarn so you have approx. 130 cm yarn – possibly apply a stitch marker in the loop when measuring. Photo guide: Crochet in rows (see photo 1 below), after cutting the yarn, you need a teether foot (see photo 2 below). You now fold up the long strand of yarn and pull it through the foot (see photo 3 below) and then pull approx. half of your 9 rows through the foot (see photo 4 below). Now, continue crocheting your ch on the other side of the foot (see photo 5 below). Begin in the ch just before you started the rows (see photo 6 below) and make a dc in each ch (see photo 7 below). Finish by cutting the strand and leaving a tail for assembly, remember to add one wooden bead on each leg.

Assembly and application of beads
Draw the two strand-ends through the needle and lead the needle through the bead.
Now, sew the leg onto the body approximately 4 rounds from the last round on the body.
Sew on tightly, so the baby doesn’t accidentally pull it off.
Do this by inserting the two strands into two stitches placed right next to each other - ie one strand through each stitch. Then you insert the two strands around inside the body so that the strand is firmly attached to the stuffing. You now lead each strand out of the body through the same stitch. Here you pull the two strands tight, make two to three knots and push it into the body of the ostrich.
Spots
You can make as many spots as you want, but here are some suggestions.
Crochet in yellow
Spot 1 (make 4)
Rd. 1: Make 6 dc in mr (6)
sl st and leave a tail for sewing.
Spot 2 (make 3)
Rd. 1: Make 6 dc in mr (6)
Rd. 2: *inc* x6 (12)
sl st and leave a tail for sewing.
Spot 3 (make 4)
Rd. 1: Make 6 dc in mr (6)
Rd. 2: *inc* x6 (12)
Rd. 3: *inc, 1 dc* x6 (18)
sl st and leave a tail for sewing.
Spot 4 (make 2)
Rd. 1: Make 6 dc in mr (6)
Rd. 2: *inc* x6 (12)
Rd. 3: *inc, 1 dc* x6 (18)
Rd. 4: *inc, 2 dc* x6 (24)
sl st and leave a tail for sewing.
Sew the spots onto the body.
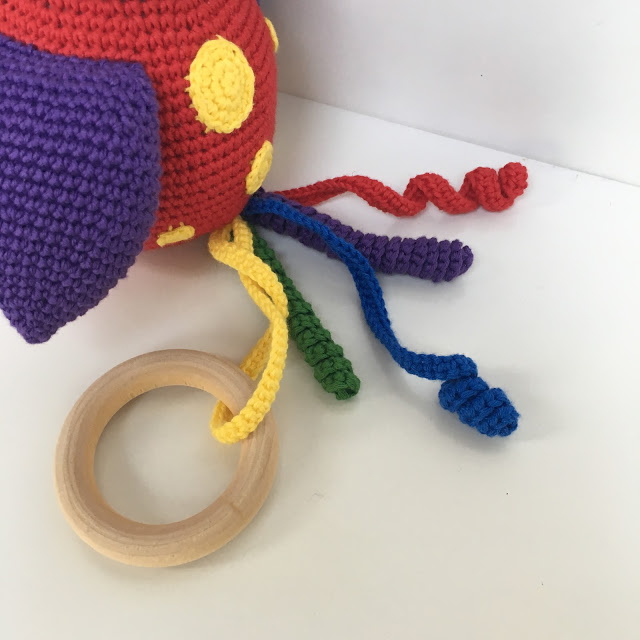
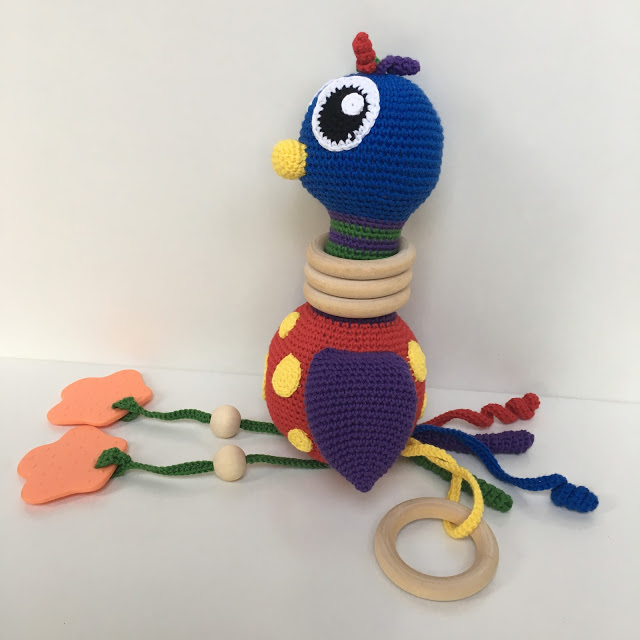
You can mix and match the tail how you prefer. You can make less or more, and/or shorter or longer tail feathers than what has been suggested in the photos. Remember to make the tail feathers max. 22 cm long.
You begin all the feathers with xx ch and then you start in 2nd ch from the hook.
You can begin all tail feathers – except from yellow - by attaching the yarn directly to the body. The tail is placed roughly in the middle on the back, about 5-10 rounds from the bottom. You could, for example, place two tails next to each other, two above and one below the first two, so that they are slightly separated and not all placed on one row.
| Tail feather colour | Description |
| Yellow | Cast on 61 ch and make 1 dc in each. Sew on the one end, add a wooden ring and sew on the other end. |
| Green | Make 51 ch (tight) and make 2 dc in each ch. |
| Red | Make 55 ch (tight) and make 1 htr in each. |
| Blue | Make 45 ch (tight) and crochet 2 htr in the next 15 ch and hereafter 1 dc in each ch. |
| Purple | Make 55 (tight) and make 3 dc in each ch. |
Your ostrich is now finished!
Designed by: annaskjemt.dk (Anna Skjemt)
 Österreich
  Belgique
  Bosna i Hercegovina
  България
  Κύπρος
  Česká republika
  Danmark
  Eesti
Eesti  Føroyar
  Suomi
Suomi  France
  Deutschland
  Ελλάδα
  Kalaallit Nunaat
  Magyarország
  Ísland
  Ireland
  Italia
  Latvija
  Liechtenstein
  Lietuva
  Lëtzebuerg
  Malta
Malta  Isle of Man
  Nederland
  Norge
Norge  Polska
  Portugal
  România
  Slovensko
  Slovenija
  España
  Sverige
  Schweiz
  Ukraїna
  United Kingdom