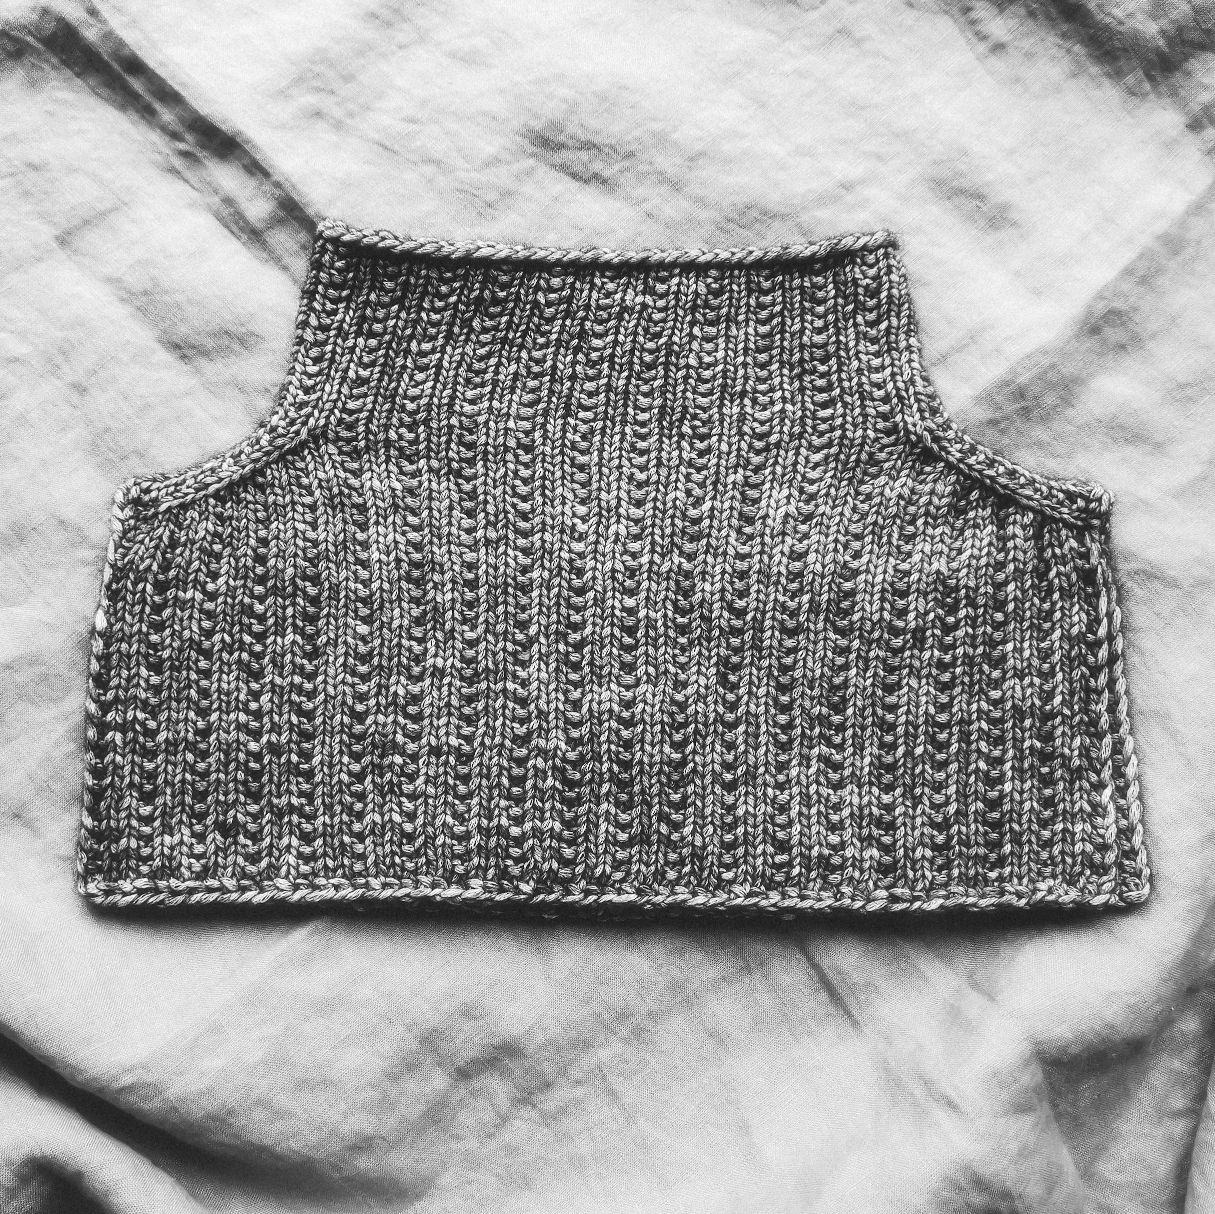
Knitted #ClassyNeck - Onesize
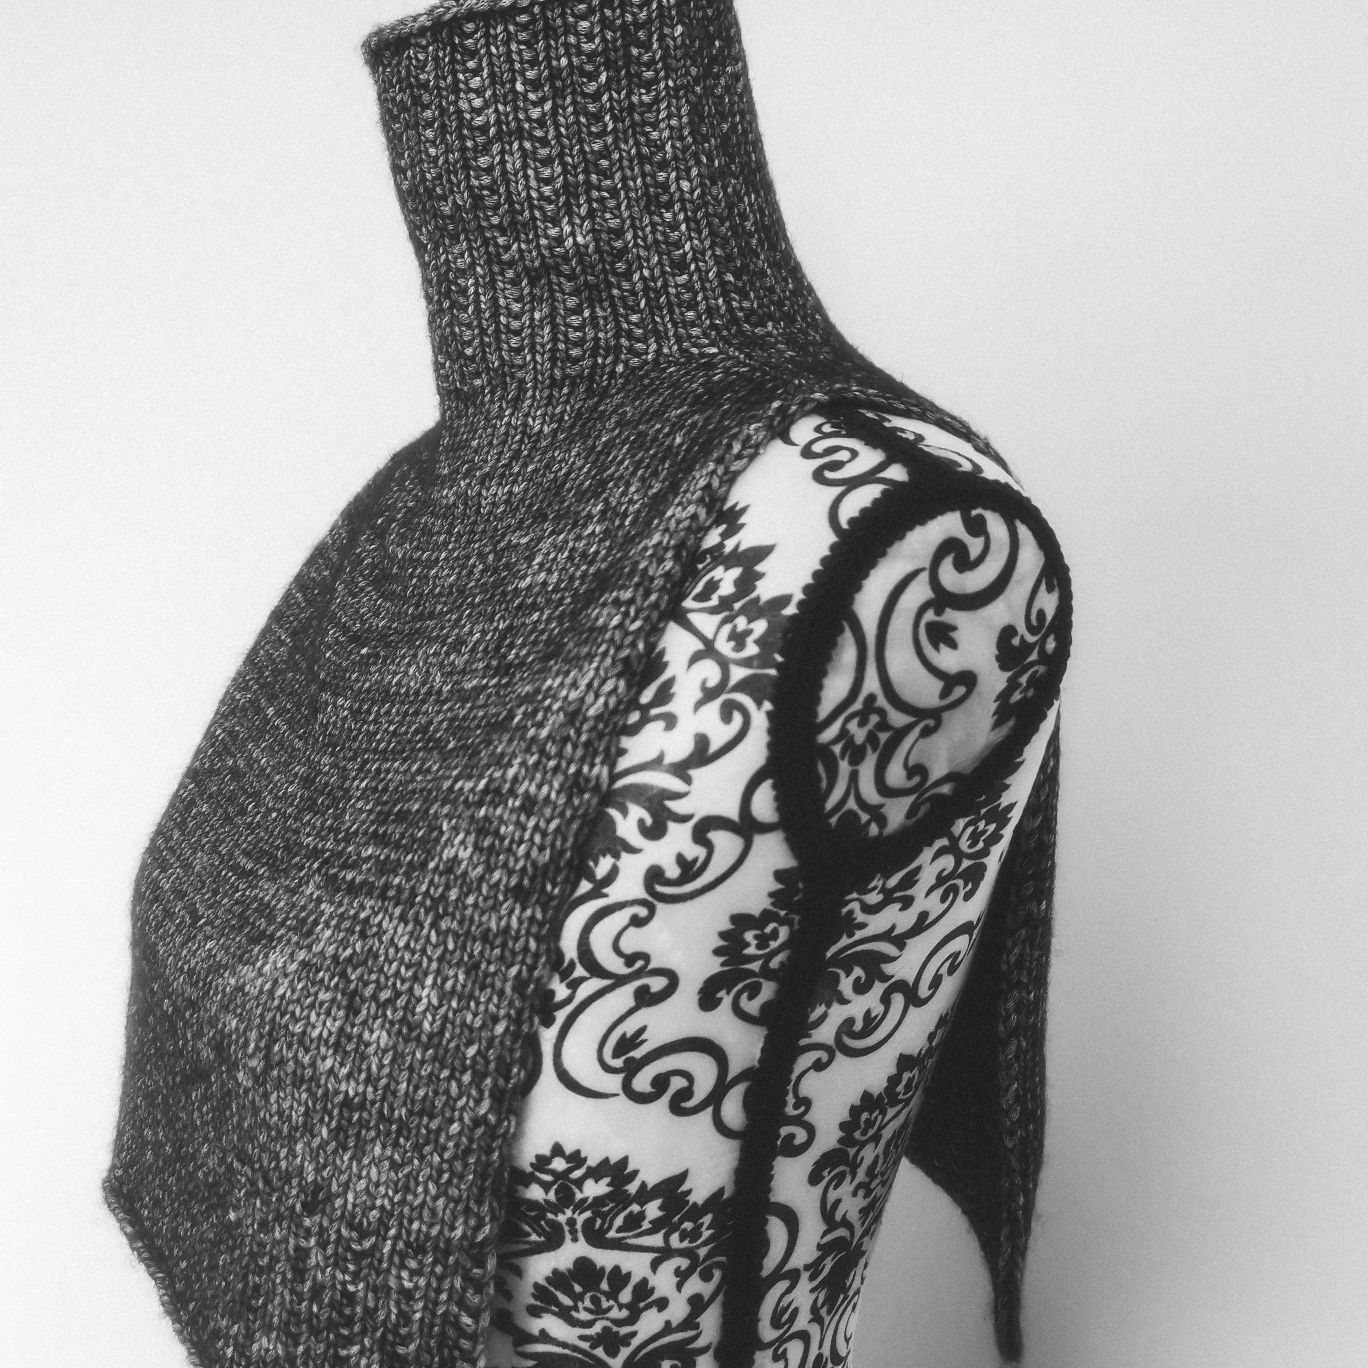


A nice and classic neck that fits nicely underneath your coat or jacket.
Measurements
44cm long, 32cm at the widest
Materials
Yarn
Infinity Hearts Lily. Consists of 70 % Cotton, 30 % SW Merino wool Yarn length 50 g = approx. 100 s.
Yarn consumption
4 skeins
Knitting tension: 18 stitches per 10cm.
Knitting needles: 40cm circular needles, 4.5mm.
Or the needle you need to achieve the right knitting tension.
You will also need a longer cable if you increase the number of stitches. And possibly an extra cable where the stitches on the front piece can 'rest' while you finish knitting the back piece (you knit each part separately).
Abbreviations
s = stitch(es)
K = Knit
P = Purl
round = round(e)
n = needles
PSM = place stitch marker
SM = Stitch marker
RS = Right side
WS = Wrong side
K2tog = Knit 2 s together
Increase: YO between 2 s and knit stitch through back loop.
Instructions
Cast on 69 s on 4.5, 40cm needles. PSM to mark the beginning of the round. Knit 1 round.
Knit rib like this:
Round 1: * K2, P1 * - repeat for entire round
Round 2: K entire round
Repeat Round 1 and 2 19 times more = 40 round rib. Round 2 is the last round.
On the next round you increase 3 s and place SM to mark off for the saddle shoulders.
Instructions: K14, PSM, K7, PSM, K1, M1, K12, M1, K12, M1, K1, PSM, K7, PSM, K15.
You have now marked off 29 s for the back and front and 7 s for each shoulder= 72m
Now, knit stocking stitch front and back, while the shoulders continue in the rib pattern. Knit 1 round (K front and back and rib over the shoulders).
Saddle shoulder increase:
You continue in the pattern, over shoulders and stocking stitch over front and back while you increase BEFORE 1st and 3rd marker and AFTER 2nd and 4th marker.
Instructions:
BEFORE THE MARK:
Make new stitch right-leaning.
Use the left knitting needle to pick up the yarn between 2 stitches from the round below, pick up yarn from the back and knit the stitch in front loop.
AFTER THE MARK:
Make new stitch left-leaning.
Use left needle to pick up the yarn between 2 stitches from the round below, pick up yarn from the front and knit the stitch in back loop.
So you only increase on the front and back, the number of shoulder seams remains the same. Continue with the increases in the pattern. Increase as described on each round a total of 15 times. = 132 stitches.
You now have 59 s for the front and back and 7 s for each shoulder.
Knit a round where you cast off the shoulder stitches.
You now knit the front piece and the back piece separately.
Knit both parts the same way, like this:
(you can use an extra cable and leave the remaining stitches to ‘rest’ on it while you knit the first part):
Knitting needle 1 (RS): With yarn in front, slip first s purl-wise, Knit the rest. Turn.
Knitting needle 2 (WS): With yarn in front, slip first s purl-wise, Purl until you have 1 s left, finish with K1. Turn
Repeat N1 and N2 until you have knitted 28cm of stocking stitch (possibly longer/shorter if desired), finish with needle 2.
On the next n (from the right side) you cast off 2 s, like this:
With yarn in front, slip first s purl-wise, K14, K2tog, K28, K2tog, K13. Turn
Knit back as «Knitting needle 2»
You know knit the last rib like this:
Needle 1 (RS): With yarn in front, slip first s purl-wise, * P1, K2 *, repeat until you have 2 s left, P1, finish with K1. Turn.
Needle 2 (WS): With yarn in front, slip first s purl-wise, purl until you have 1 s left, finish with K1. Turn
Repeat N1 and N2 9 more times
Cast off from RS with K.
Weave in ends.
Wash and block.
Design by: jillkarina (Jill Karina Bø)

 Österreich
  Belgique
  Bosna i Hercegovina
  България
  Κύπρος
  Česká republika
  Danmark
  Eesti
Eesti  Føroyar
  Suomi
Suomi  France
  Deutschland
  Ελλάδα
  Kalaallit Nunaat
  Magyarország
  Ísland
  Ireland
  Italia
  Latvija
  Liechtenstein
  Lietuva
  Lëtzebuerg
  Malta
Malta  Isle of Man
  Nederland
  Norge
Norge  Polska
  Portugal
  România
  Slovensko
  Slovenija
  España
  Sverige
  Schweiz
  Ukraїna
  United Kingdom