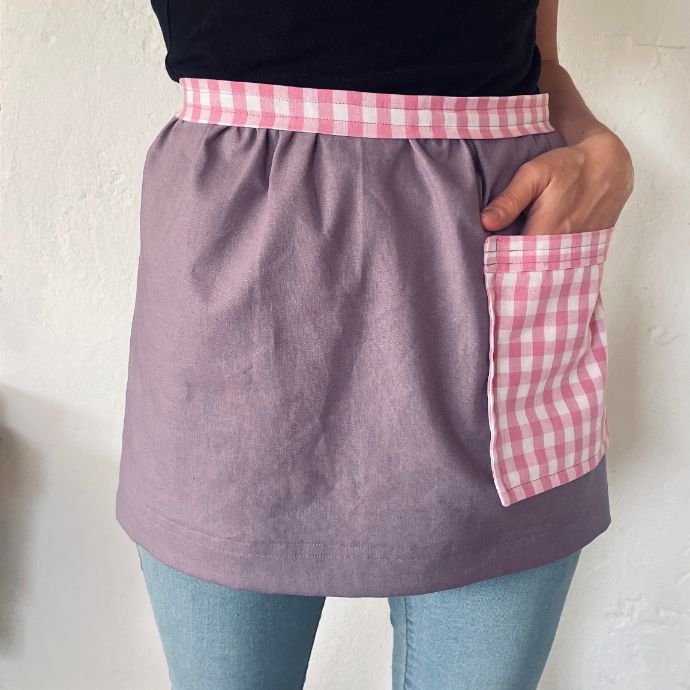
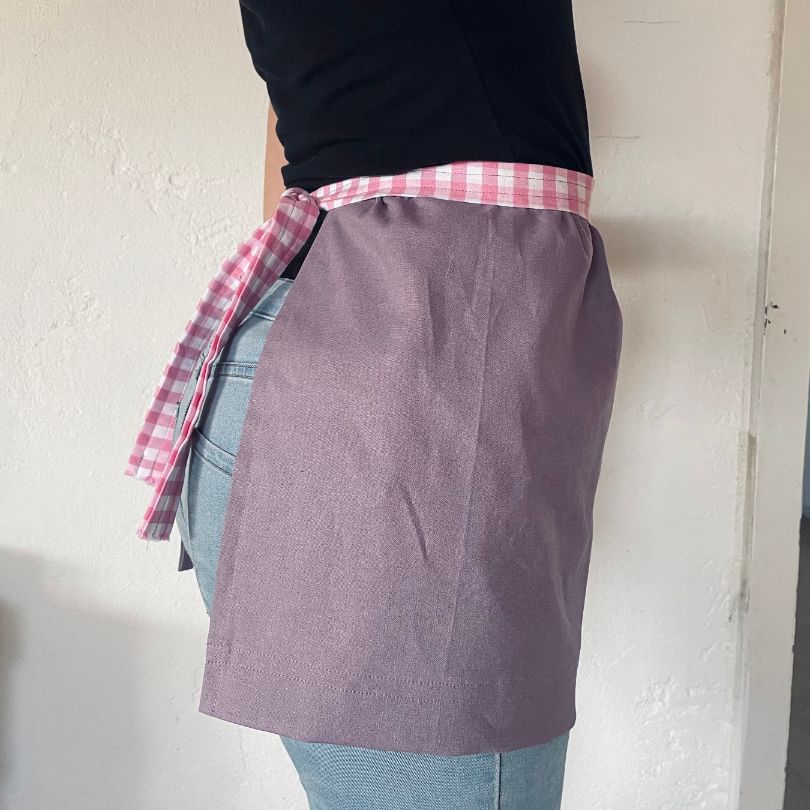
Free Apron Sewing Pattern
Measurements
Your personal measurements
Materials
Tools
Preparation
Measure yourself around the waist (note down your measurements).
Measure from the waist down to where you want your apron to end (note down your measurements).
Instructions
Cut out the parts:
1. The apron itself. Cut the apron so that it measures 10cm more than your waist and 7cm more than the desired length.
2. Whether you want 1 or 2 pockets is up to you. I have made 1 pocket with the measurements 25cmx19cm. You cut 2 pieces per. pocket. So if you want 2 pockets, cut 4 squares.
3. Waistband 12cmx140cm. If you need it to be larger, then cut the extra length and sew the strips together into one long strap by laying the strips and sewing diagonally across as shown here:

The skirt:
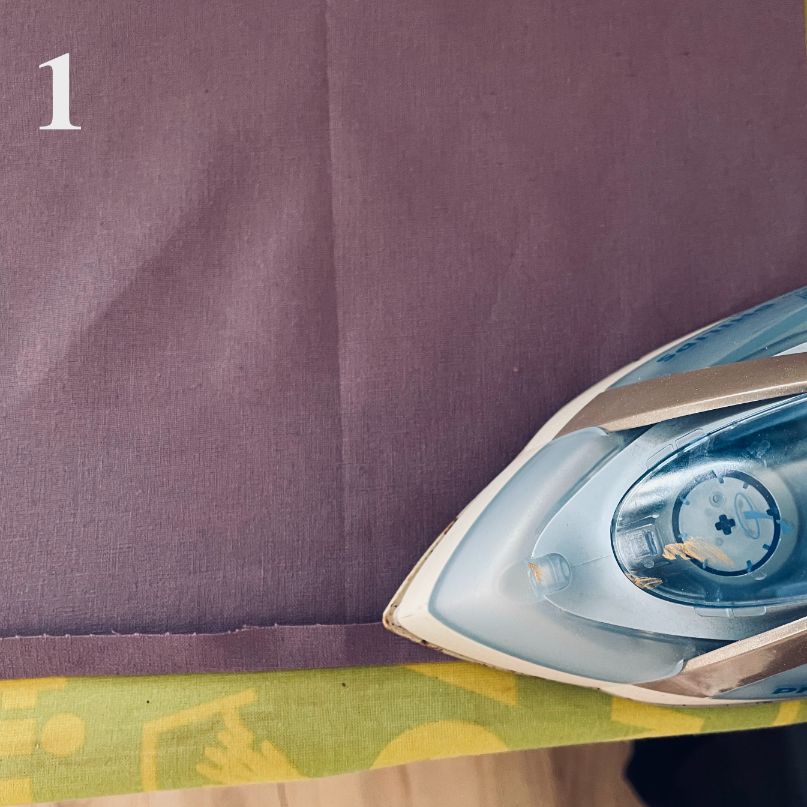
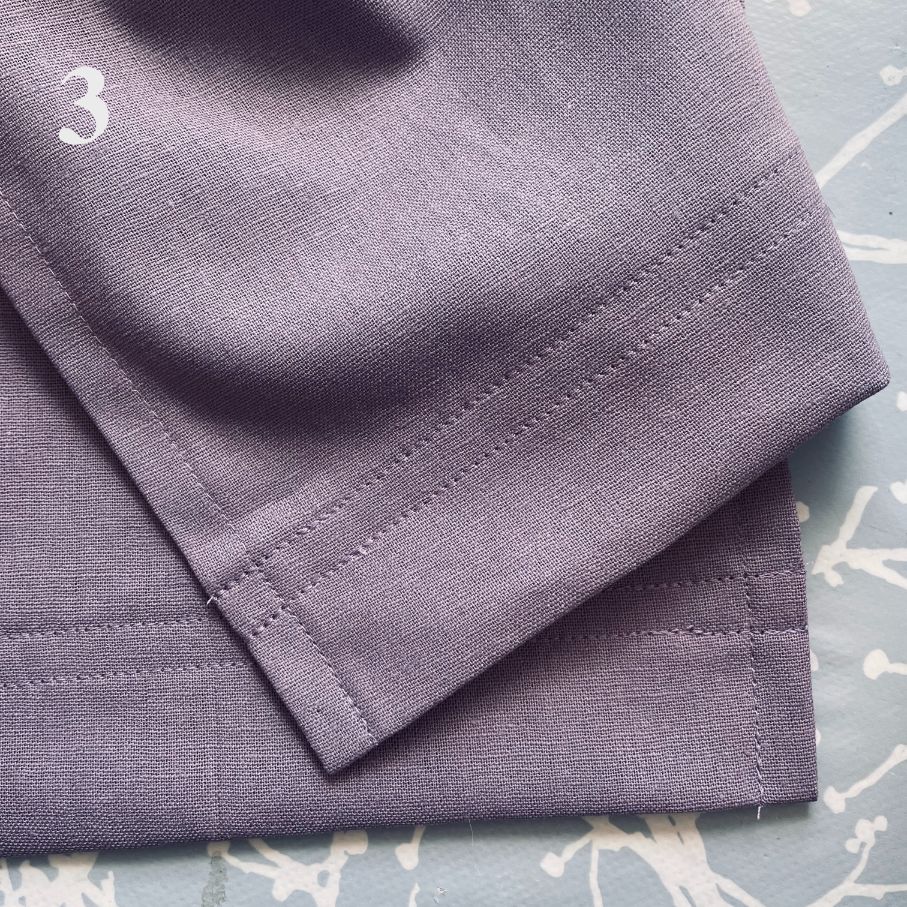
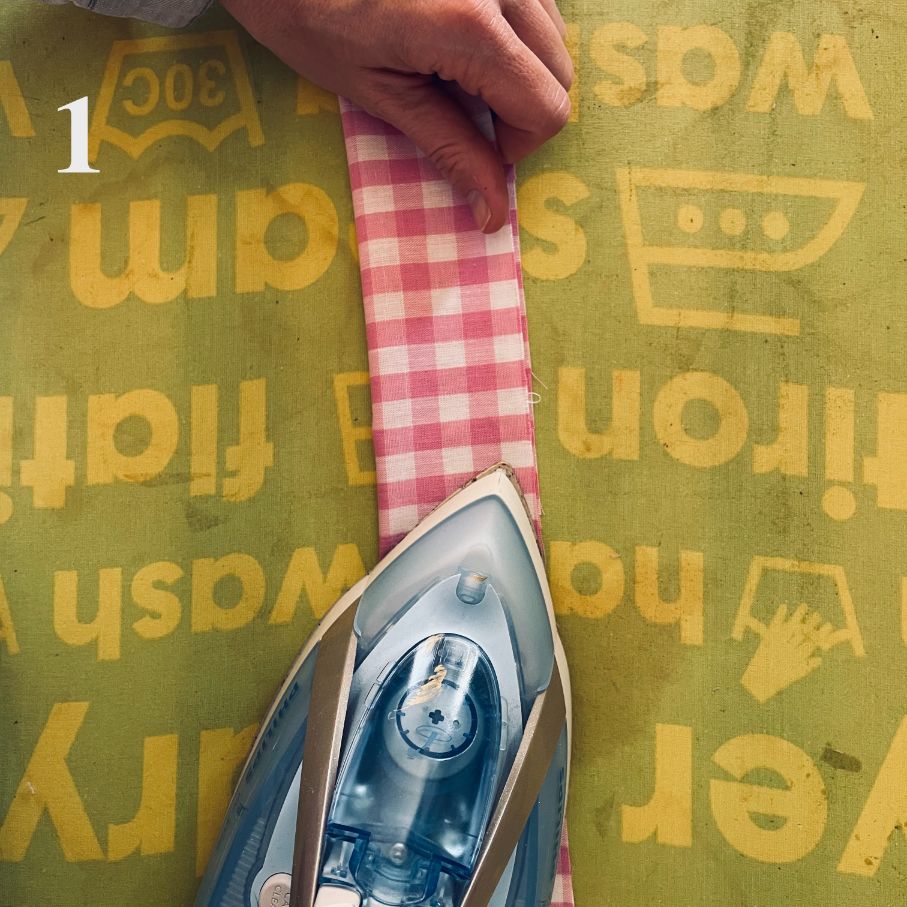
1. Iron both sides (the two short ones) and one longest edge of your apron with a 1cm fold.
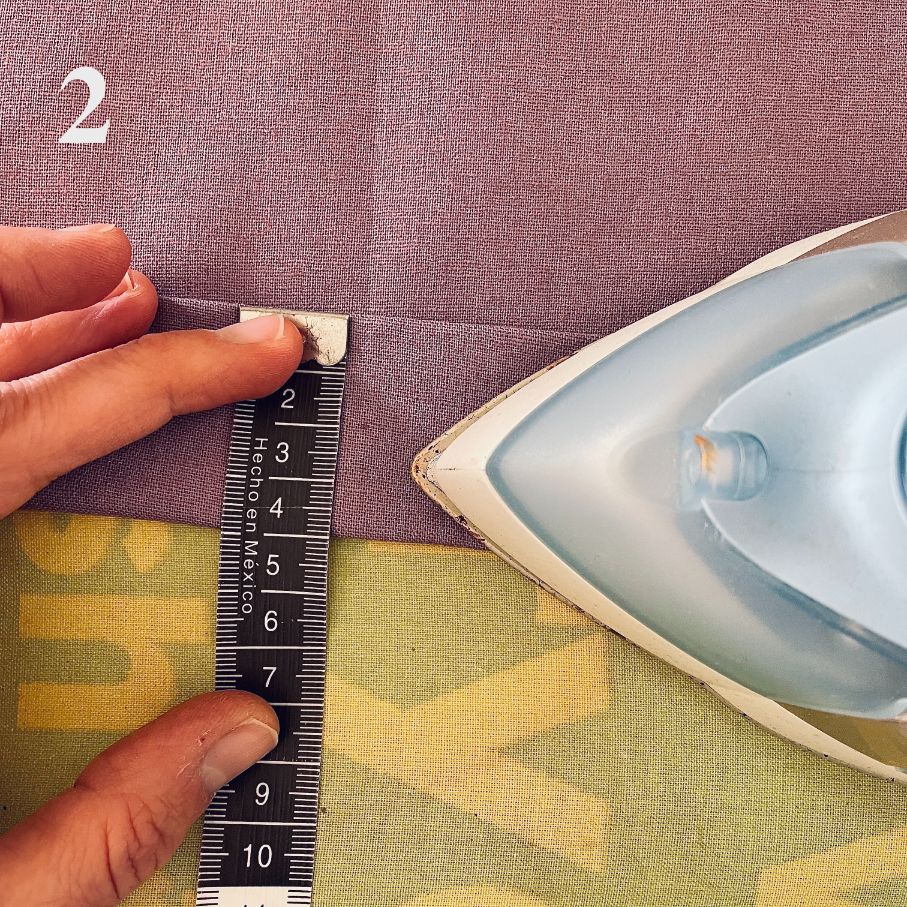
2. Then make a 4cm fold on the longest edge (this will be the bottom edge).
3. Pin the folds and sew 2.5mm stitches across all folds.
Pocket:
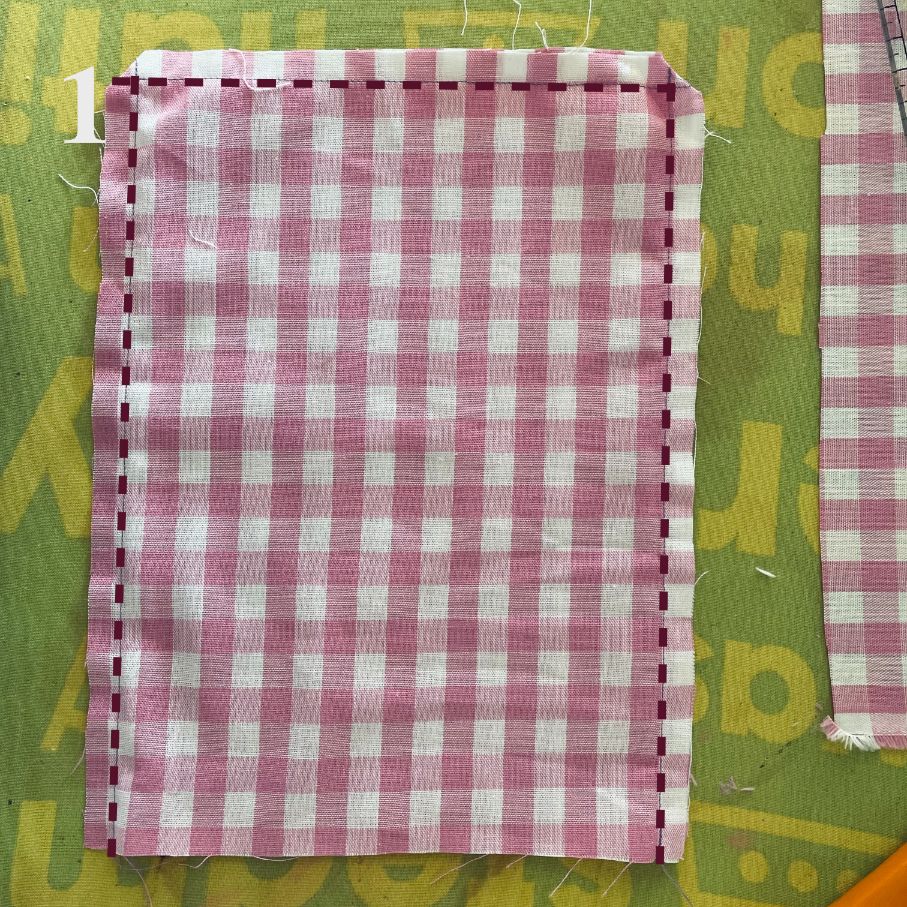
1. Sew the pocket by folding the 2 pocket pieces right sides together. Sew around as shown in the picture below:
2. Turn the pocket with the right sides out and iron it to make it nice and flat.
3. Now make a nice edge at the top of the pocket. You make two folds on the pocket of 2.5cm each:
4. Sew stitches of 2.5mm on the front of the pocket:
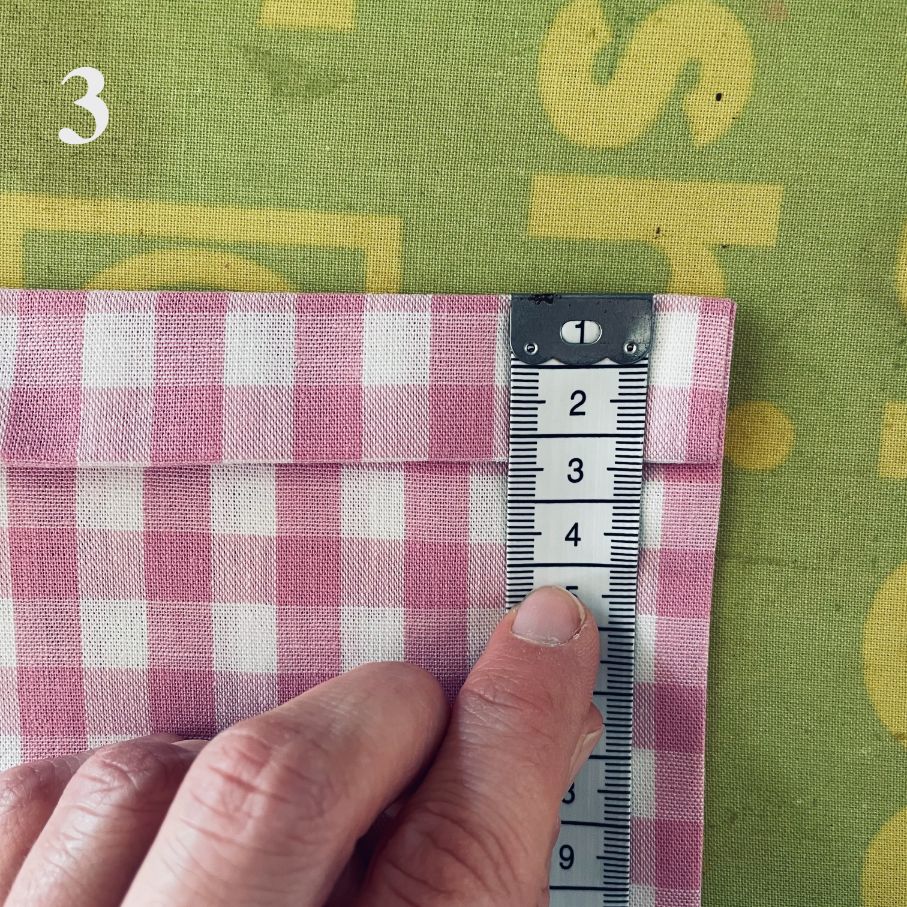


5. Place the pocket 7cm from the bottom, pin it and sew the two long sides and the bottom - and not the top.
Waistband:
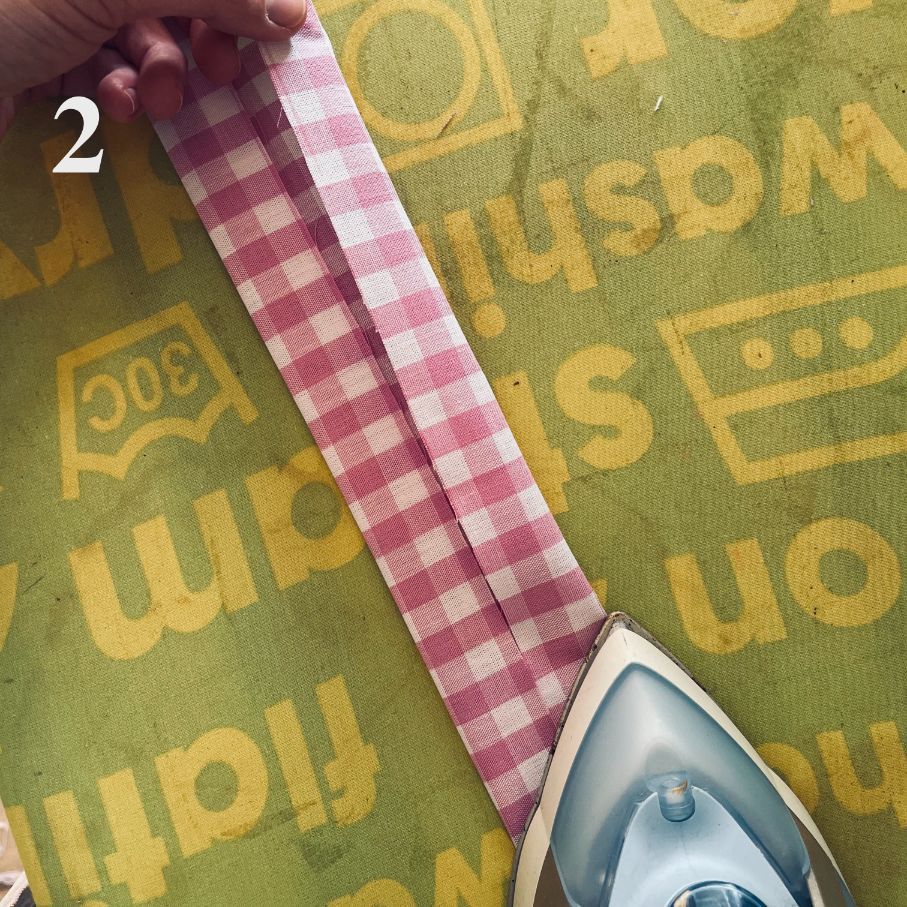
1. Fold the band along the middle and iron it
2. Fold it out and iron the edges on each side of the middle in towards the middle.
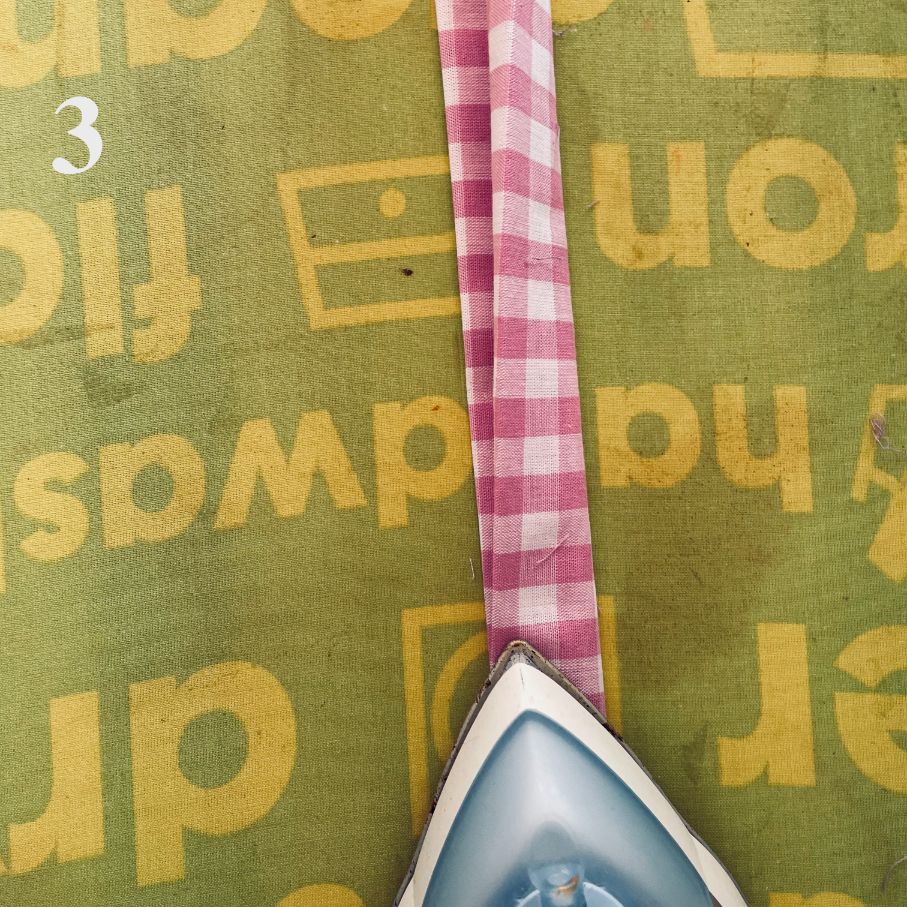
3. Fold it again and iron down the middle once again:
Apron:
1. Mark the centre of your skirt by folding it in the middle and mark it with chalk on the middle fold.
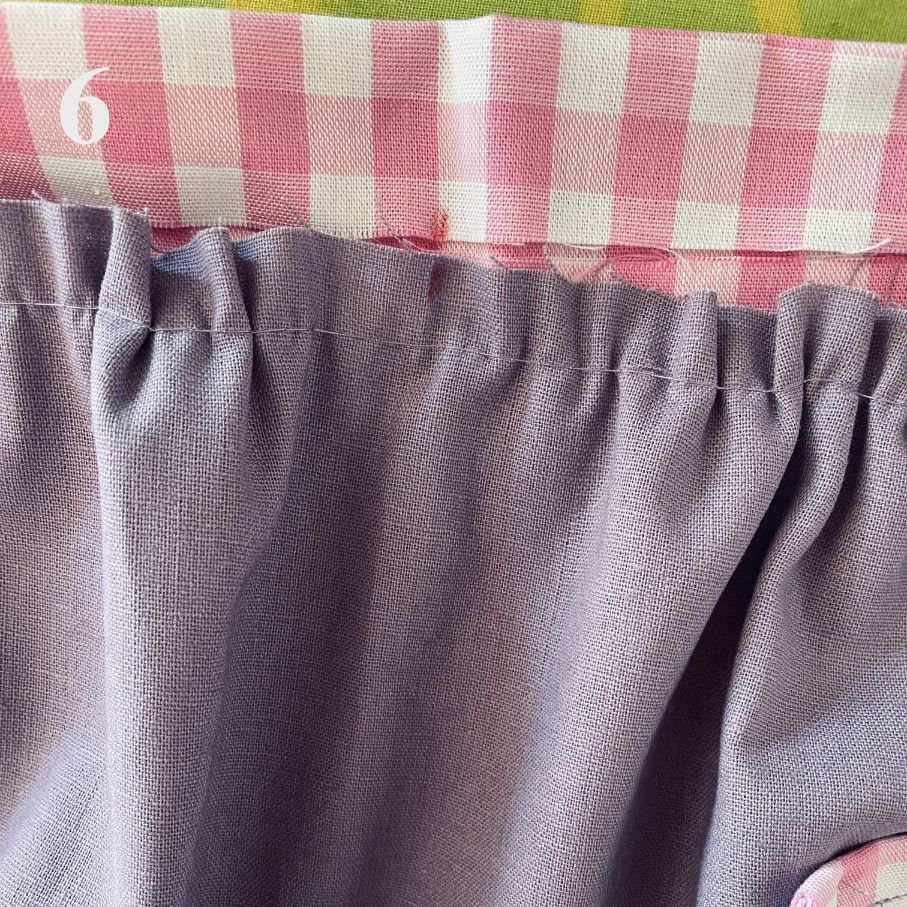
2. Crease the top edge of your skirt by sewing with the widest possible stitches your sewing machine can make and about 2cm from the skirt edge. Have at least 10cm of sewing thread on each side - ie. Do NOT cut the sewing thread close to the fabric. You will need the sewing thread on each side of the skirt to pull and crease up the edge.
3. Find the centre of your waistband in the same way as you did with the skirt.
4. Tie the waistband around yourself (with the marked centre by your belly button) and mark where one edge of the skirt should be; that is, how far behind on the back it should be. Mark it with chalk or with a pin. Just do it on one side.
5. Take off the waistband and fold it in the middle. Then mark it similarly to what you just did on the other side. Then you know how the skirt should fit as well as where the centre of the skirt is.
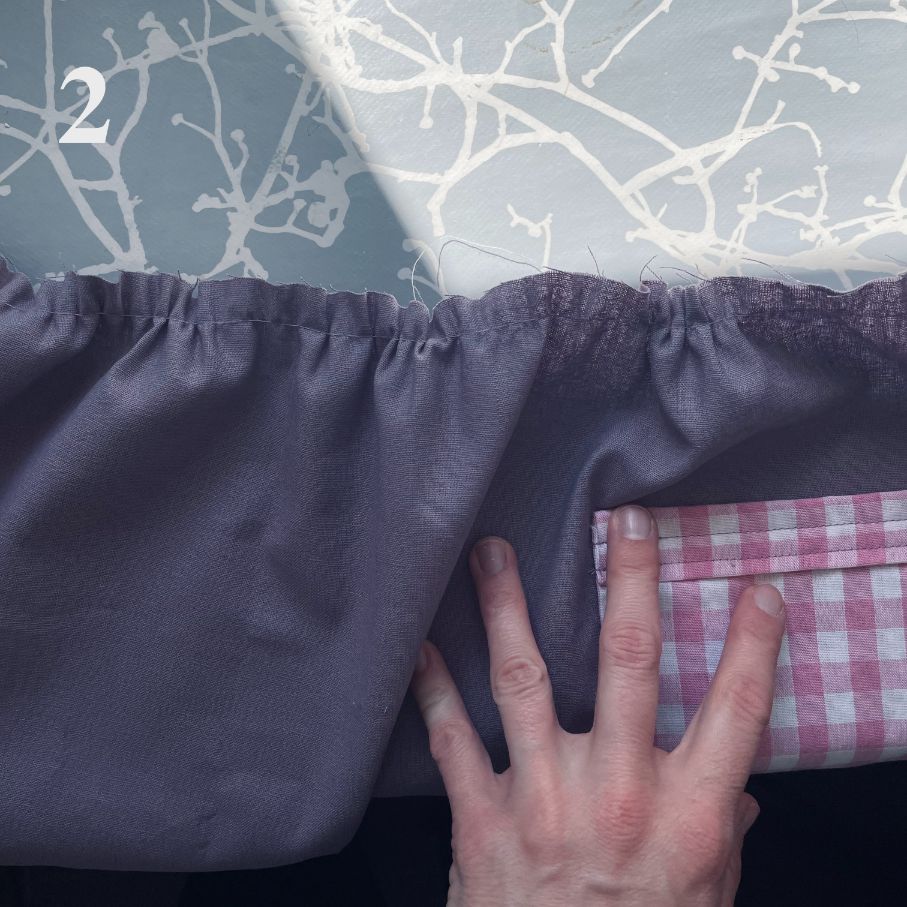
6. Fold up the waistband one time and place the skirt into the waistband so that the centre marks on both the skirt and the waistband meet. The waistband should therefore be folded in on both the back and the front of the skirt:
7. Pin the skirt in the middle and on both sides so that the sides meet your markings of the skirt.
8. Now, you pull on the sewing threads so that your skirt creases up and fits.
9. Pin it all together well so it does not start slipping when you sew.
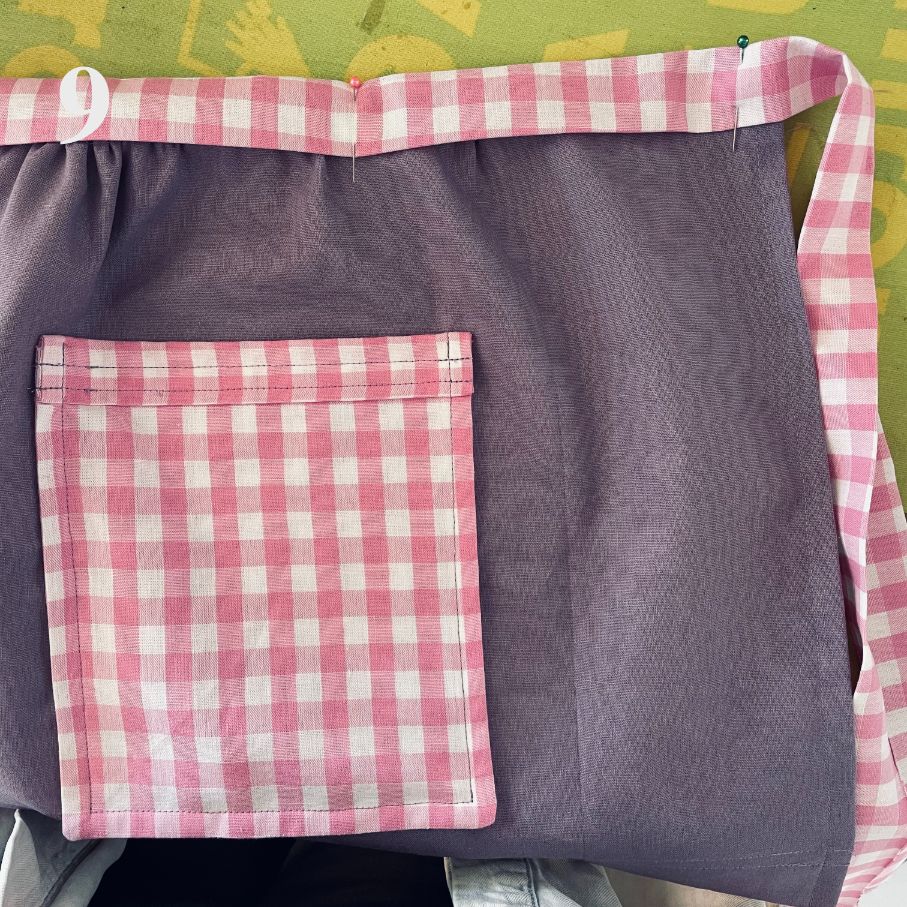
10. Sew ribbon and skirt together with 2.5cm stitches.
You now have a lovely new apron.
Design by: Rain in May (Maj Leszczynski Suurballe) @rainin_may
 Österreich
  Belgique
  Bosna i Hercegovina
  България
  Κύπρος
  Česká republika
  Danmark
  Eesti
Eesti  Føroyar
  Suomi
Suomi  France
  Deutschland
  Ελλάδα
  Kalaallit Nunaat
  Magyarország
  Ísland
  Ireland
  Italia
  Latvija
  Liechtenstein
  Lietuva
  Lëtzebuerg
  Malta
Malta  Isle of Man
  Nederland
  Norge
Norge  Polska
  Portugal
  România
  Slovensko
  Slovenija
  España
  Sverige
  Schweiz
  Ukraїna
  United Kingdom