Guide for Christmas Heart Embroidery on Wooden Plate

You will need:
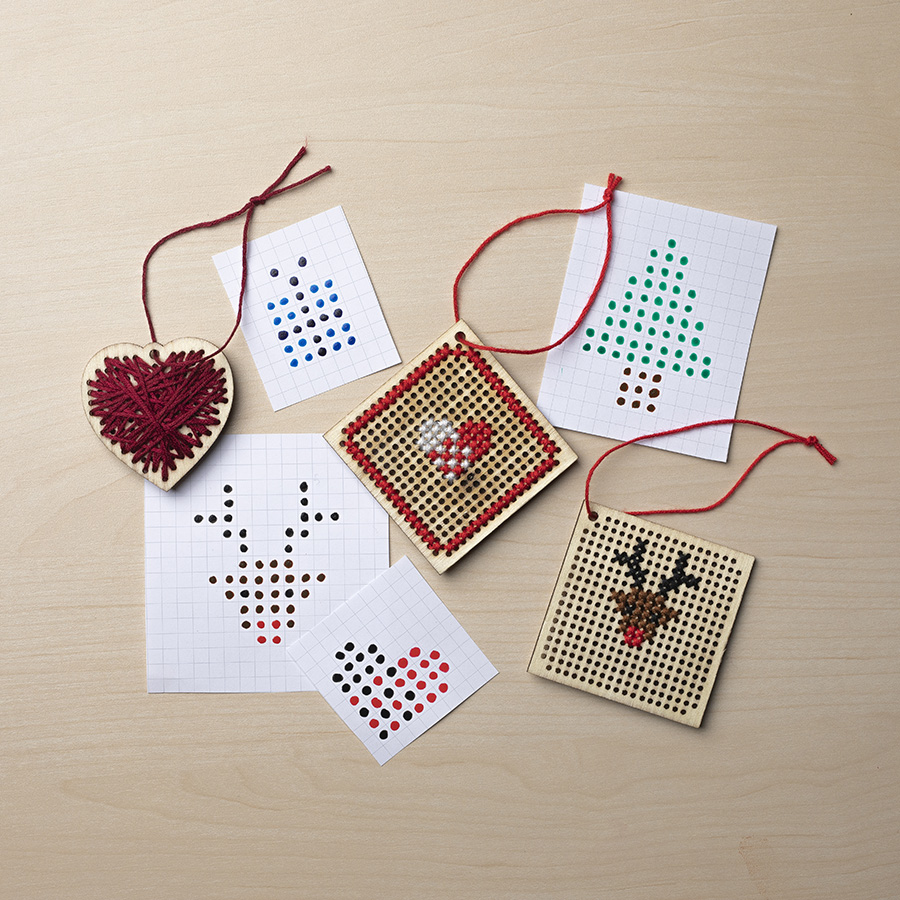
In general about cross stitch:
Start in the upper left corner of the pattern. Always embroider from left to right and from top to bottom.
Follow the pattern to see where to place the stitches in relation to each other.
Single cross stitch:
A cross stitch consists of a cross embroidered between four holes. Start by pulling the needle through from the back towards the front of the wooden board and through the bottom left corner of the four holes. Pull the thread diagonally towards the top right corner of the four holes. Insert the needle through there from front to back. Now stick the needle through from back to front again, this time in the bottom right corner of the cross stitch. Pull the thread from this corner and diagonally towards the top left corner and insert the needle through there from the front towards the back of the wooden board. You have now made a cross stitch.
Cross stitch in a row:
For example, if you have four cross stitches next to each other, you can make them consecutively. That means, you make the four diagonal stitches that go from the bottom left corner to the top right corner of each cross stitch. Make sure that each cross stitch overlaps, so that stitch number two starts in the hole just below the hole where the first cross stitch ended. Then embroider from right to left in the row and finish the row of cross stitches by making the opposite diagonal stitches so that they add up to four crosses.

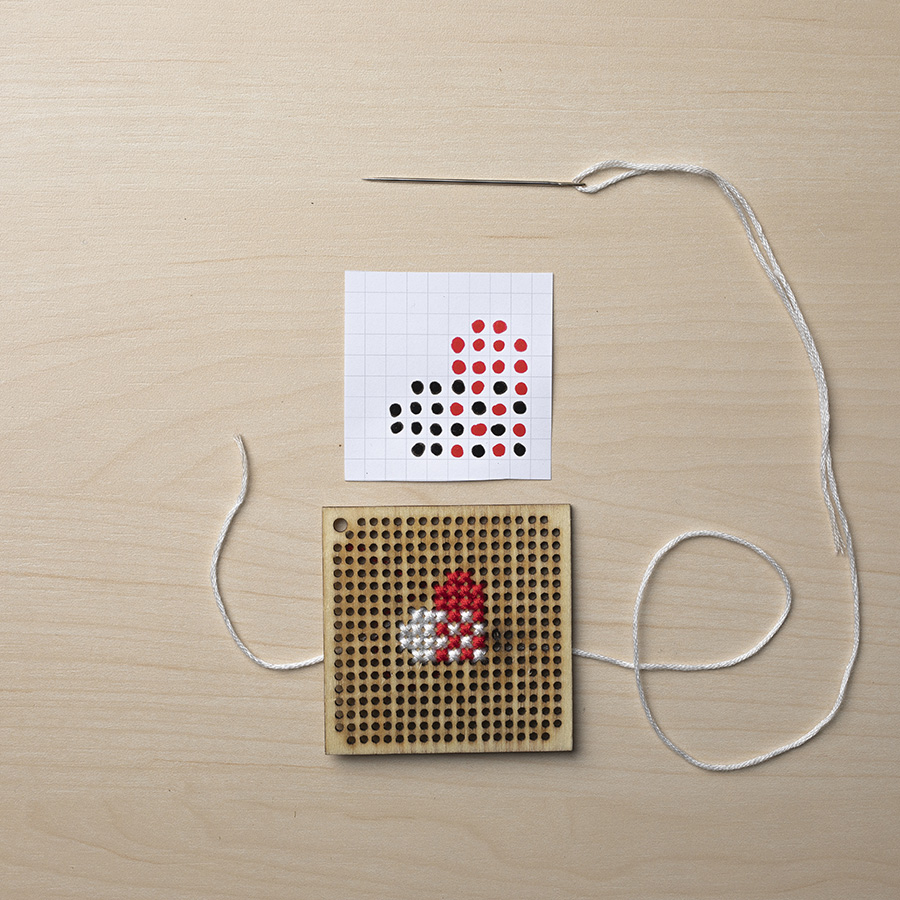
Figure out where on the board to start to center the pattern. Consider that the first cross stitches you make will fill two rows of holes. The next rows count as one row of holes, as they overlap with the previous row. Cut about half a yard of the red embroidery thread and attach the needle. In this case, you will start with two red cross stitches, so they are made as one row of cross stitches (see description above).
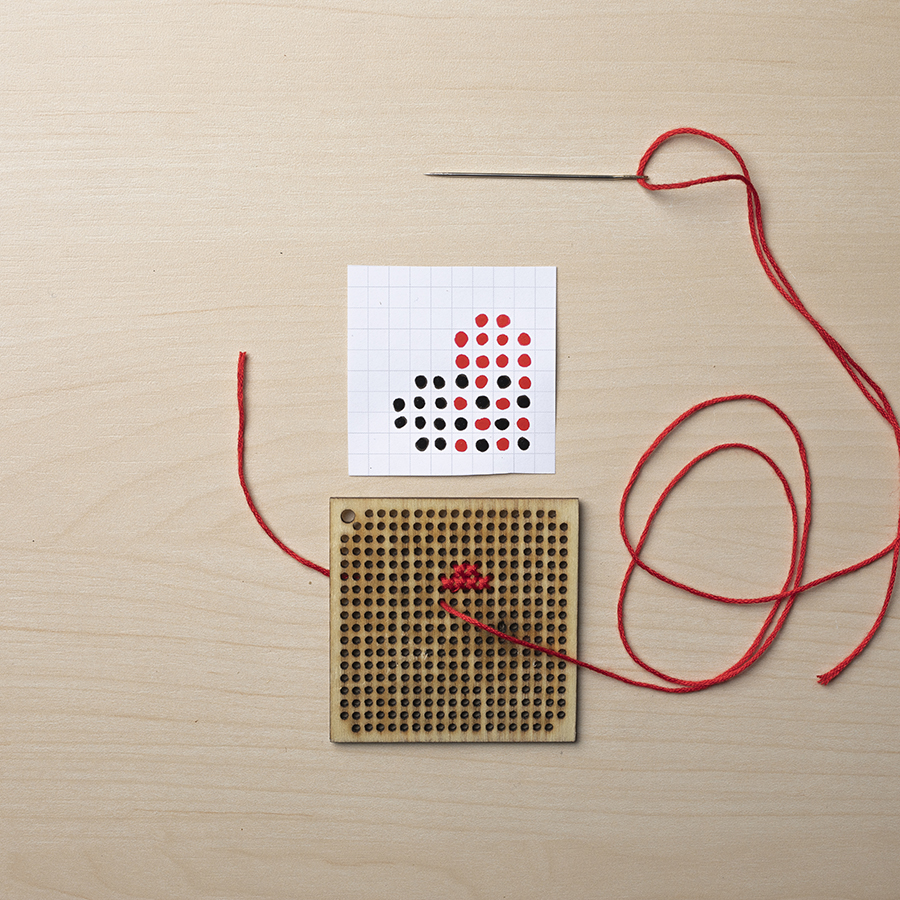
Make the second row of cross stitches, which consists of four red cross stitches.
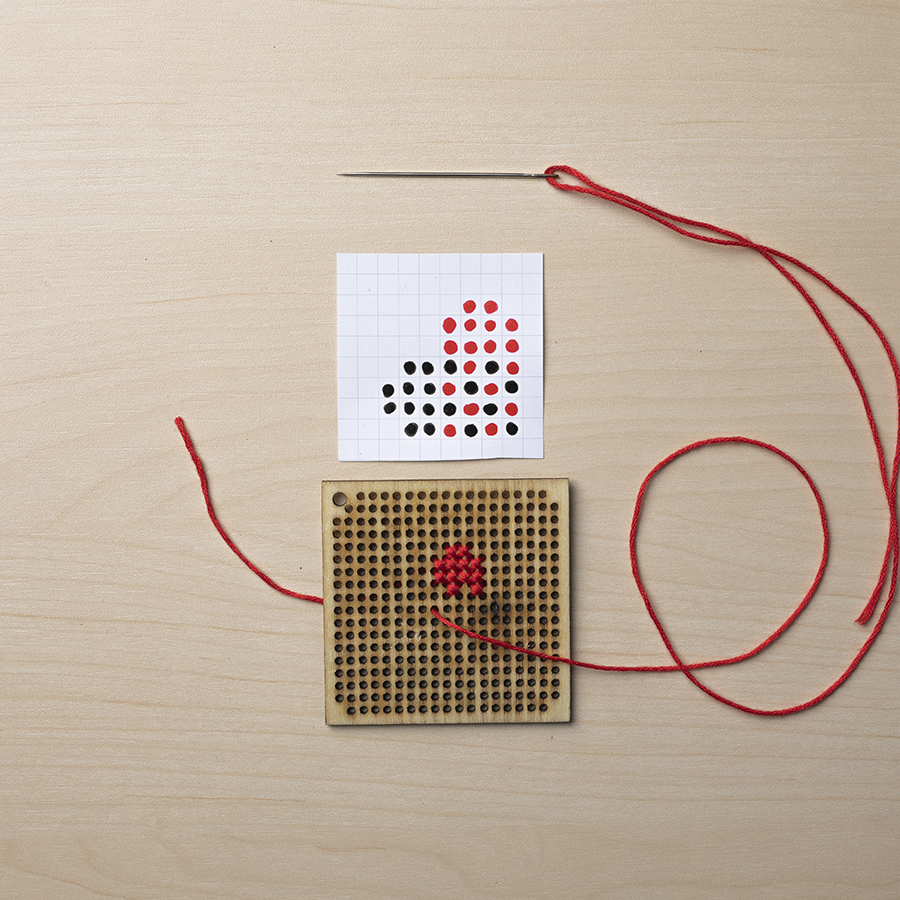
Make the 3rd row of cross stitches as you made the 2nd row, and then make two single cross stitches in the 4th row (see description above).
Also make two single cross stitches in the 5th, 6th and 7th row.

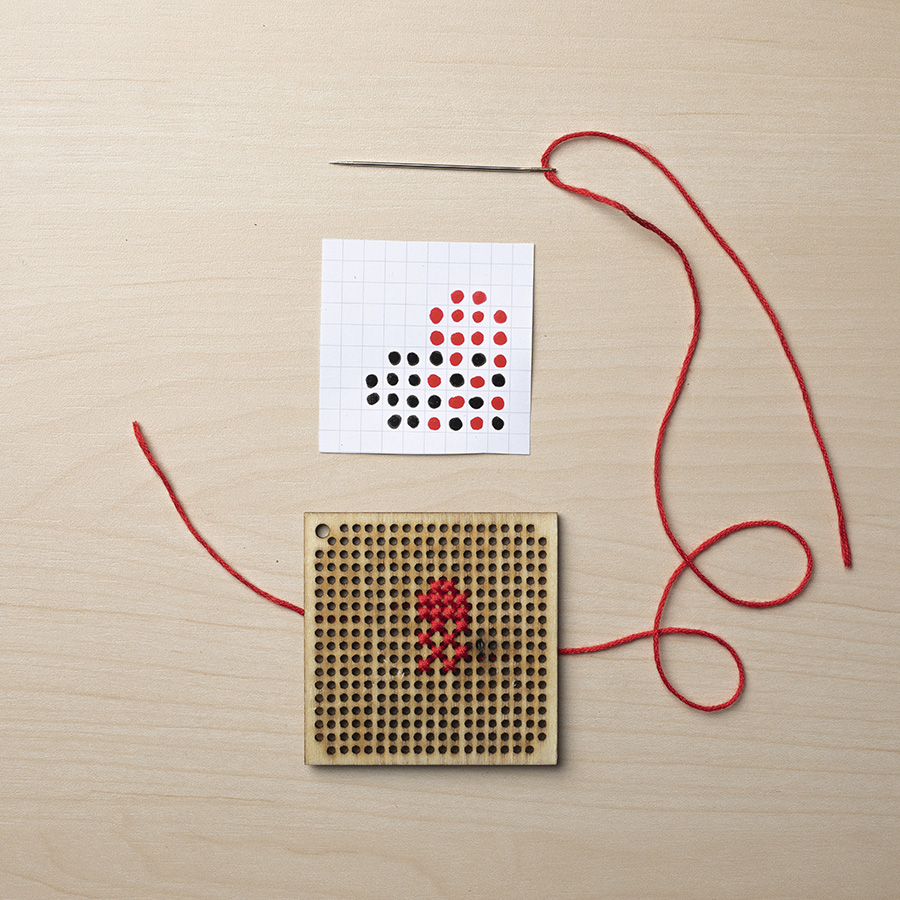
Now you are done with the red thread. Fasten both red ends by pulling the thread through your stitches at random places on the back, and cut off the ends.
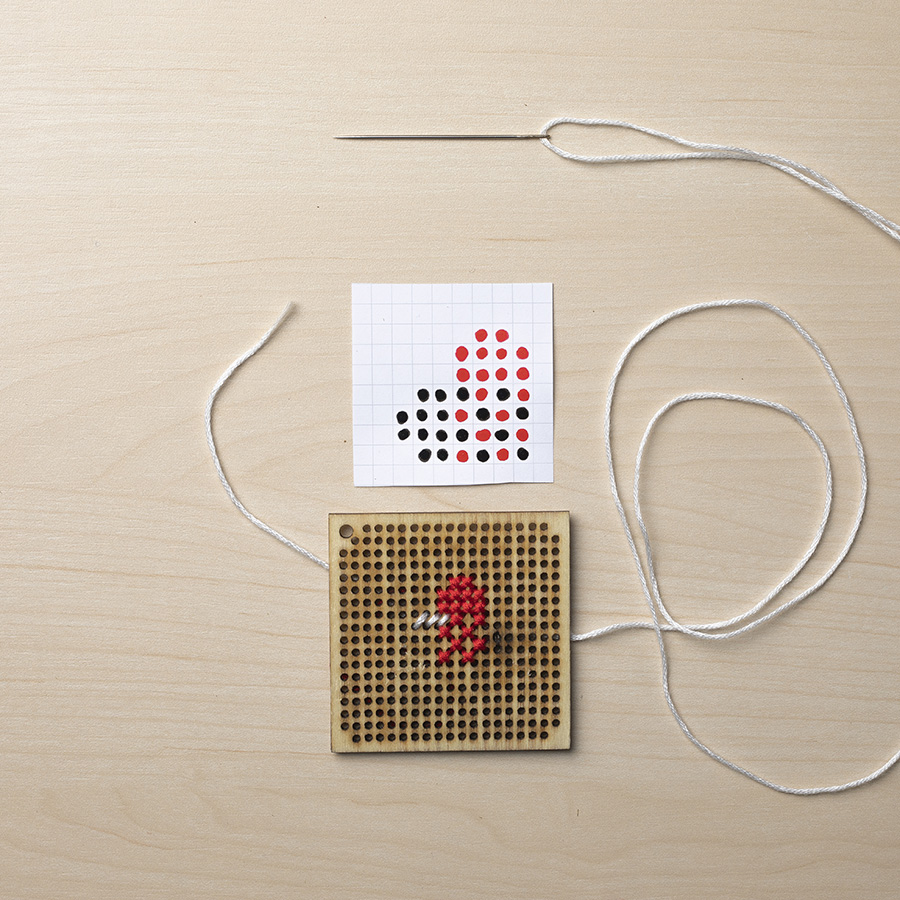
Cut off about a foot of white embroidery thread and attach the needle. It is important that you do not turn the plate over now as you want your cross stitches to be consistent. Start on row 4 by making three white cross stitches.

Continue on row 4 by making a single cross stitch between the two red ones.
Finish embroidering the Christmas heart itself row by row, following the pattern. Finally fasten the ends and cut them off.
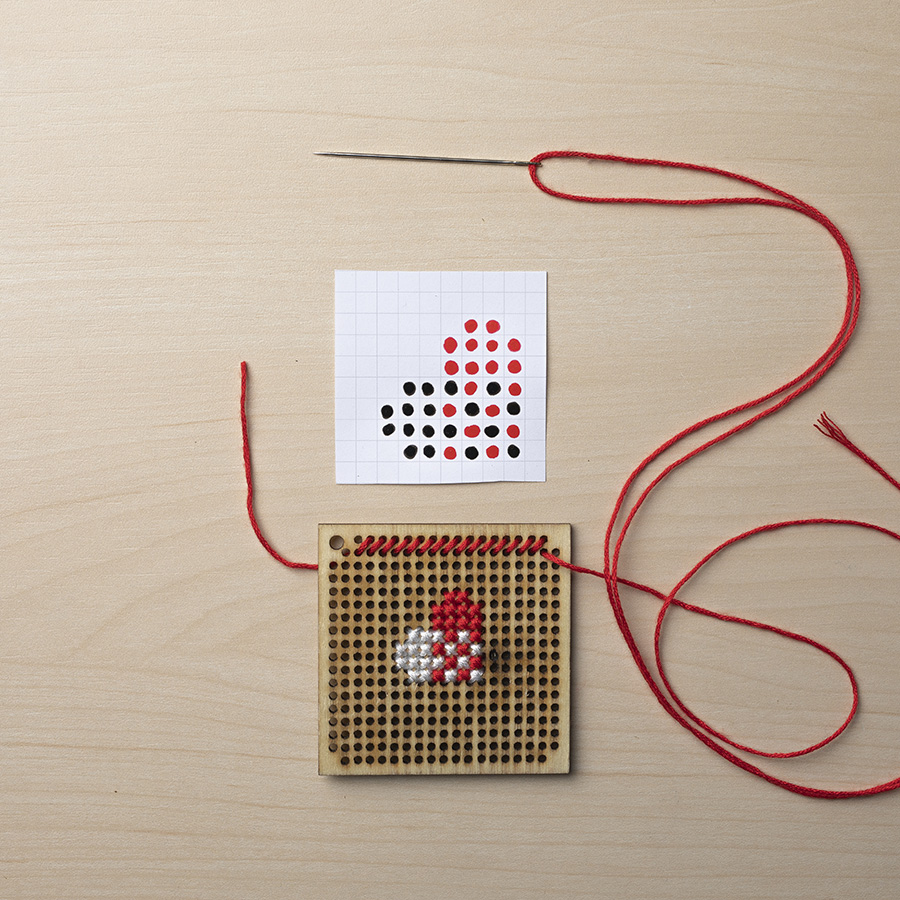
Optionally, embroider around the edge. Finish and start again, continuing to embroider to the right or down.
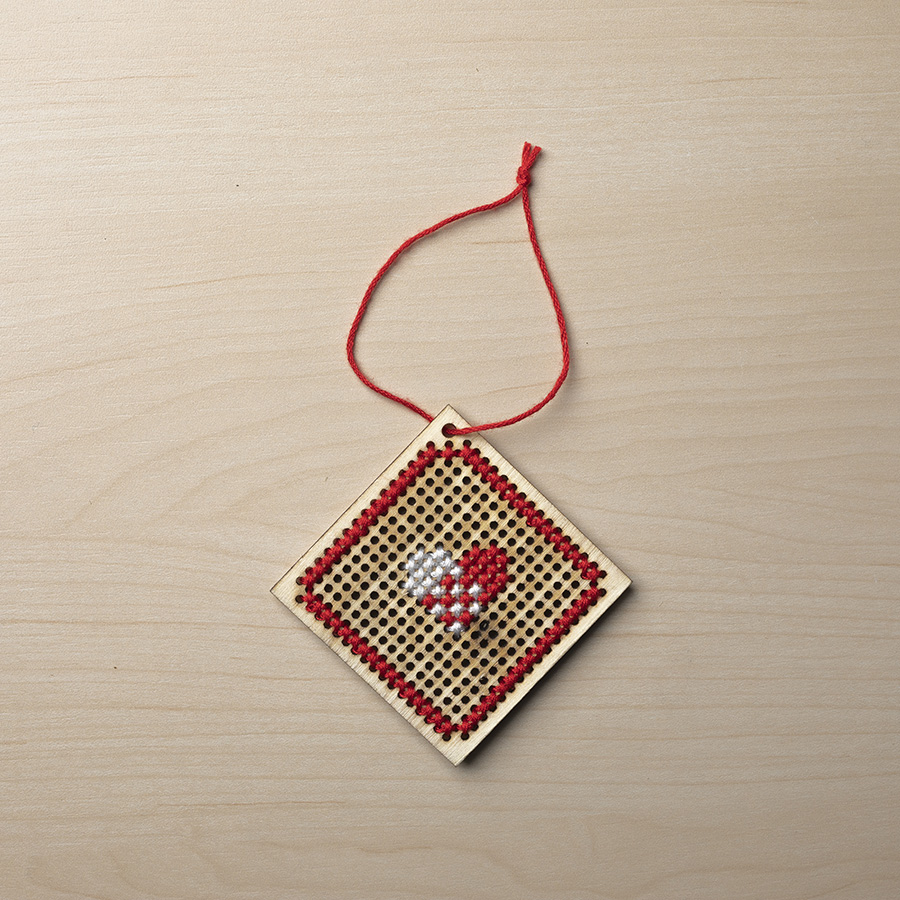
Reuse one of the cut pieces of embroidery thread as a hanging. Your wooden panel pendant is now complete.
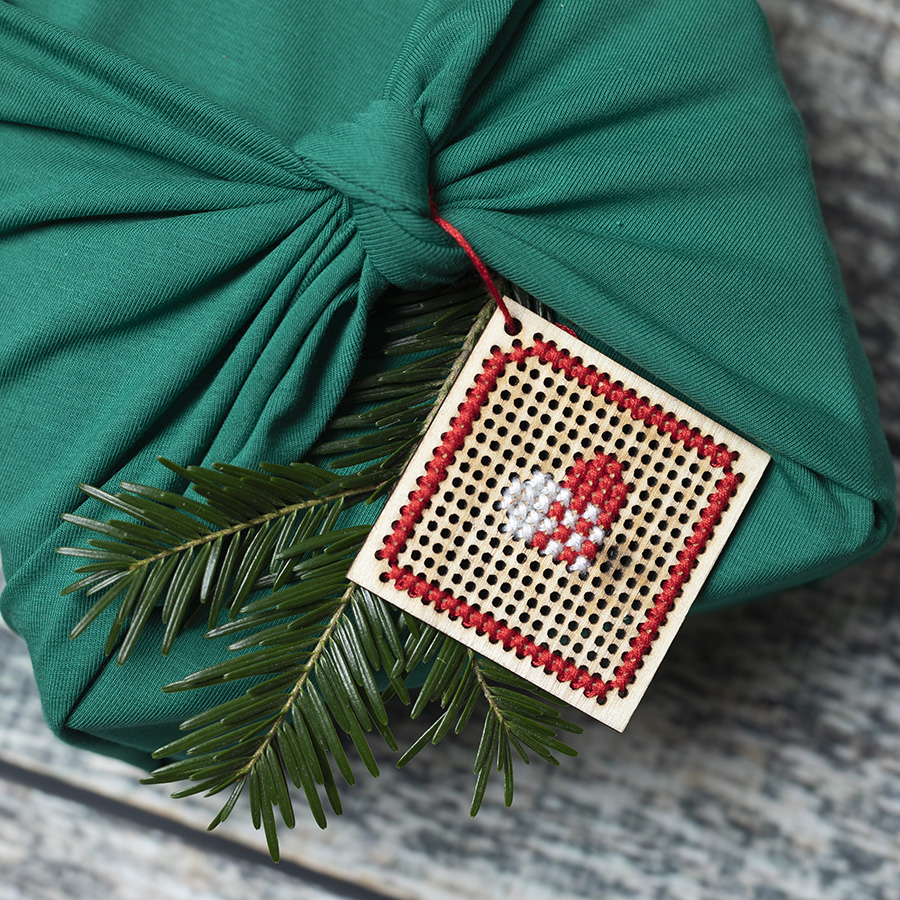
The wooden plaque can be used as a pendant for gifts, a Christmas tree decoration, a table decoration, a key ring and all sorts of other things.
Other embroidery guides for wooden plates
If you need more great ideas for what to embroider on the wooden plates, check out our other great guides right here:
Have fun!
 Österreich
  Belgique
  Bosna i Hercegovina
  България
  Κύπρος
  Česká republika
  Danmark
  Eesti
Eesti  Føroyar
  Suomi
Suomi  France
  Deutschland
  Ελλάδα
  Kalaallit Nunaat
  Magyarország
  Ísland
  Ireland
  Italia
  Latvija
  Liechtenstein
  Lietuva
  Lëtzebuerg
  Malta
Malta  Isle of Man
  Nederland
  Norge
Norge  Polska
  Portugal
  România
  Slovensko
  Slovenija
  España
  Sverige
  Schweiz
  Ukraїna
  United Kingdom