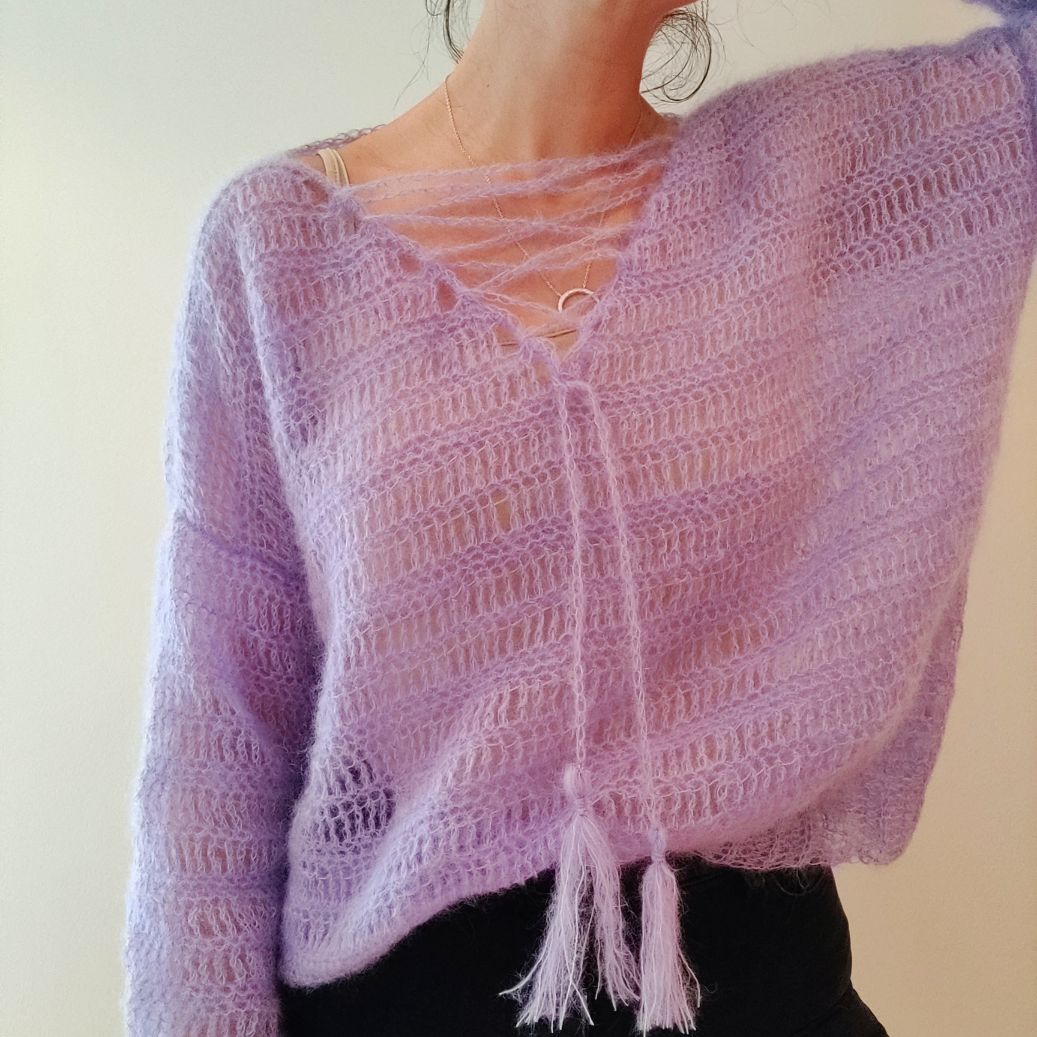
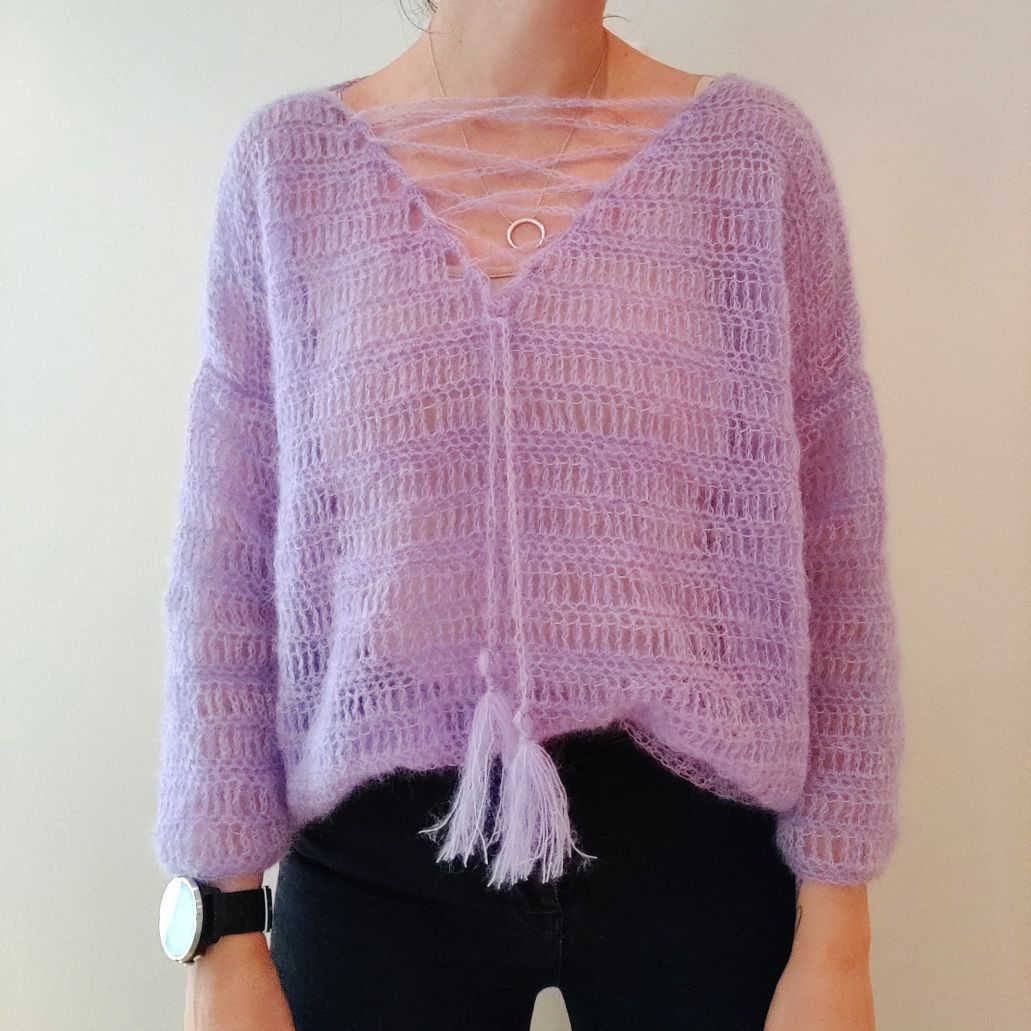
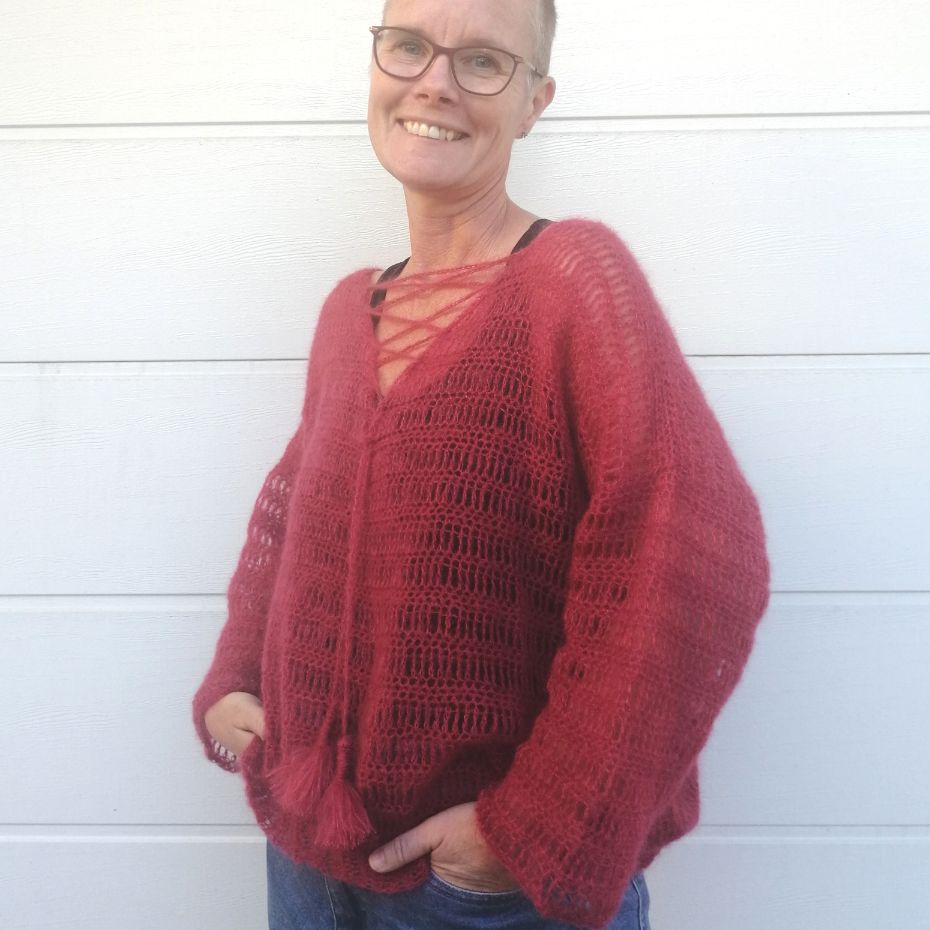
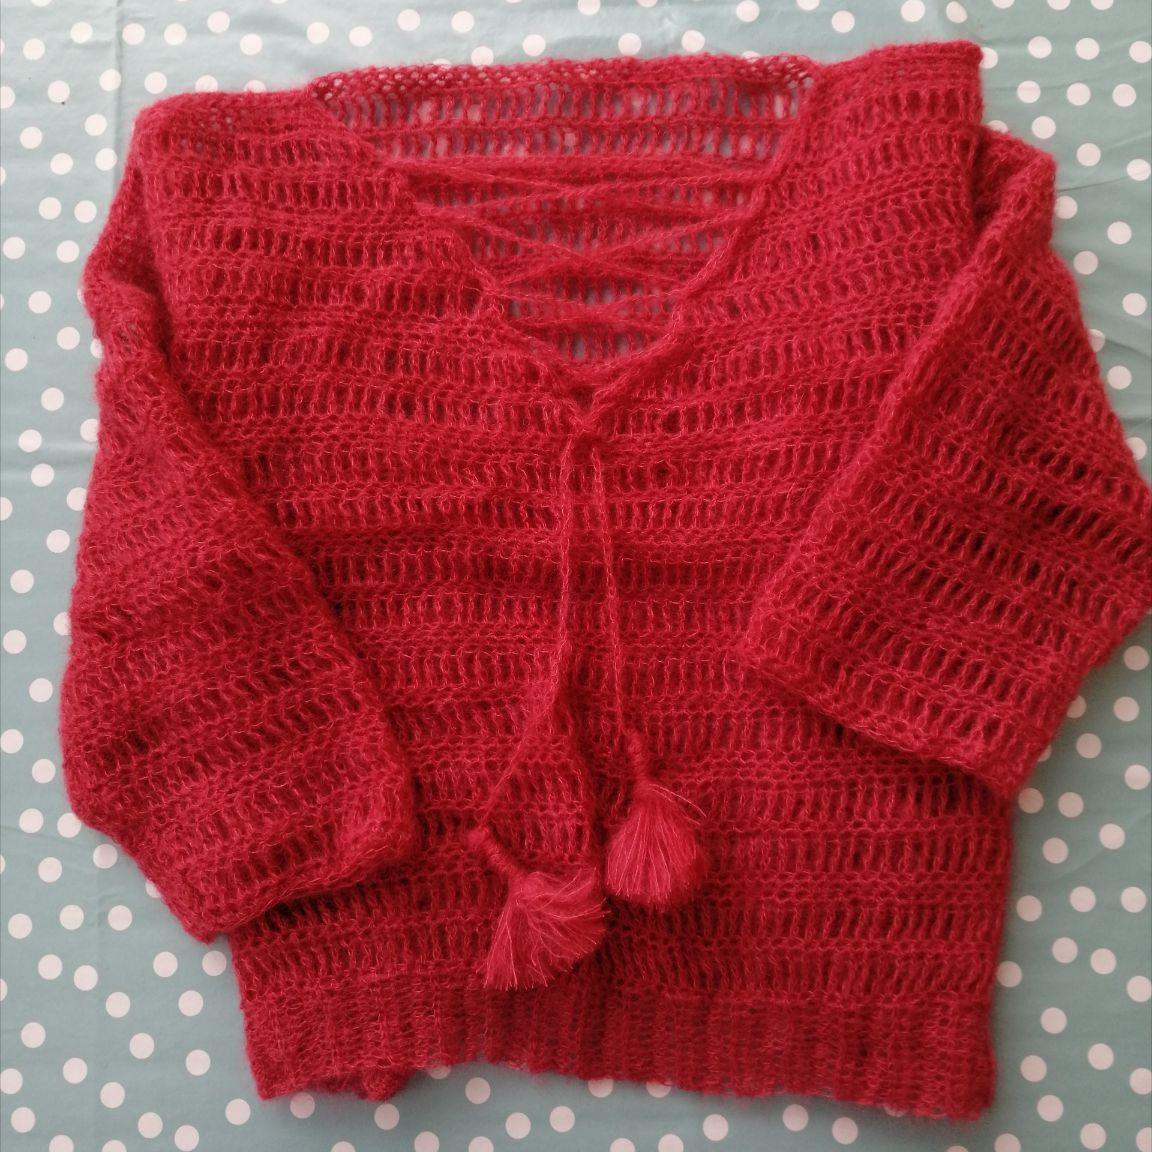
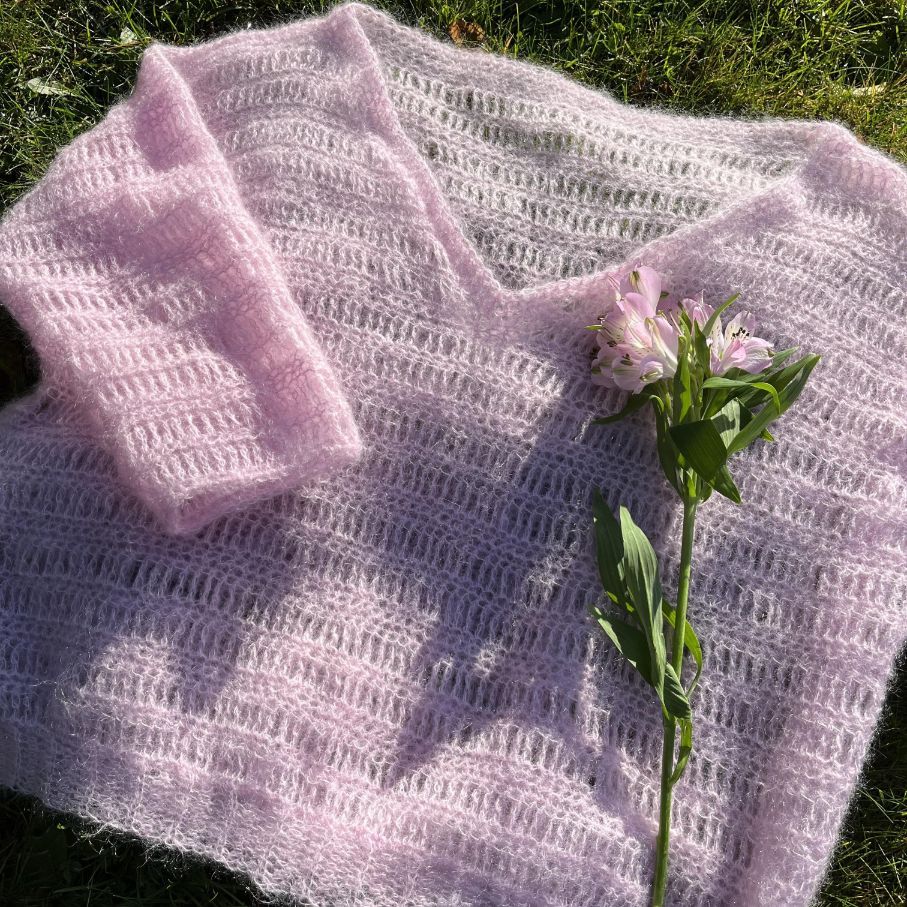
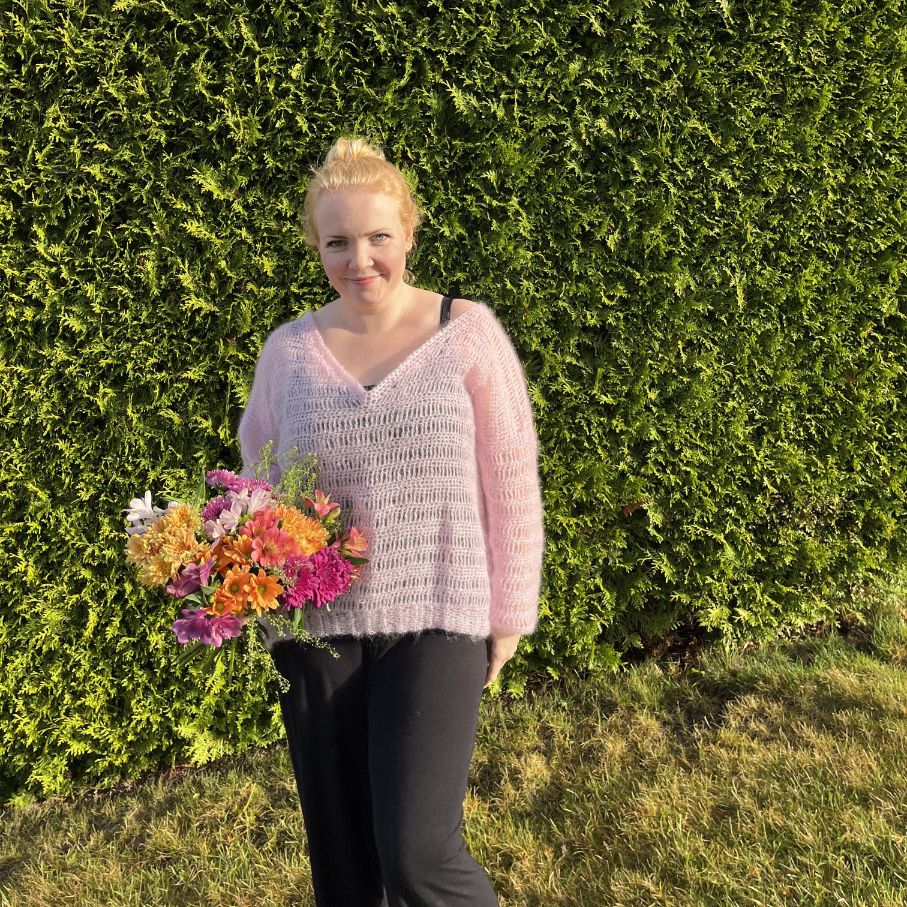
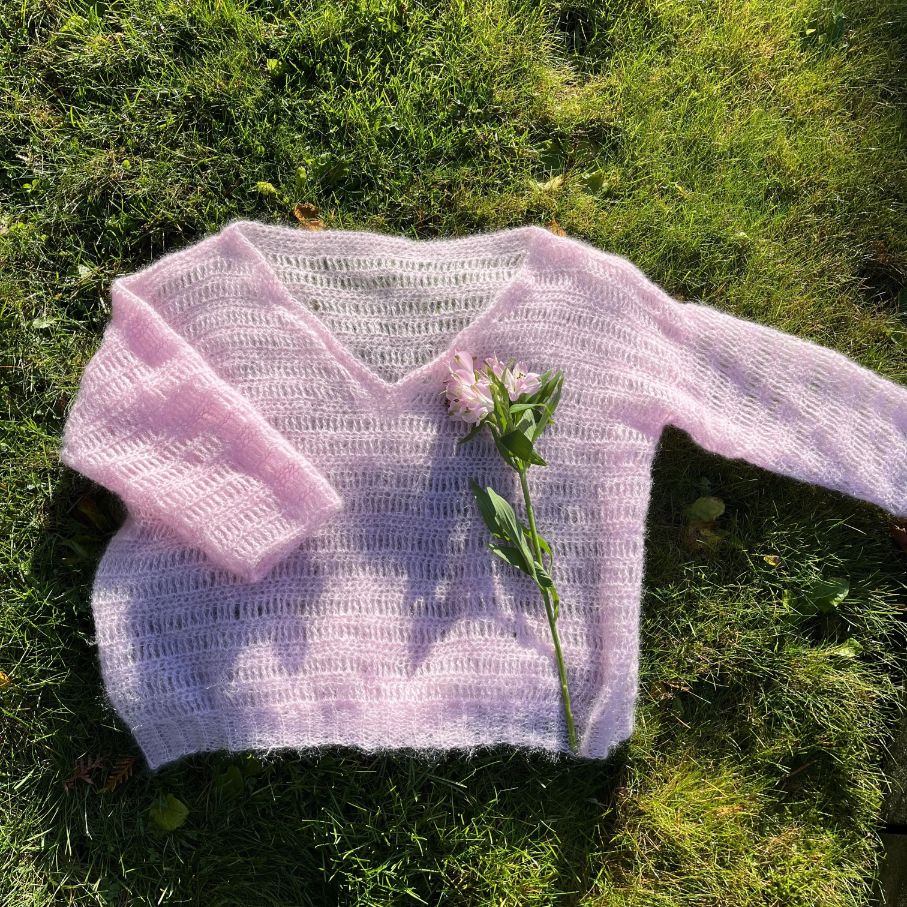
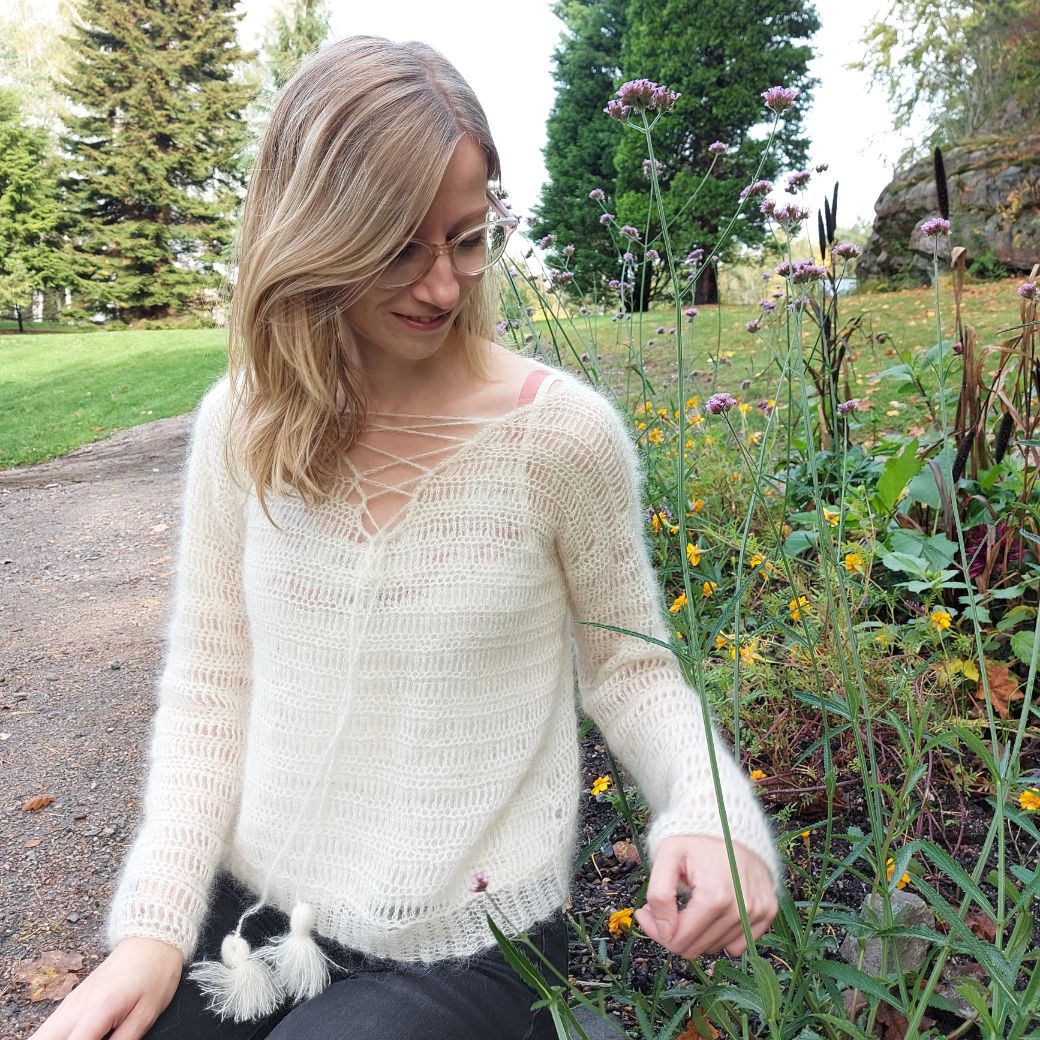
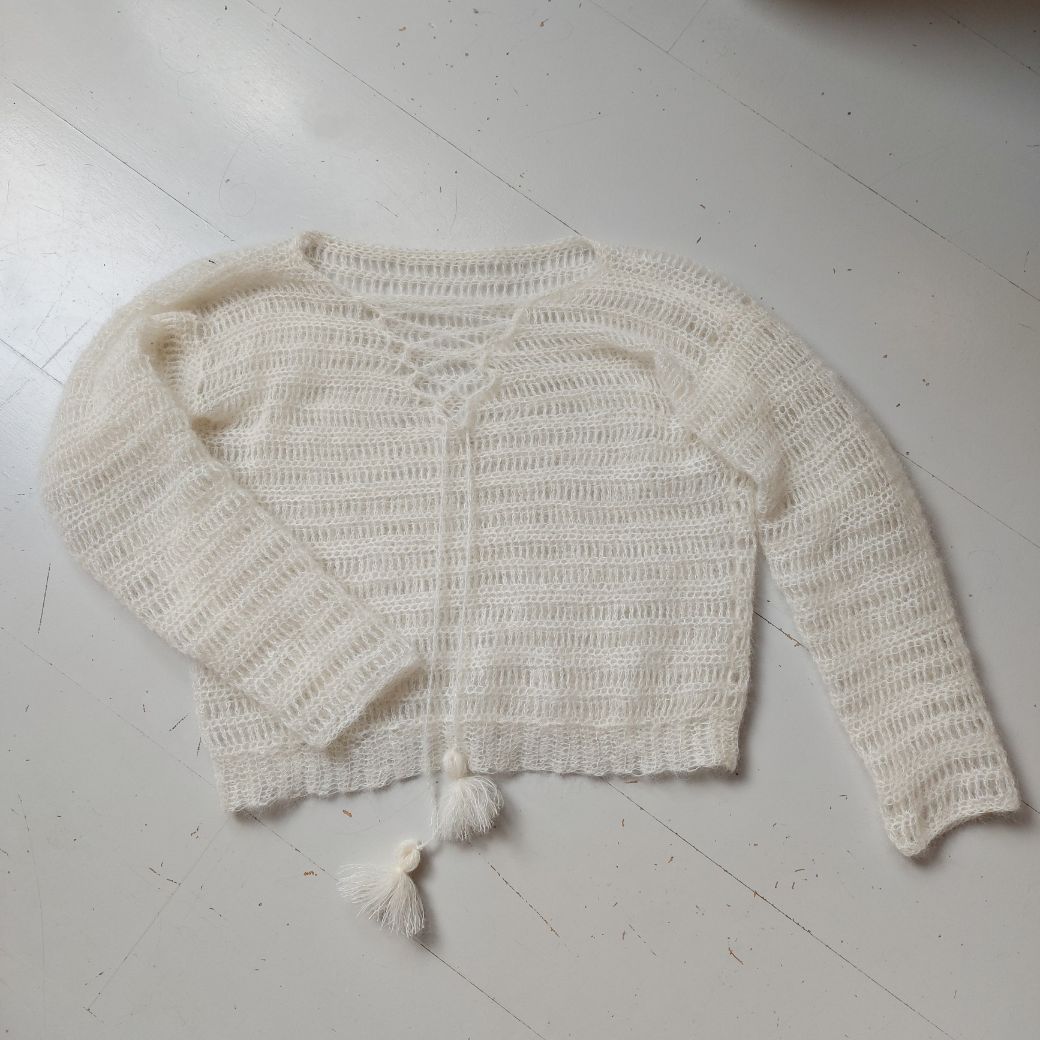
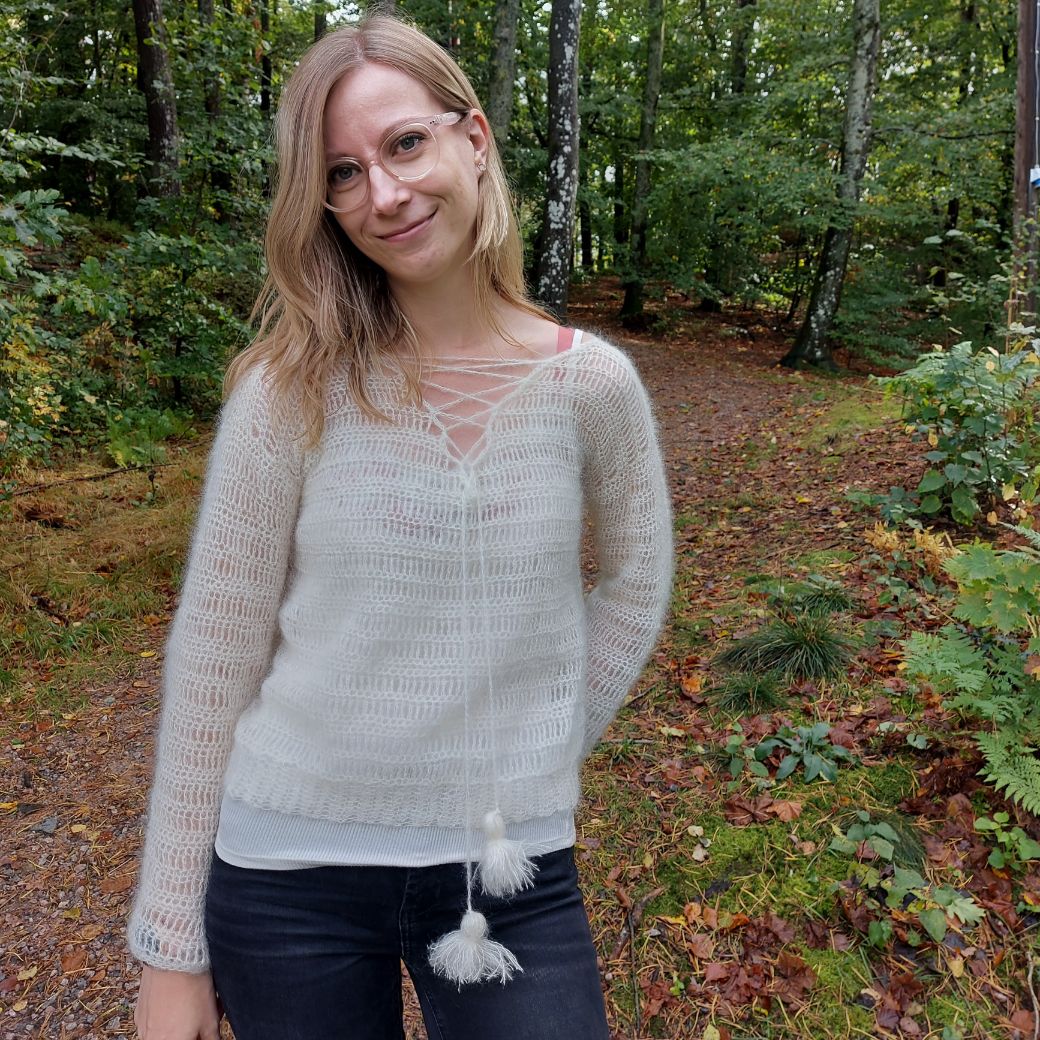
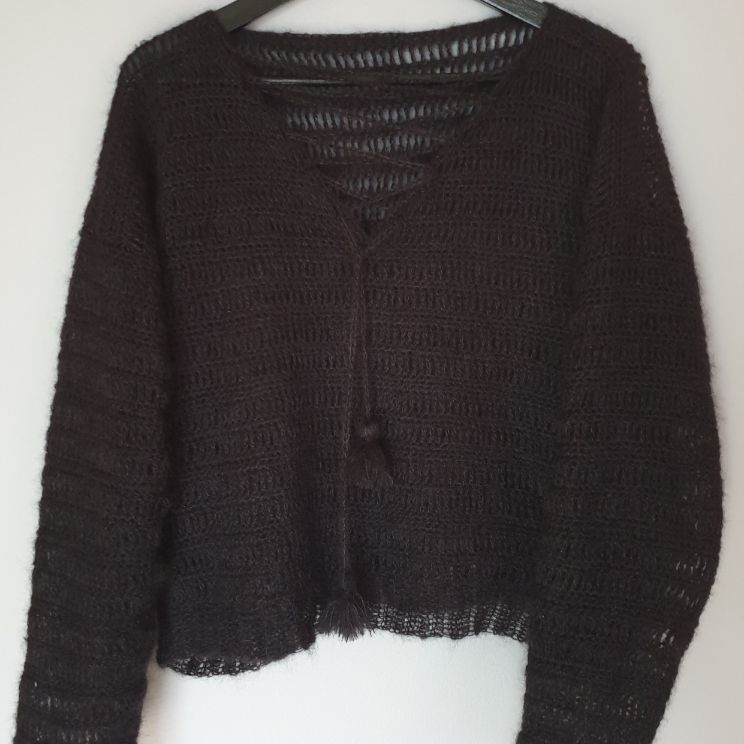
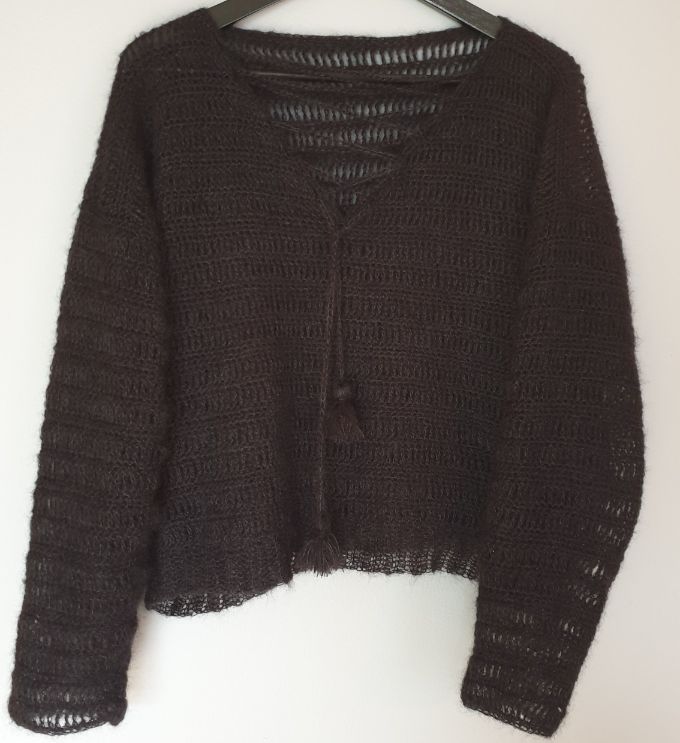
Nimbus Sweater
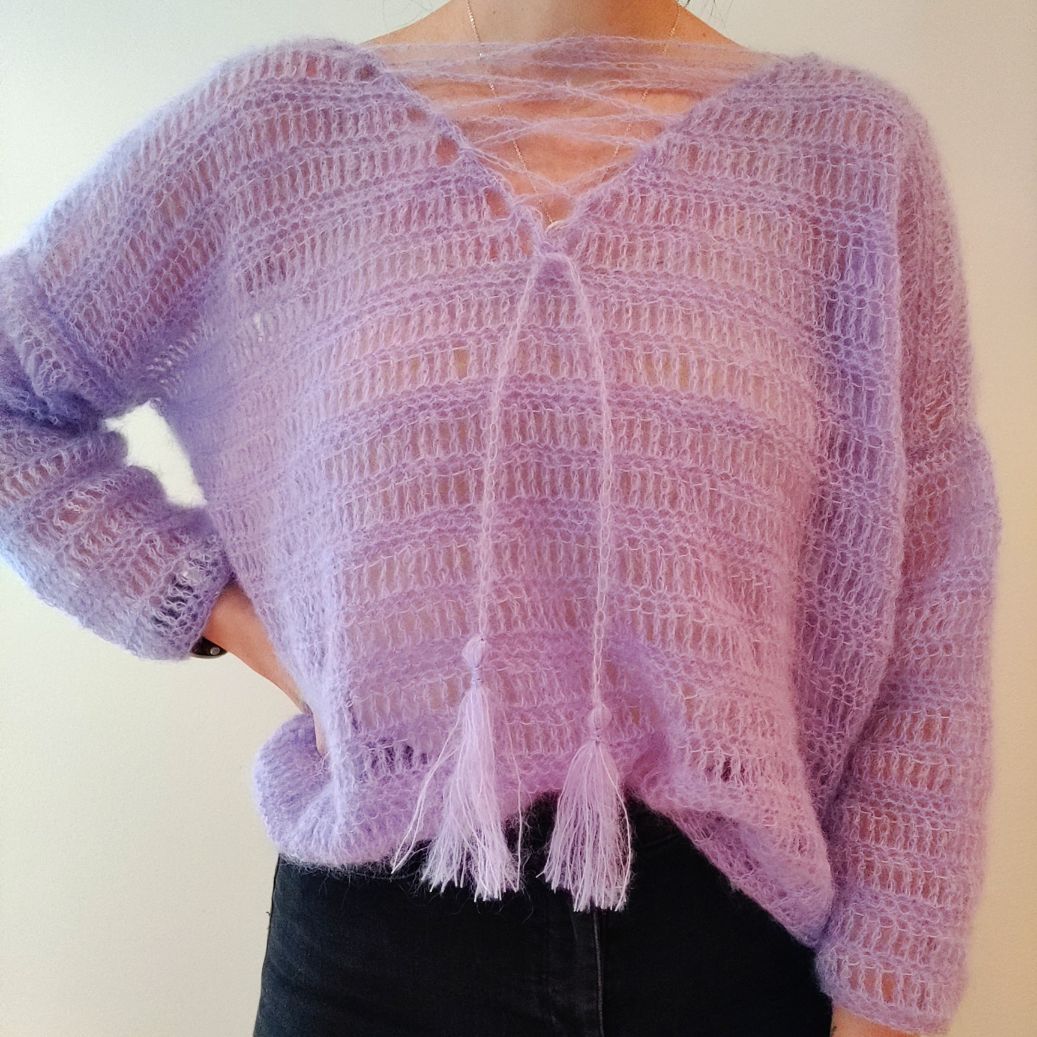
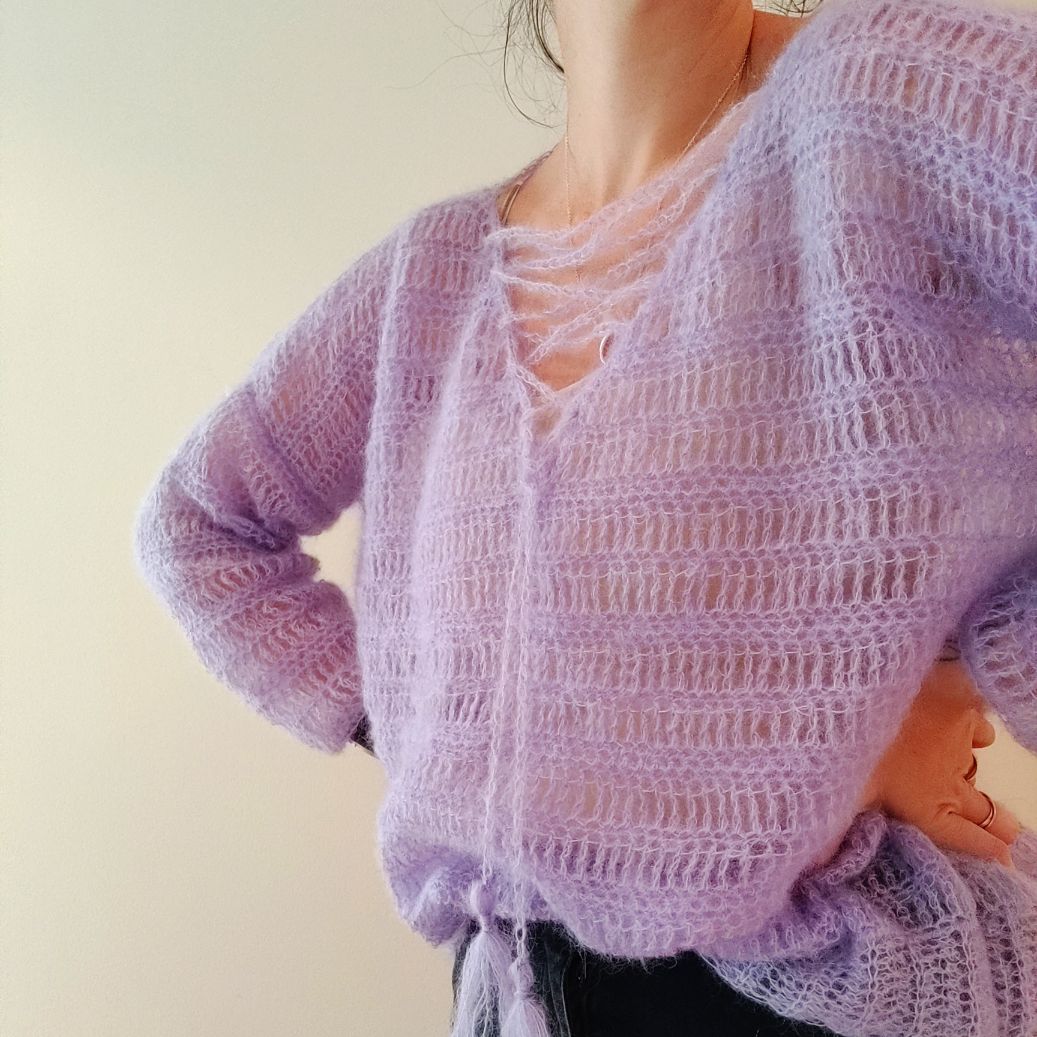
- Nimbus is a flowy and breezy sweater made with lace yarn. It’s perfect for those colder summer nights or the autumn chill.
- Nimbus is constructed in four separate pieces that are sewn or crocheted together.
The Sweater is made with Nordic Sky Oulu Kid-Silk
Sizes and measurements
This pattern comes in 9 sizes: XS, S, M, (L, XL, 2XL), (3XL, 4XL og 5XL).
Finished measurements:
Chest size: 32’’, 36, 40, (44, 48, 52), (56, 60, 64)
Garment chest size: 100 cm, 110, 120.5, (130.5, 141,151), (161, 171, 182) to fit actual chest size 76 cm, 86, 96.5, (106.5, 117, 127), (137, 147, 158)
Gauge
- 15 tr = 10 cm
- One pattern repeat = 6 cm
Nimbus is made with about 24 cm of positive ease, to give you that flowy feel.
It’s constructed in four separate pieces that are sewn or crocheted together.
Materials
- 5,0 mm Crochet hook
- Needle
- Scissors
Yarn consumption
Nordic Sky Oulu Kid-Silk 1 skein = 237 meters
Amount: 4, 4, 5, (5, 5, 6), (6, 6, 6) skeins
Abbreviations
(US terminology)
ch – chain
Sc – single crochet
Hdc – half double crochet
Tr – treble crochet
2sctog – 2 sc together
2trtog – 2 tr together
St - stitch
Pattern
1. Start with the rib. Ch11, and hdc in second ch from the hook and across. (10 hdc). Turn.
2. Ch2 (doesn’t count as a st) and hdc in back loop only across. Turn.
3. Repeat row 2 until you have (38, 43, 45, (49, 53, 57), (60, 64, 68) rows.
4. Turn your work 90 degrees and continue working on top of the ribbing. Ch1 (doesn’t count as a st from here on out) and sc2 in each row. (76, 86, 90, (98, 106, 114), (120, 128, 136) sc. Turn
5. Ch4 (counts as a st) and tr in each sc from previous row. Turn.
6. Ch1 and sc in each tr from previous row. Turn.
7. Repeat row 5.
8-10. Repeat row 6, three times.
Rows 5 to 10 are the pattern repeat for the sweater. Repeat these rows a total of (5, 5, 5, (6, 6, 6), (6, 7, 7) times (or more if you want a longer sweater). These rows finish at the botton of the V-neck.
11. Ch4 and continue with tr until you have a total of (38, 43, 45, (49, 53, 57), (60, 64, 68) tr. Turn.
12. Ch1, skip first st and sc in each tr from previous row. Turn. (1 st decreased)
13. Ch4 and tr until you have 2 st left. 2trtog. Turn. (1 st decreased)
Repeat the decrease for each row, and at the same time do the repeating pattern as previously established, for a total of 3 times. For even numbered rows you skip the first st, and for the odd numbered rows you do 2 st tog. For even-numbered rows with tr, you ch4 (count as a st) and sk the second st from the previous row.
14. With right side facing you, attach yarn in the st next to where you turned for V- neck on the other side. Ch3 and tr across. Turn.
15. Ch1, sc until you have 2 st left, 2sctog. Turn. (1 st decreased)
16. Ch4, skip second st from previous row and tr across. Turn. (1 st decreased)
Repeat the decrease on each row, and at the same time do the repeating pattern as previously established, for a total of 3 times. Cut yarn.
For the back piece, repeat rows 1 to 3 for ribbing, and continue with row 4. Rows 5 to 10 is repeated a total of (8, 8, 8, (9, 9, 9), (9, 10, 10) times. Cut yarn.
Sleeves - make 2
1. Ch (34, 36, 38, (42, 47, 54), (59, 64, 68). Sc in second ch from hook and across. Here, you can also do a foundation single crochet if desired.
2. Ch4, tr in same st (1 st increased), tr until you have 1 st left, 2tr in last st. Turn. (2 st increased in total)
3. Ch1 and sc in each tr from previous row. Turn.
4. Repeat row 2.
5. Repeat row 3, for a total of three times.
6. Repeat rows 2 to 5 for a total of 5, 5, 5, (6, 6, 6), (6, 7, 7) times. The sleeves are about ¾ long, and if you want to lenthen them you can repeat the established pattern until desired length. Keep in mind the amount of increases.
Assembly
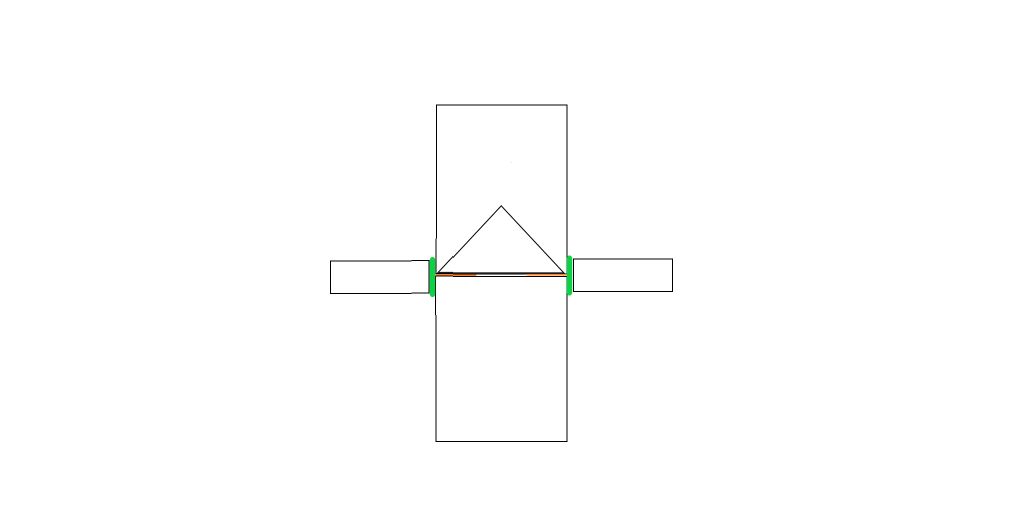
1. Crochet or sew togheter the shoulders (orange markings on figure 1)
2. Place your work as shown on figure 1 and place the sleeves against the sides of the body. Center the sleeves against the shoulderrs and crochet or sew togheter on both sides (green markings on figure 1).
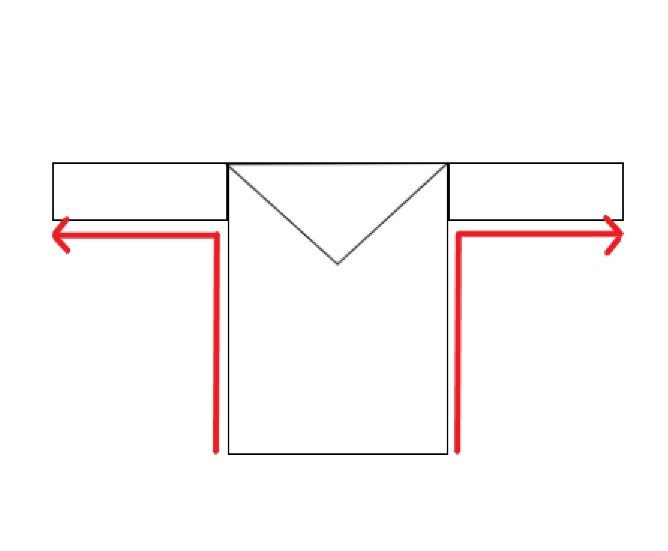
3. Crochet or sew together the sides of the sweater, from bottom to top (red markings on figure 2). Start at the waist ribbing and continue up towards the sleeves. Repeat for the other side.
Finishing touches
1. Fasten all loose ends.
2. Sc along the neckline and around the wrists.
3. Ch a long enough chain for threading through the sides of the V- neck.
4. Make pom-poms and fasten them to the ends of the chain
Designed by: Stine Hopsdal (crochetbystine)

 Österreich
  Belgique
  Bosna i Hercegovina
  България
  Κύπρος
  Česká republika
  Danmark
  Eesti
Eesti  Føroyar
  Suomi
Suomi  France
  Deutschland
  Ελλάδα
  Kalaallit Nunaat
  Magyarország
  Ísland
  Ireland
  Italia
  Latvija
  Liechtenstein
  Lietuva
  Lëtzebuerg
  Malta
Malta  Isle of Man
  Nederland
  Norge
Norge  Polska
  Portugal
  România
  Slovensko
  Slovenija
  España
  Sverige
  Schweiz
  Ukraїna
  United Kingdom