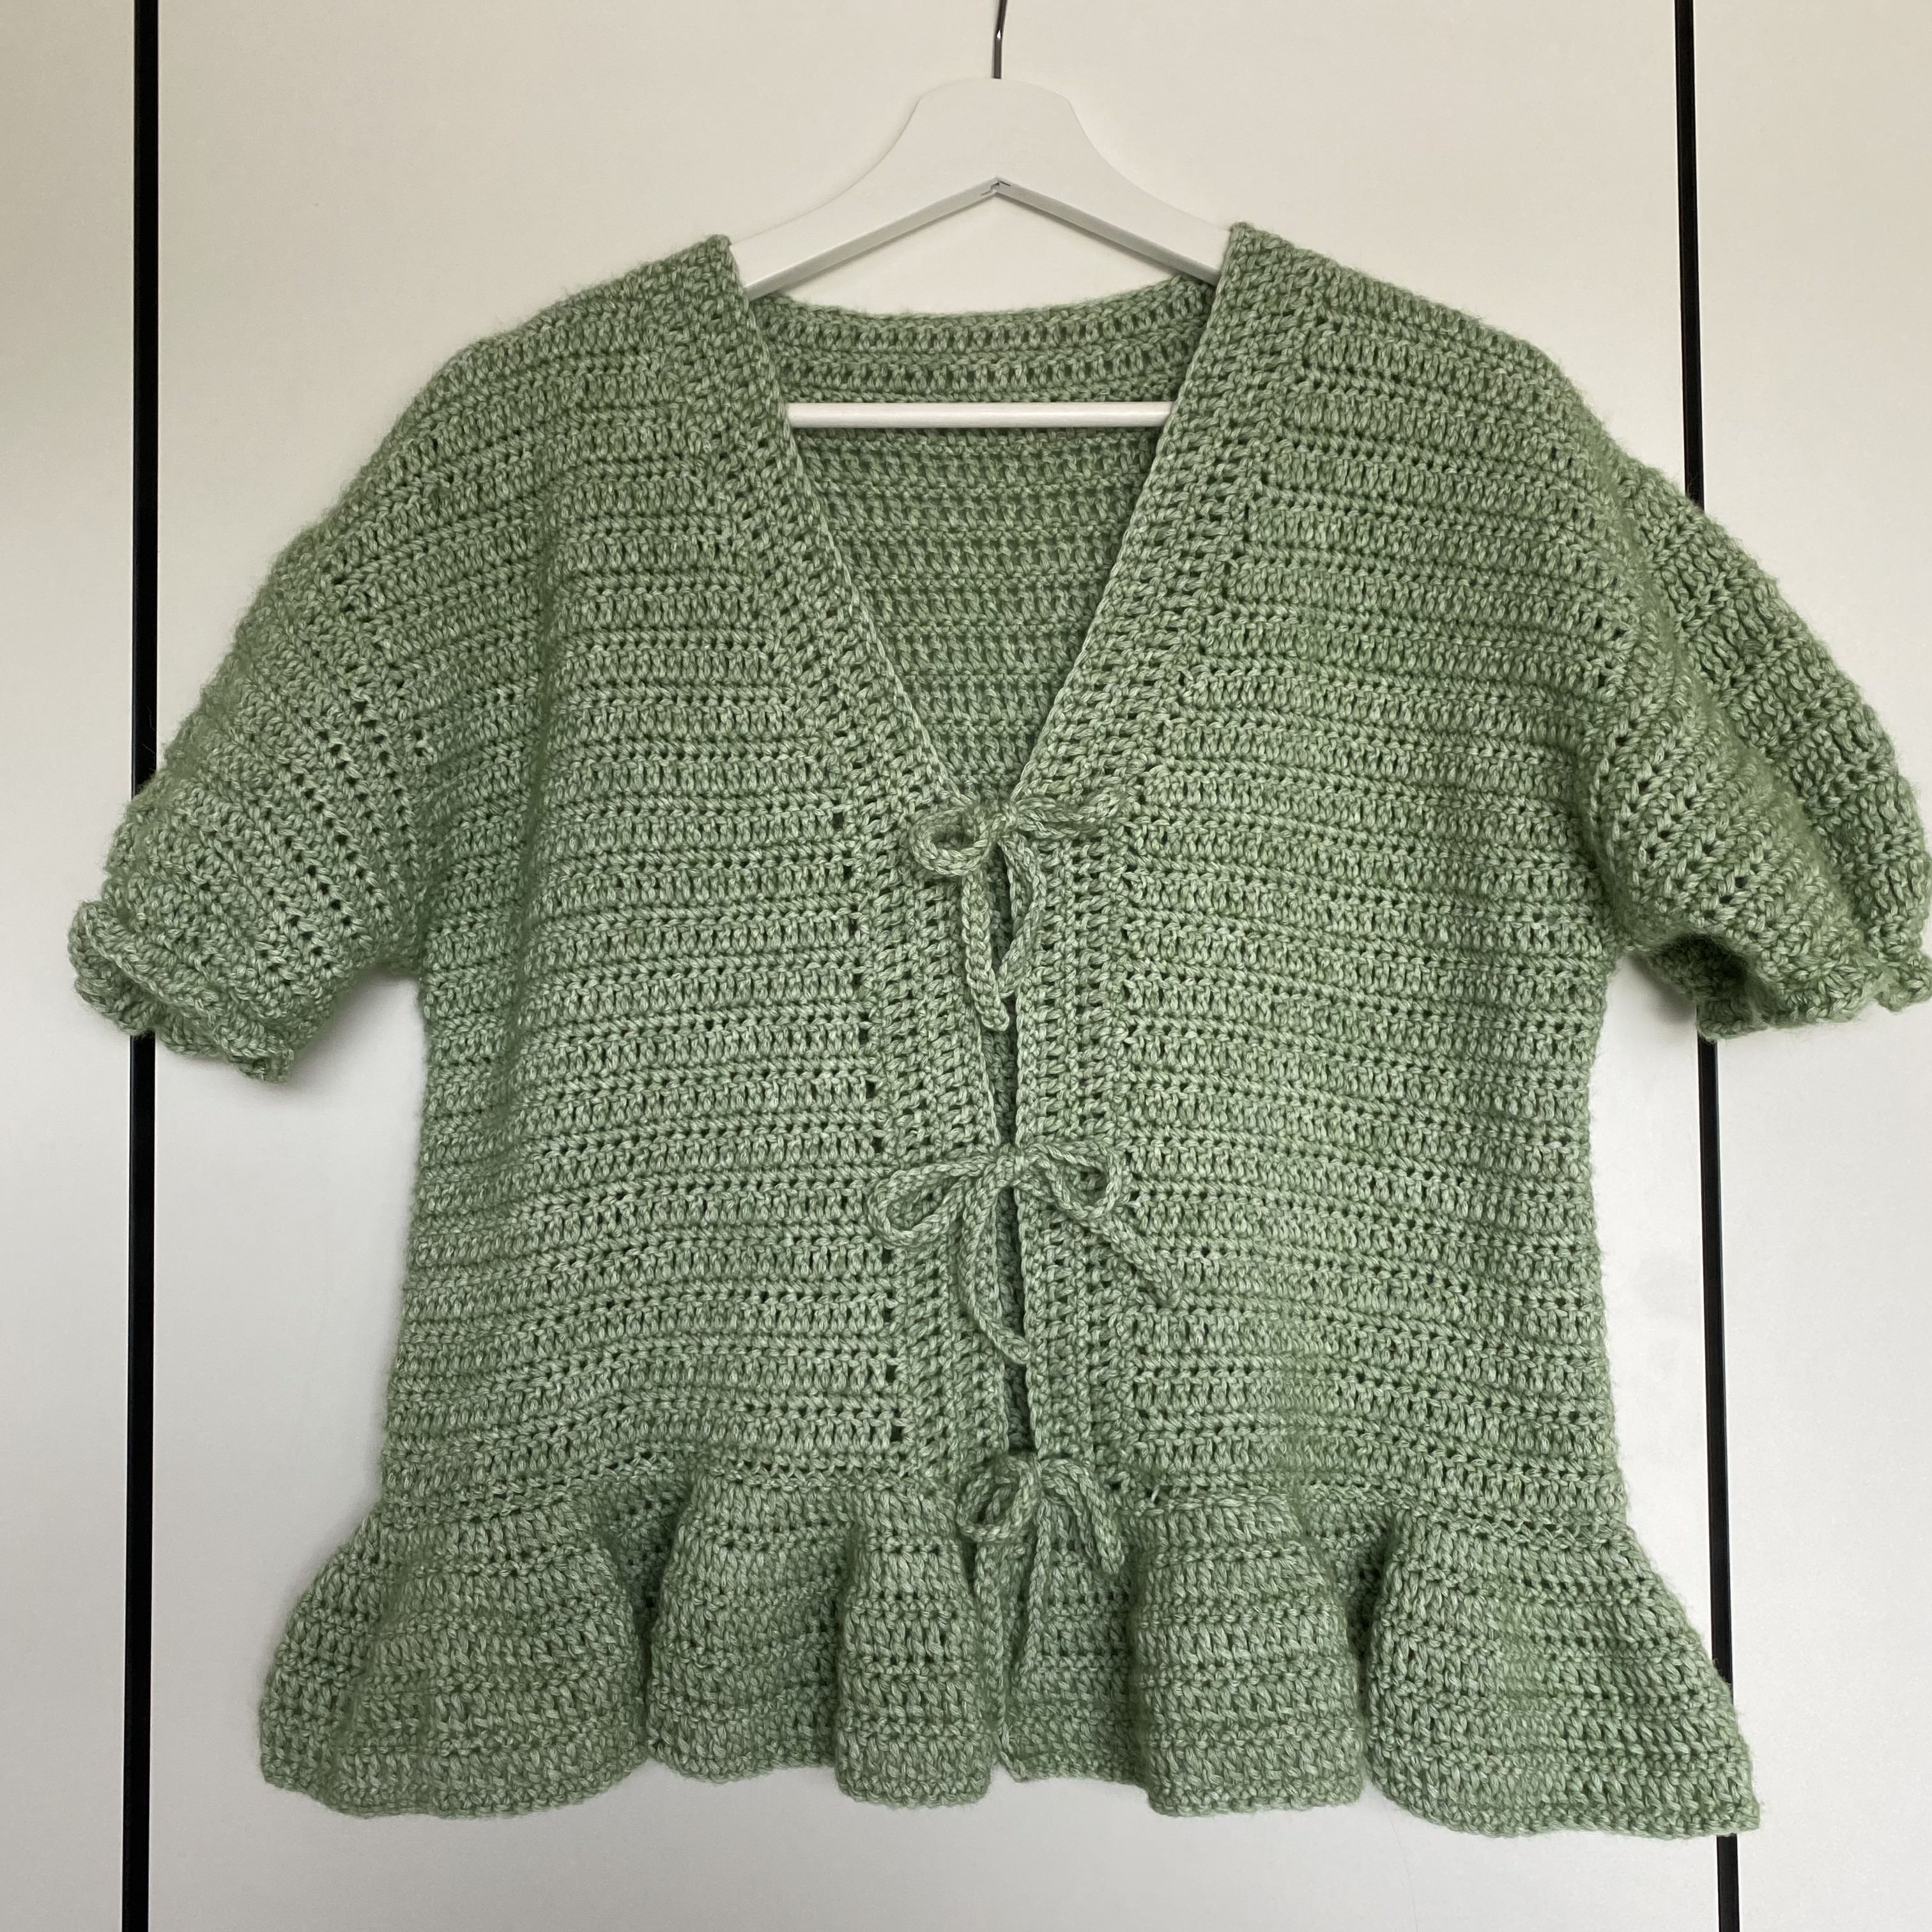
Free crochet pattern for the May Top

The top is oversized, so if you want it to have a tighter fit, you can make it one size smaller than usual. However, the top is made to fit best loose and in the size you normally wear.
The pattern is worked in size M (XS, S, L, XL)
Materials:
- Yarn: Infinity Hearts Lily. Contains 70% Cotton and 30% Merino wool. 50 grams = approx. 100 metres
- Crochet hook size 6. It is recommended to use a size 4.5 crochet hook, but the top will be less stiff when the hook size is a little larger. Therefore we also recommend that even if you are not crocheting with Infinity Heart Lily yarn, you find a crochet hook that is 1.5 sizes larger than the recommended hook size.
Other materials:
Yarn consumption:
In the pattern we have used Lily in the colour 12 Light green.
- 11 balls Infinity Hearts Lily yarn for size XS
- 12 balls Infinity Hearts Lily yarn for size S
- 12 balls Infinity Hearts Lily yarn for size M
- 13 balls Infinity Hearts Lily yarn for size L
- 14 balls Infinity Hearts Lily yarn for size XL
Crochet tension
10x10 cm = 16 sts on 10 rows (where the rows are worked alternately in double crochets and treble crochets)
Size:
The pattern is worked in size. M (XS, S, L, XL).
The chest measurements in the sizes are 93 cm (77 cm, 85 cm, 101 cm, 109 cm).
Abbreviations
rw = row
s = stitch
ch = chain
dc = double crochet
ts = turning stitch
tstr = reverse stitch to treble crochet = 3 chain stitches
tr = treble crochet
htr = half treble stitch
dtr = double treble crochet
blo = back loop
Instructions
FRONT PIECE A
Row 1: Make 32 (26, 29, 35, 38) ch. Finish with a ts and turn the piece
Row 2: Make 1 dc in blo of each st. Finish with a tstr and turn the piece
Row 3: Make 1 tr in each st. Finish with a ts and turn the piece
Row 4: Make 1 dc in each st. Finish with a tstr and turn the piece
Row 5-26: Repeat rows 3 and 4
Row 27: Make 1 tr in the next 30 (24, 27, 33, 36) sts. Make a decrease in the last 2 sts. Finish with a ts and turn the piece
Row 28: Make 1 dc in every st. Finish with a tstr and turn the piece
Row 29: Make 1 tr in the next 29 (23, 26, 32, 35) sts. Decrease in the last 2 sts. Finish with a ts and turn the piece
Row 30: Make 1 dc in every st. Finish with a tstr and turn the piece
Row 31: Make 1 tr in the next 28 (22, 25, 31, 34) sts. Decrease in the last 2 sts. Finish with a ts and turn the piece
Row 32: Make 1 dc in every st. Finish with a tstr and turn the piece
Row 33: Make 1 tr in the next 27 (21, 24, 30, 33) sts. Decrease in the last 2 sts. Finish with a ts and turn the piece
Row 34: Make 1 dc in every st. Finish with a tstr and turn the piece
Row 35: Make 1 tr in the next 26 (20, 23, 29, 32) sts. Decrease in the last 2 sts. Finish with a ts and turn the piece
Row 36: Make 1 dc in every st. Finish with a tstr and turn the piece
Row 37: Make 1 tr in the next 25 (19, 22, 28, 31) sts. Decrease in the last 2 sts. Finish with a ts and turn the piece
Row 38: Make 1 dc in every st. Finish with a tstr and turn the piece
Row 39: Make 1 tr in the next 24 (18, 21, 27, 30) sts. Decrease in the last 2 sts. Finish with a ts and turn the piece
Row 40: Make 1 dc in every st. Finish with a tstr and turn the piece
Row 41: Make 1 tr in the next 23 (17, 20, 26, 29) sts. Decrease in the last 2 sts. Finish with a ts and turn the piece
Row 42: Make 1 dc in every st. Finish with a tstr and turn the piece
Row 43: Make 1 tr in the next 22 (16, 19, 25, 28) sts. Decrease in the last 2 sts. Finish with a ts and turn the piece
Row 44: Make 1 dc in every st. Finish with a tstr and turn the piece
Row 45: Make 1 tr in the next 21 (15, 18, 24, 27) sts. Decrease in the last 2 sts. Finish with a ts and turn the piece
Row 46: Make 1 dc in every st. Cut the yarn and finish the piece
FRONT PIECE B
Row 1: Make 32 (26, 29, 35, 38) ch. Finish with a ts and turn the piece
Row 2: Make 1 dc in blo of each st. Finish with a tstr and turn the piece
Row 3: Make 1 tr in each st. Finish with a ts and turn the piece
Row 4: Make 1 dc in each st. Finish with a tstr and turn the piece
Row 5-26: Repeat rows 3 and 4
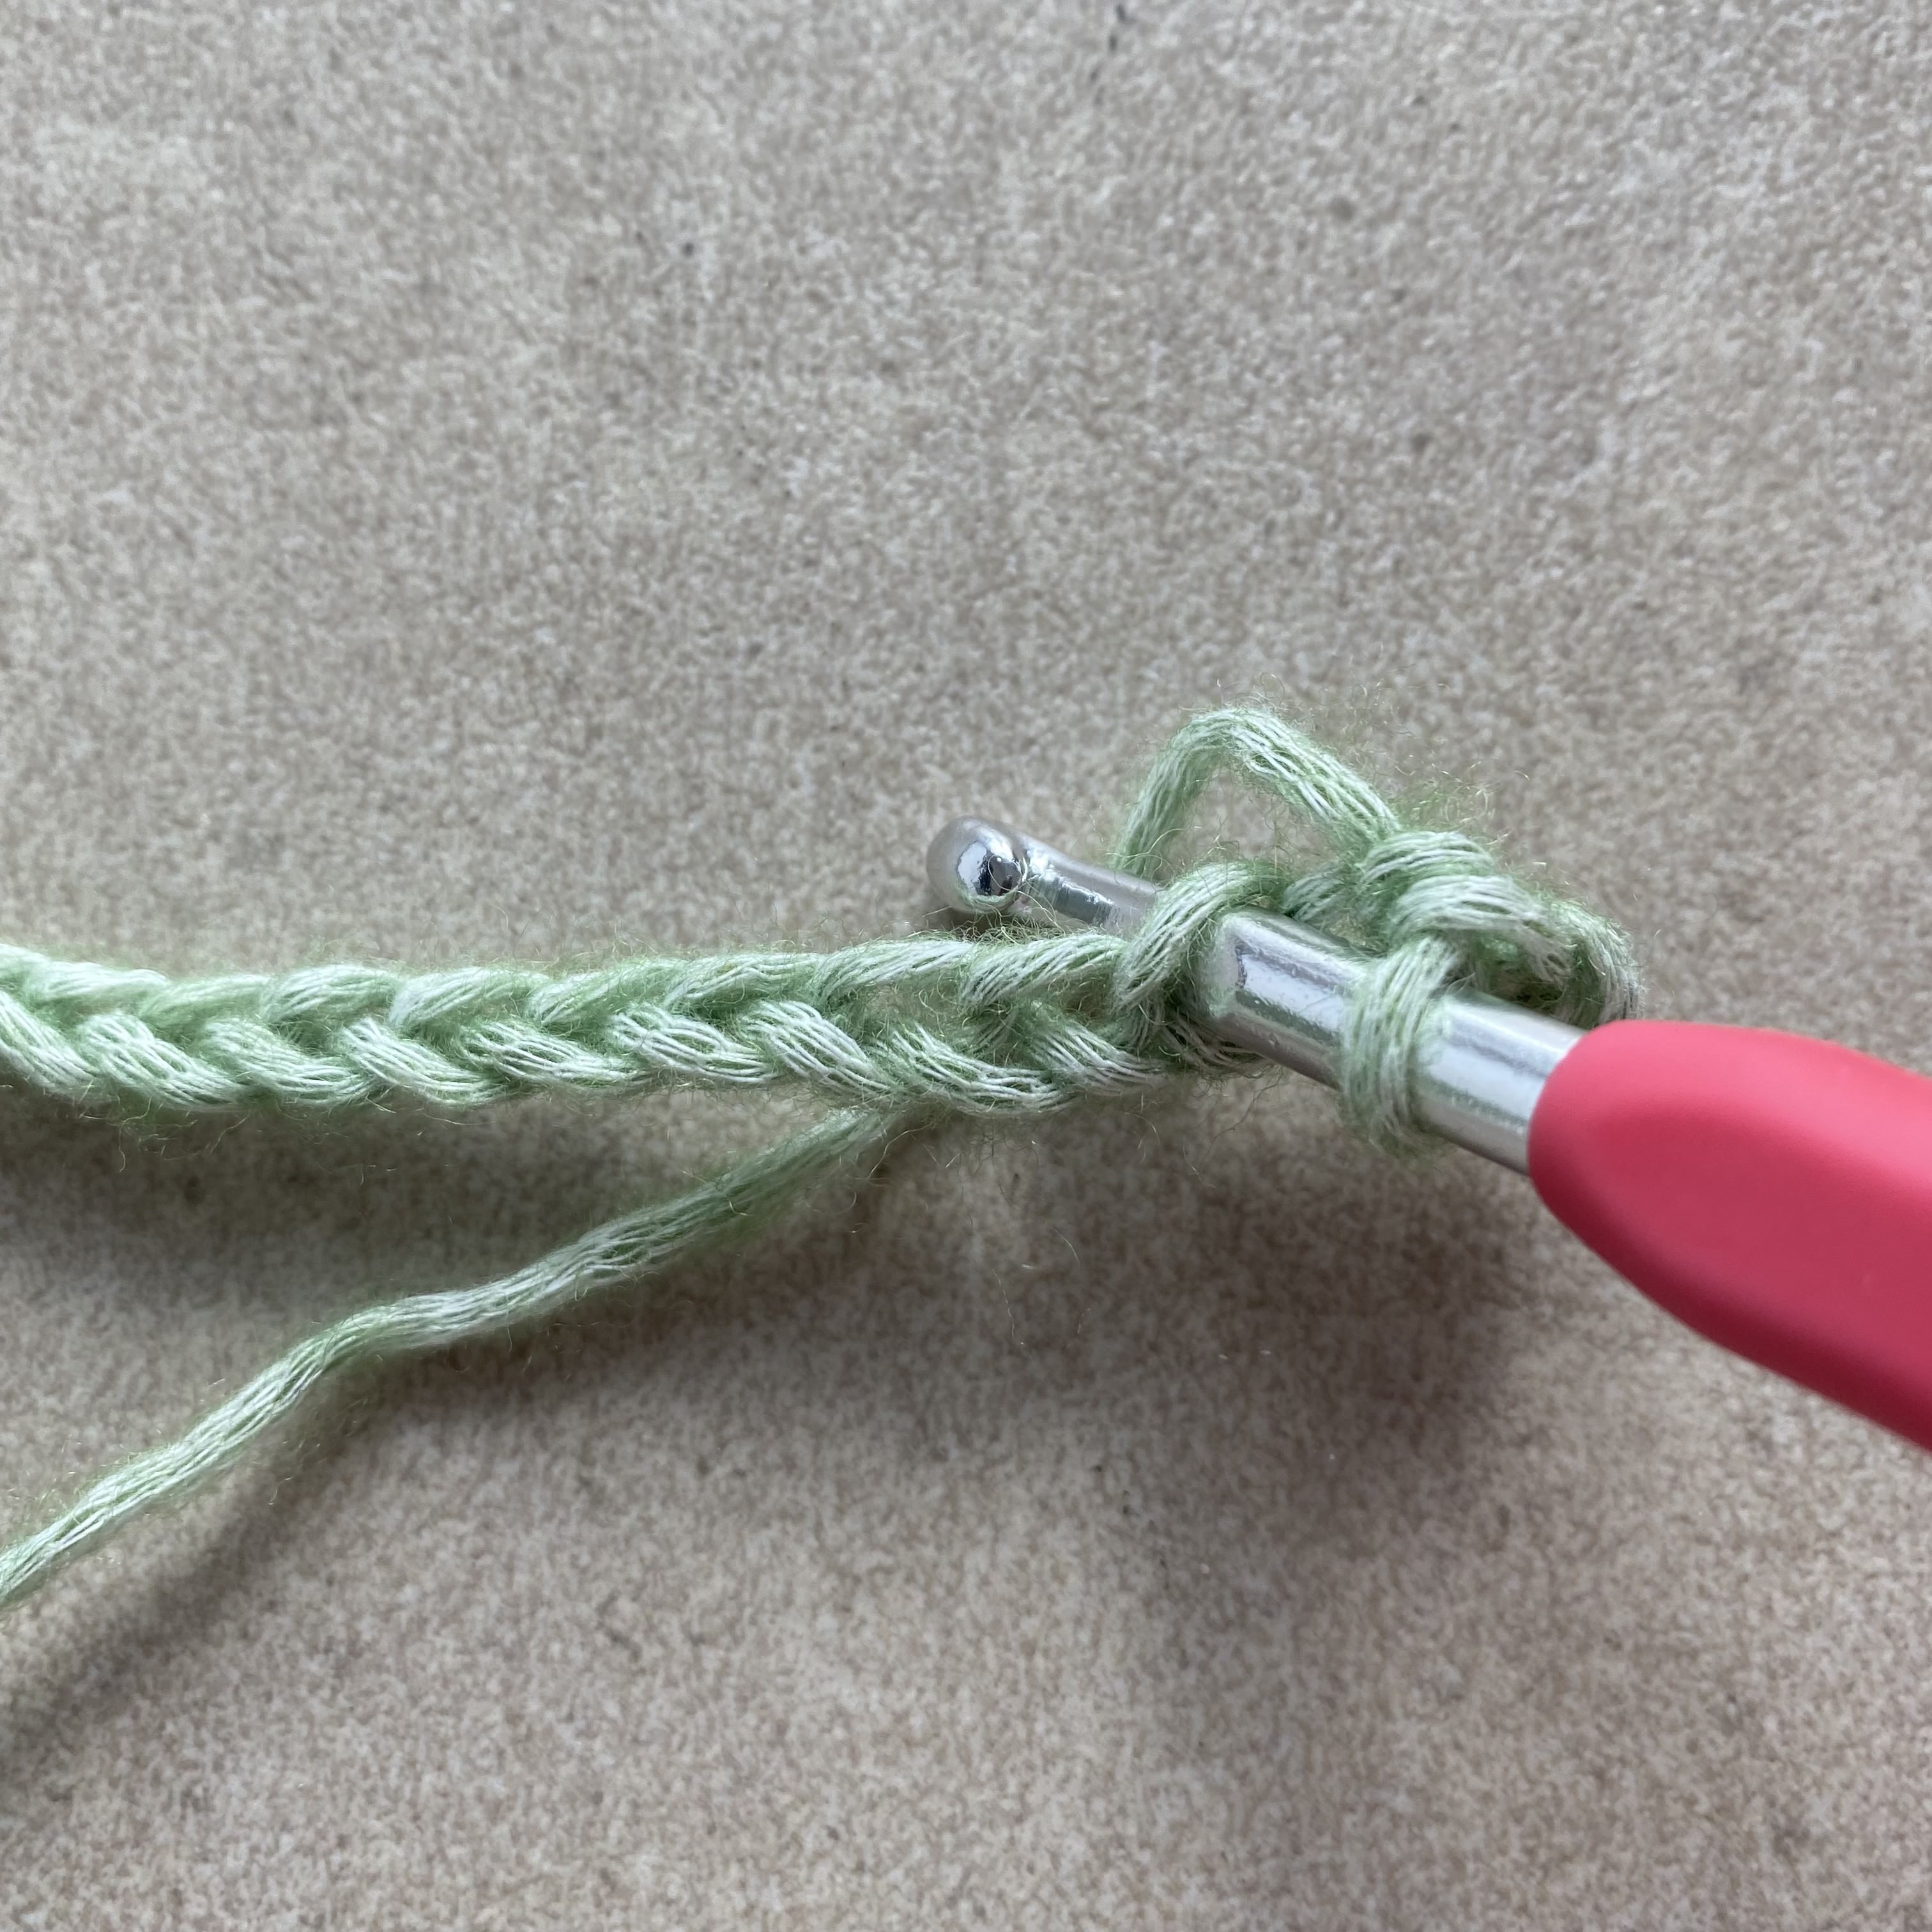
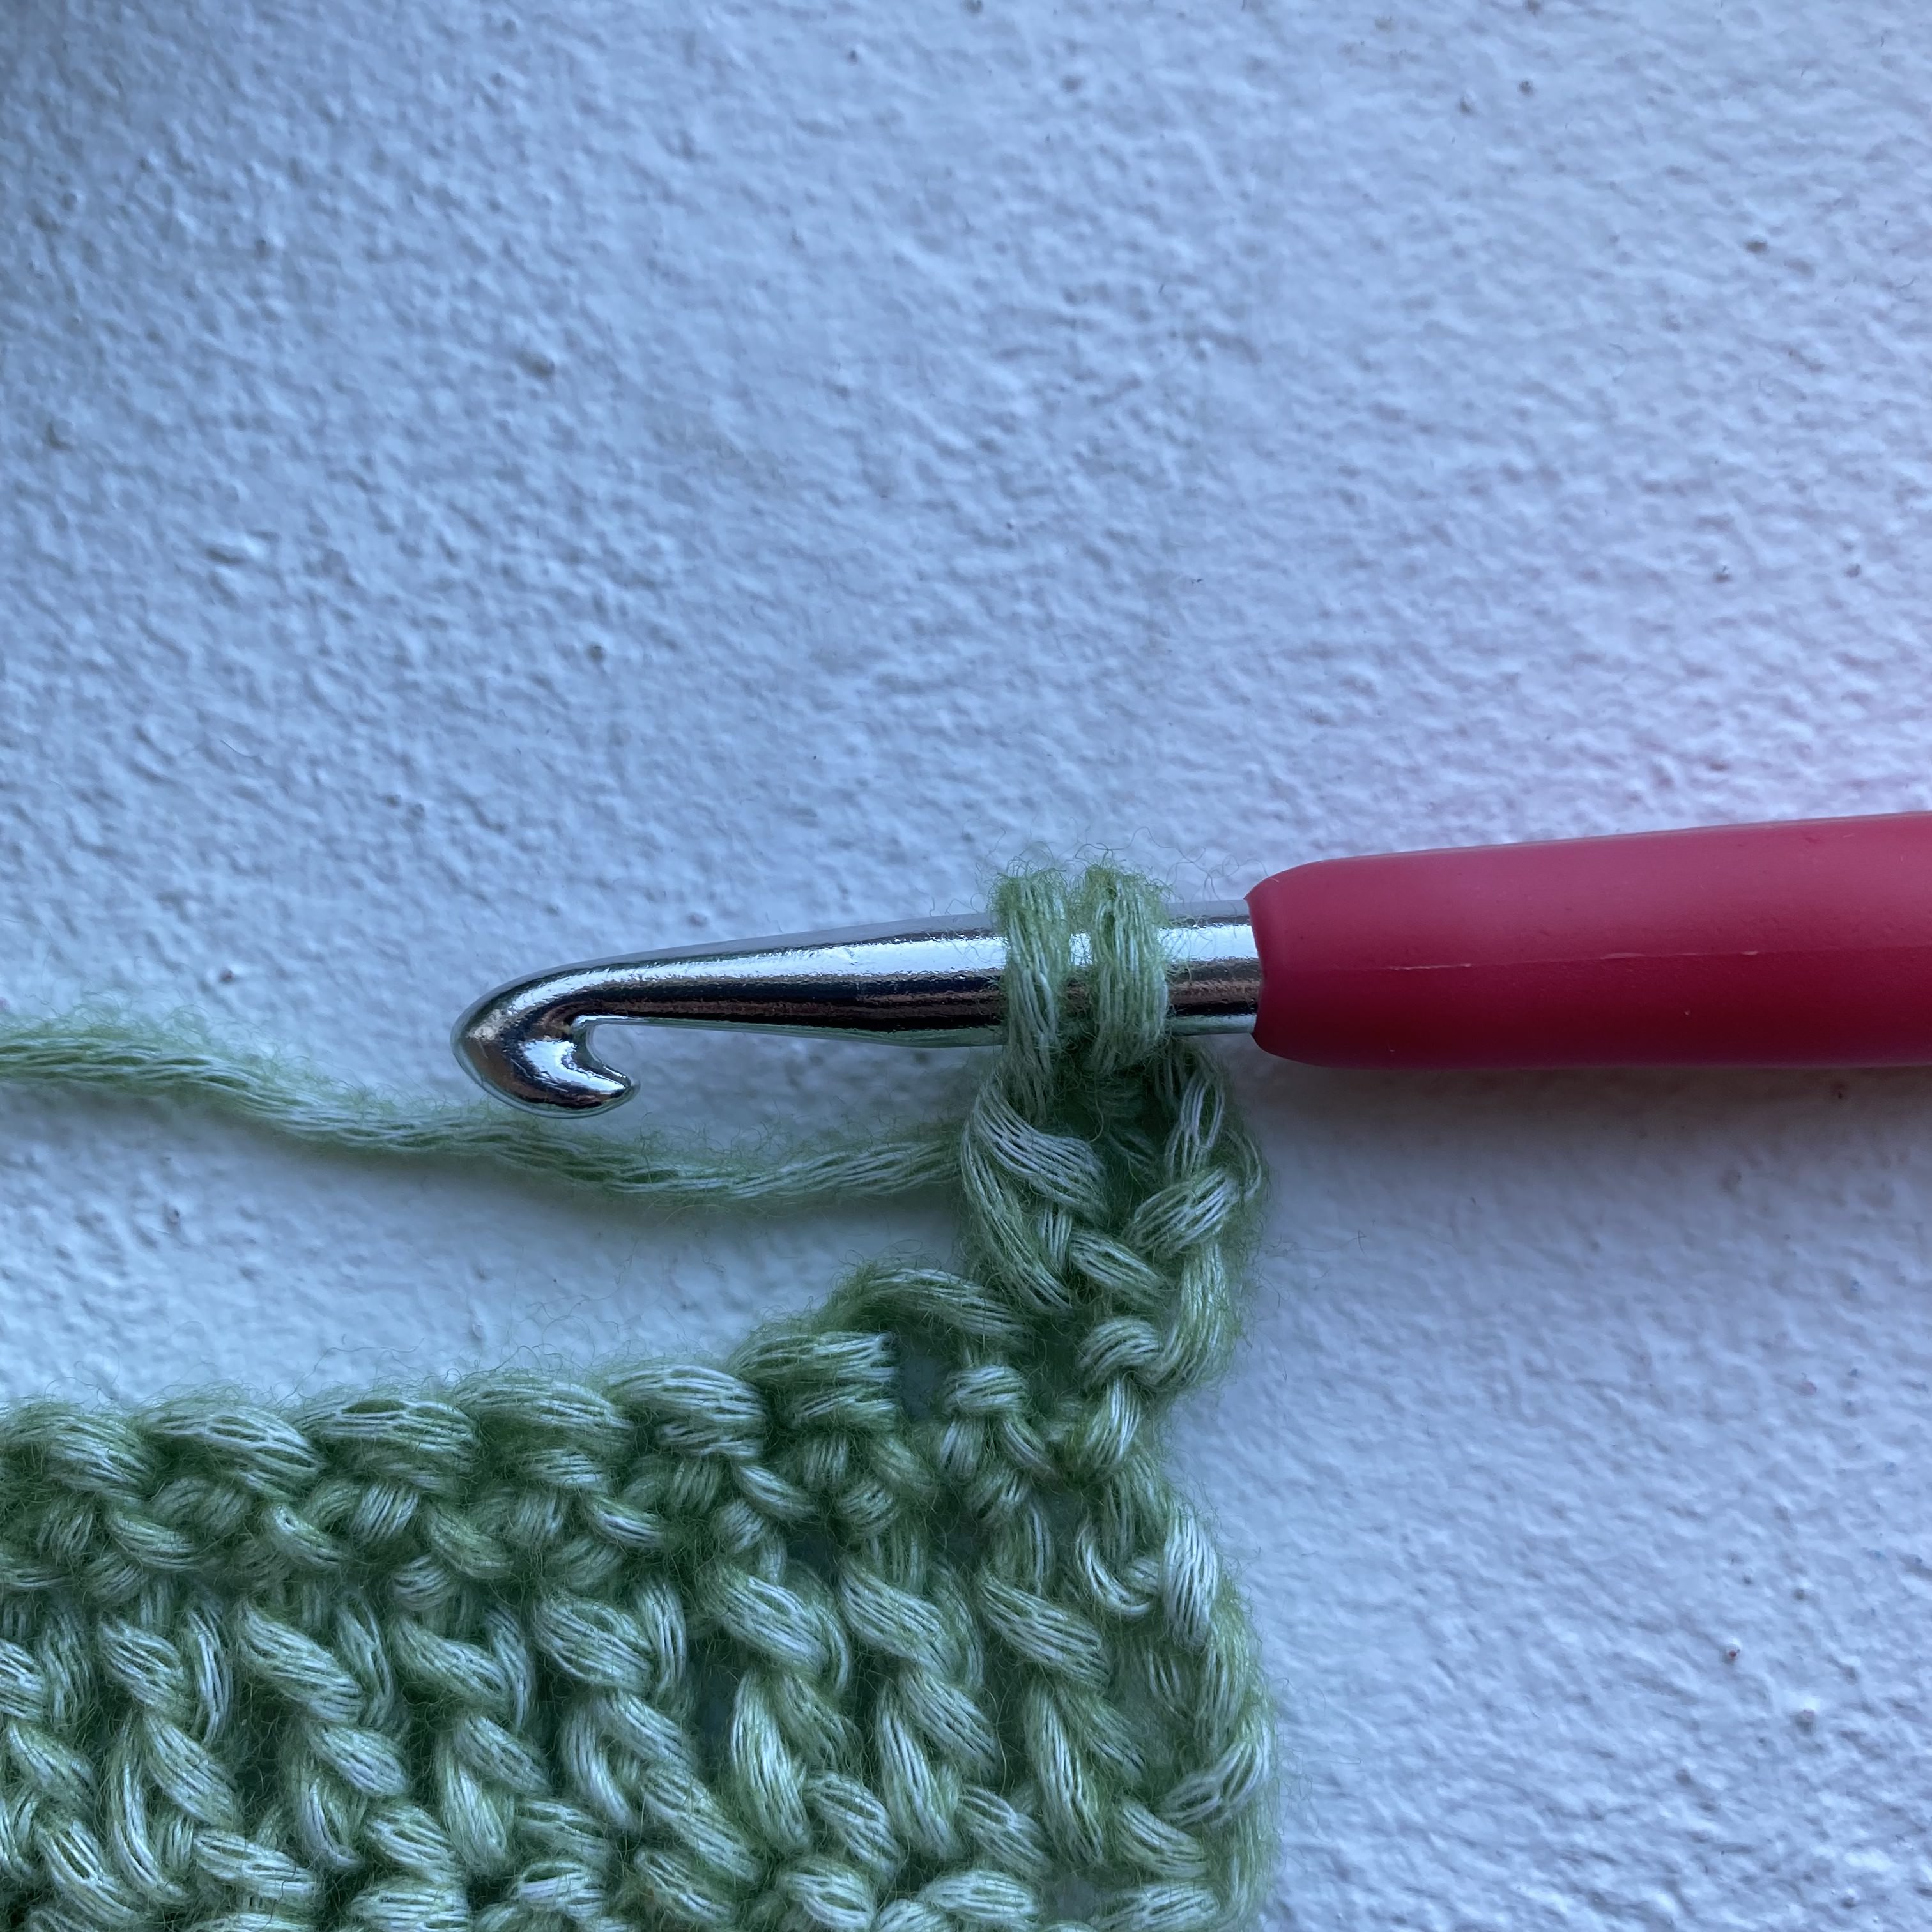
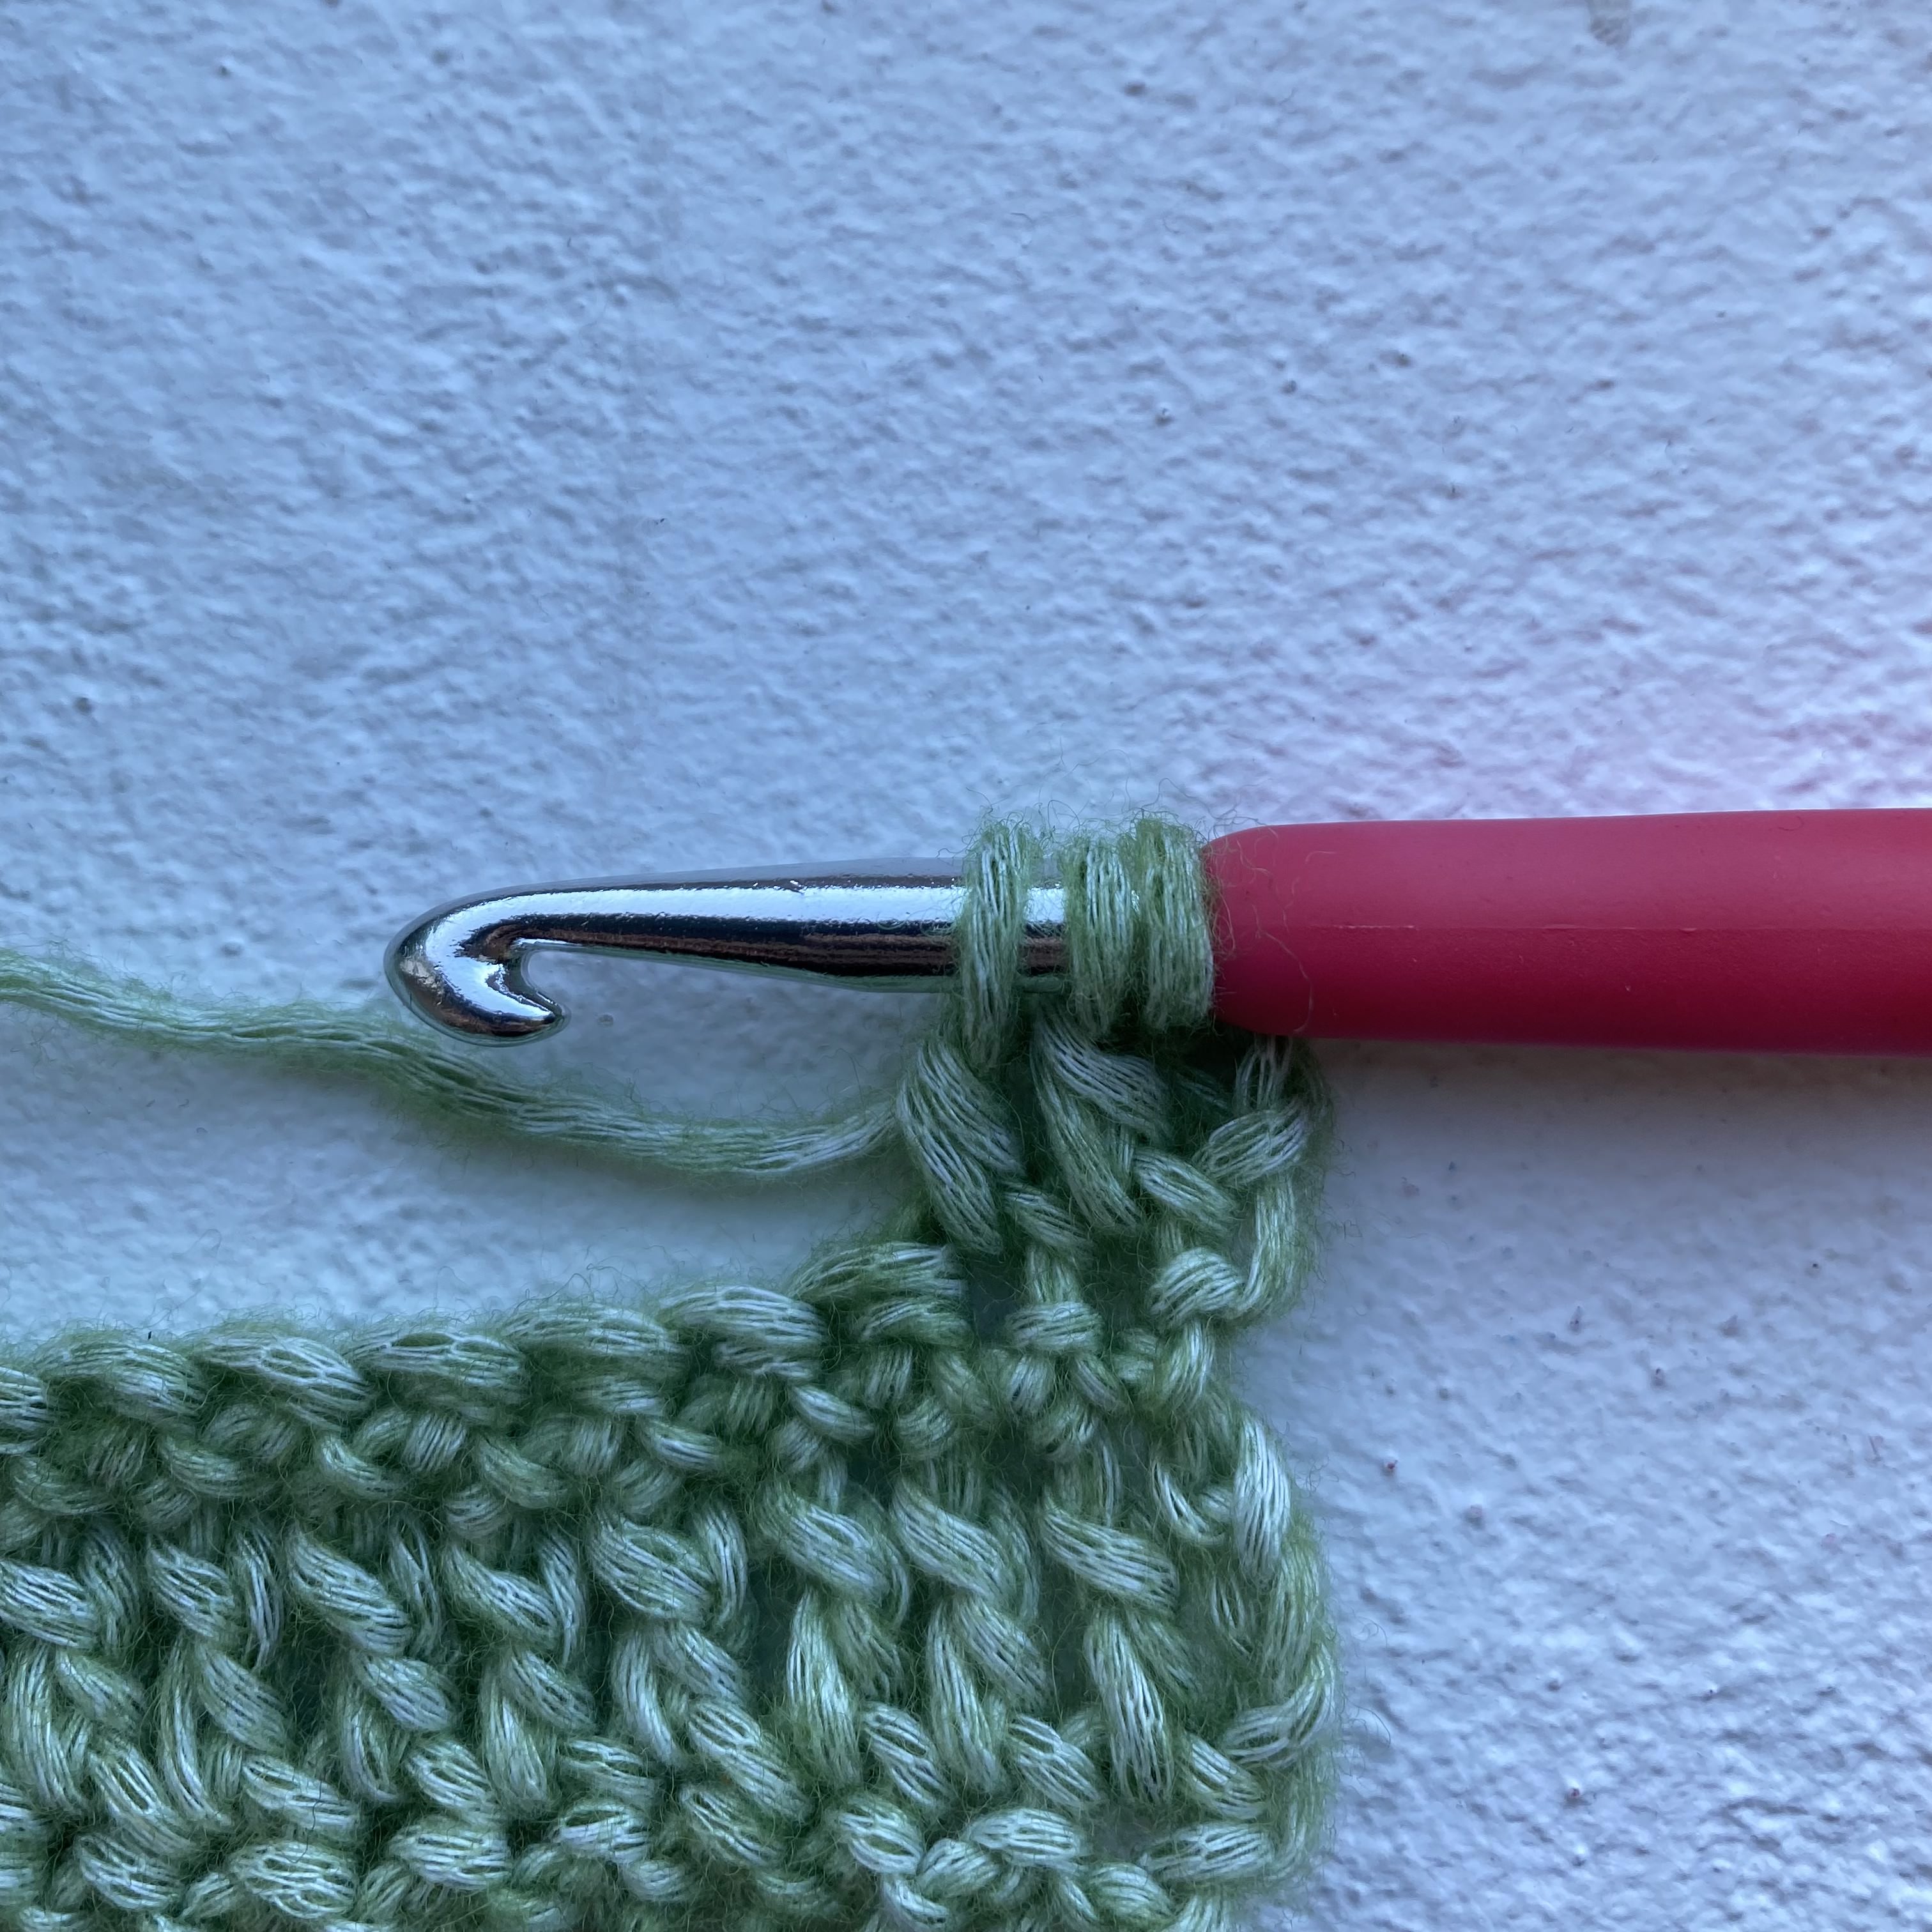
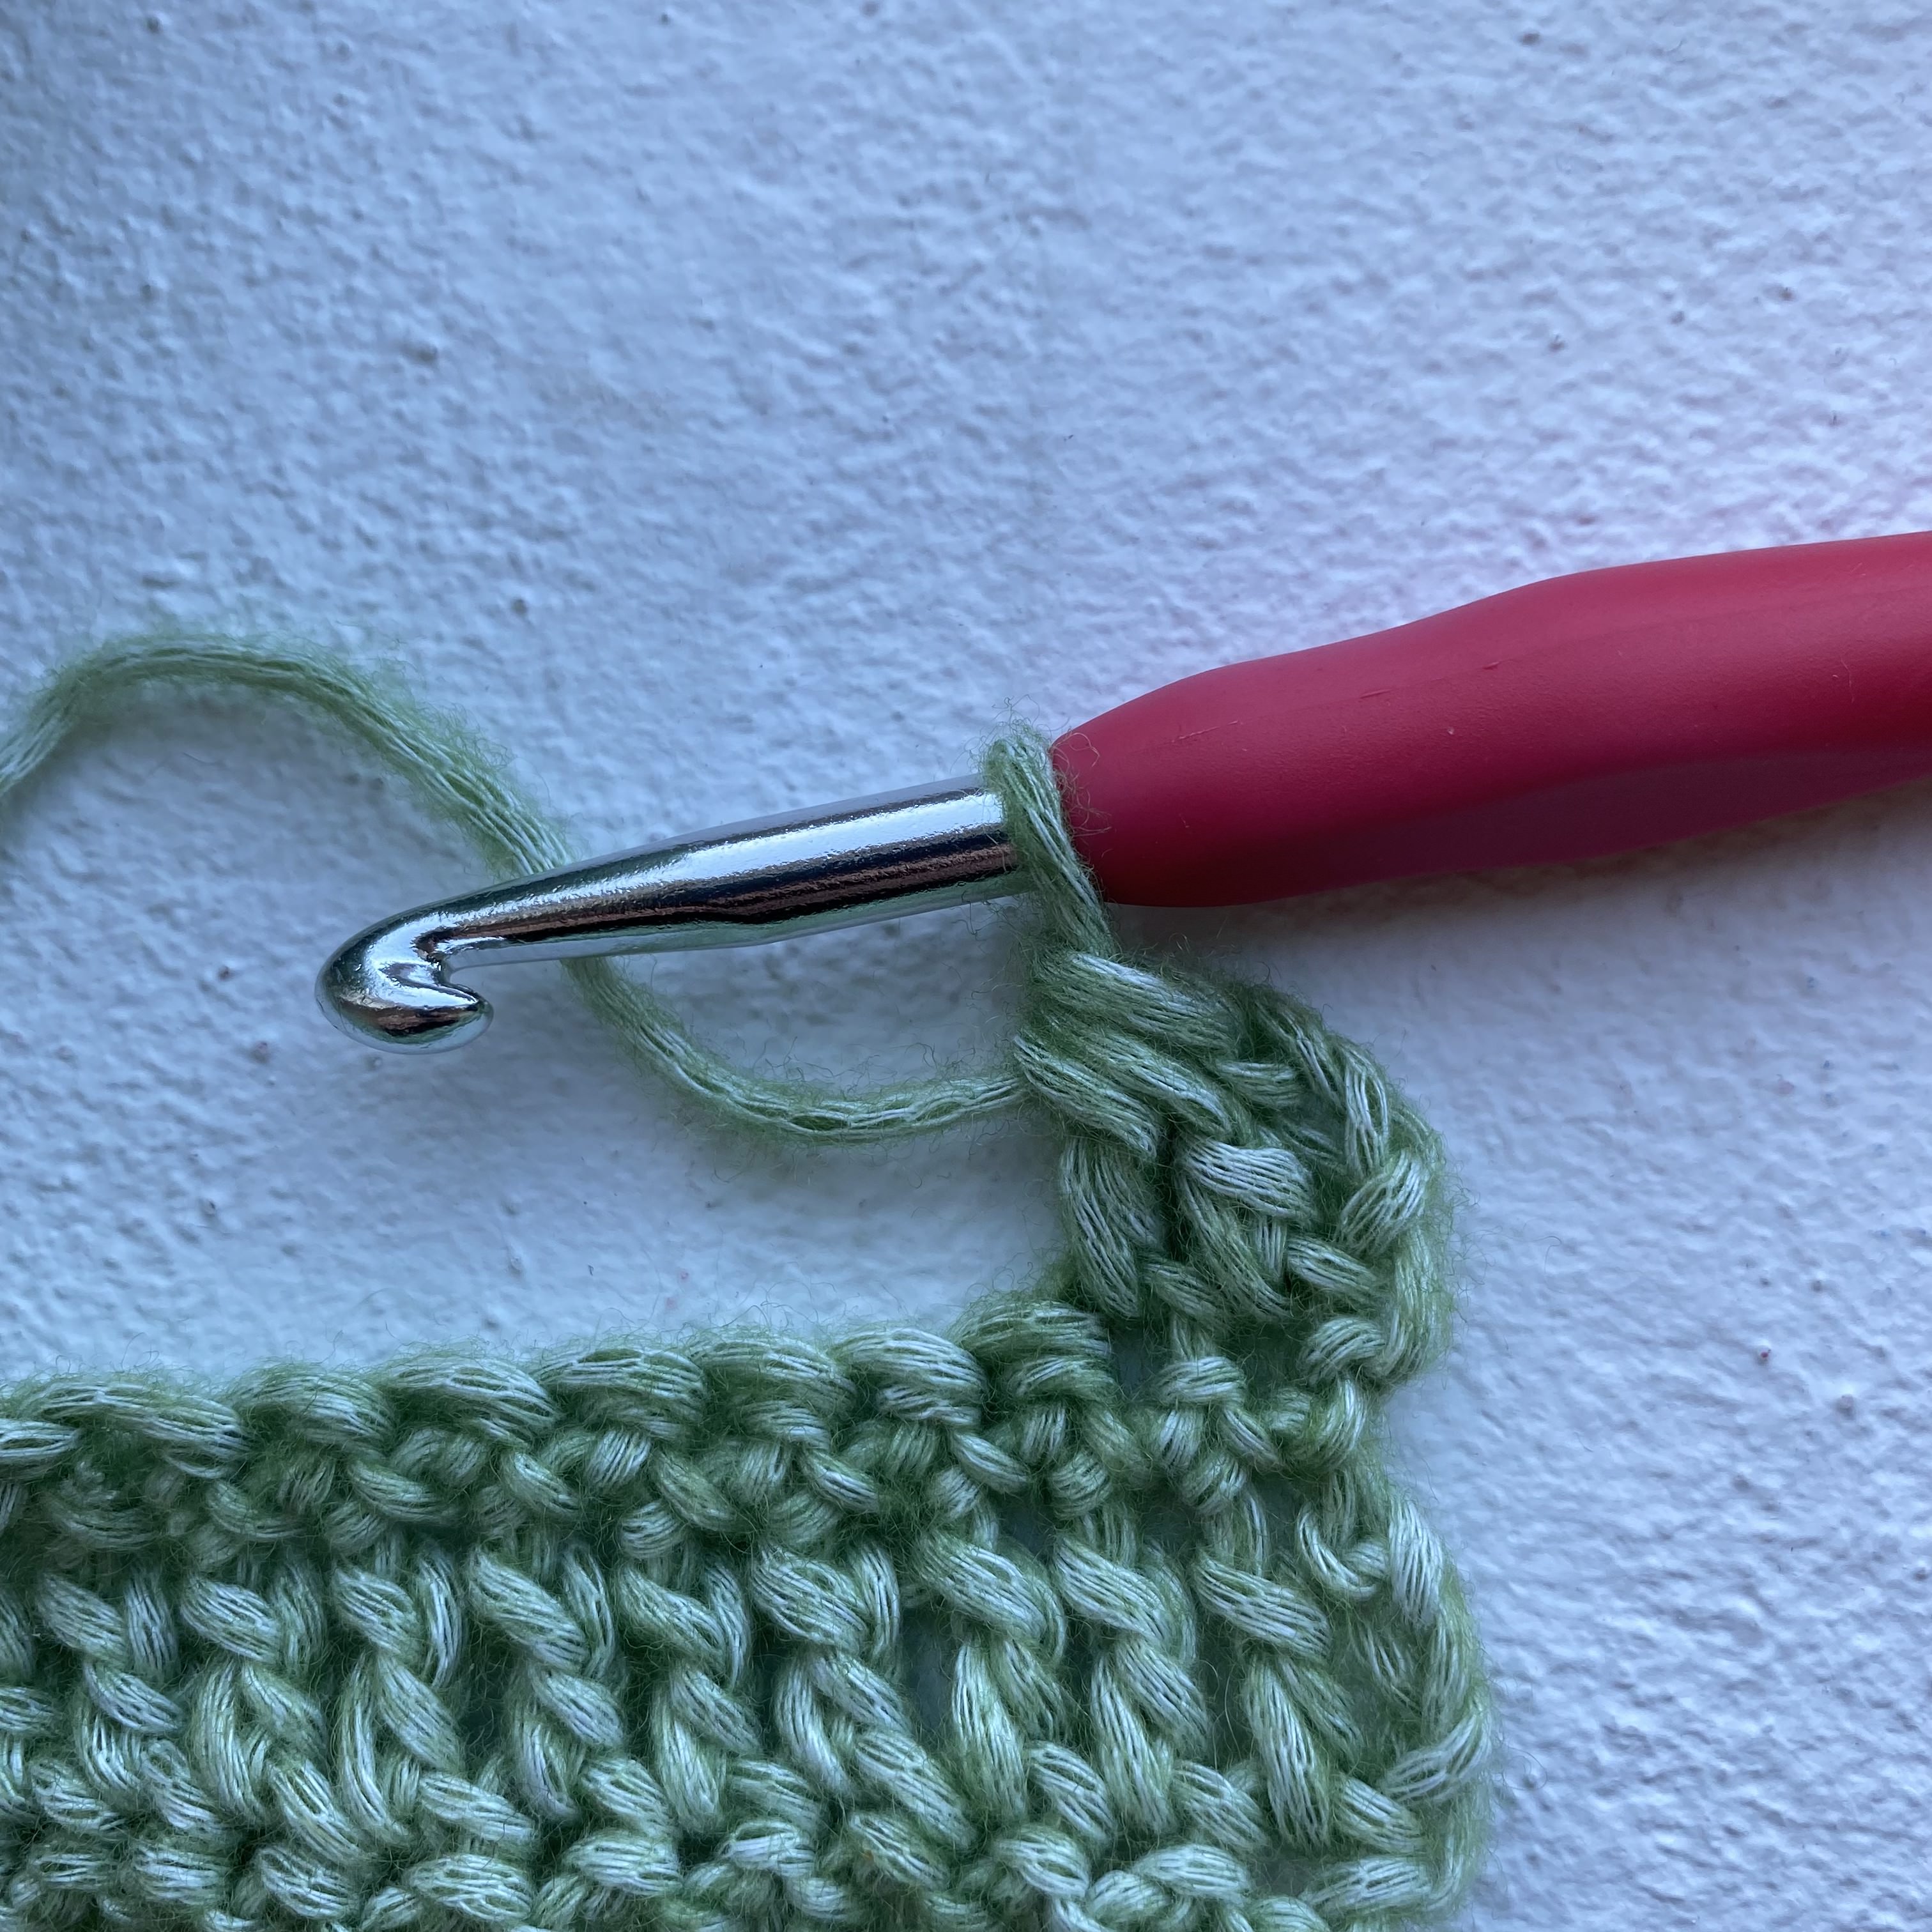
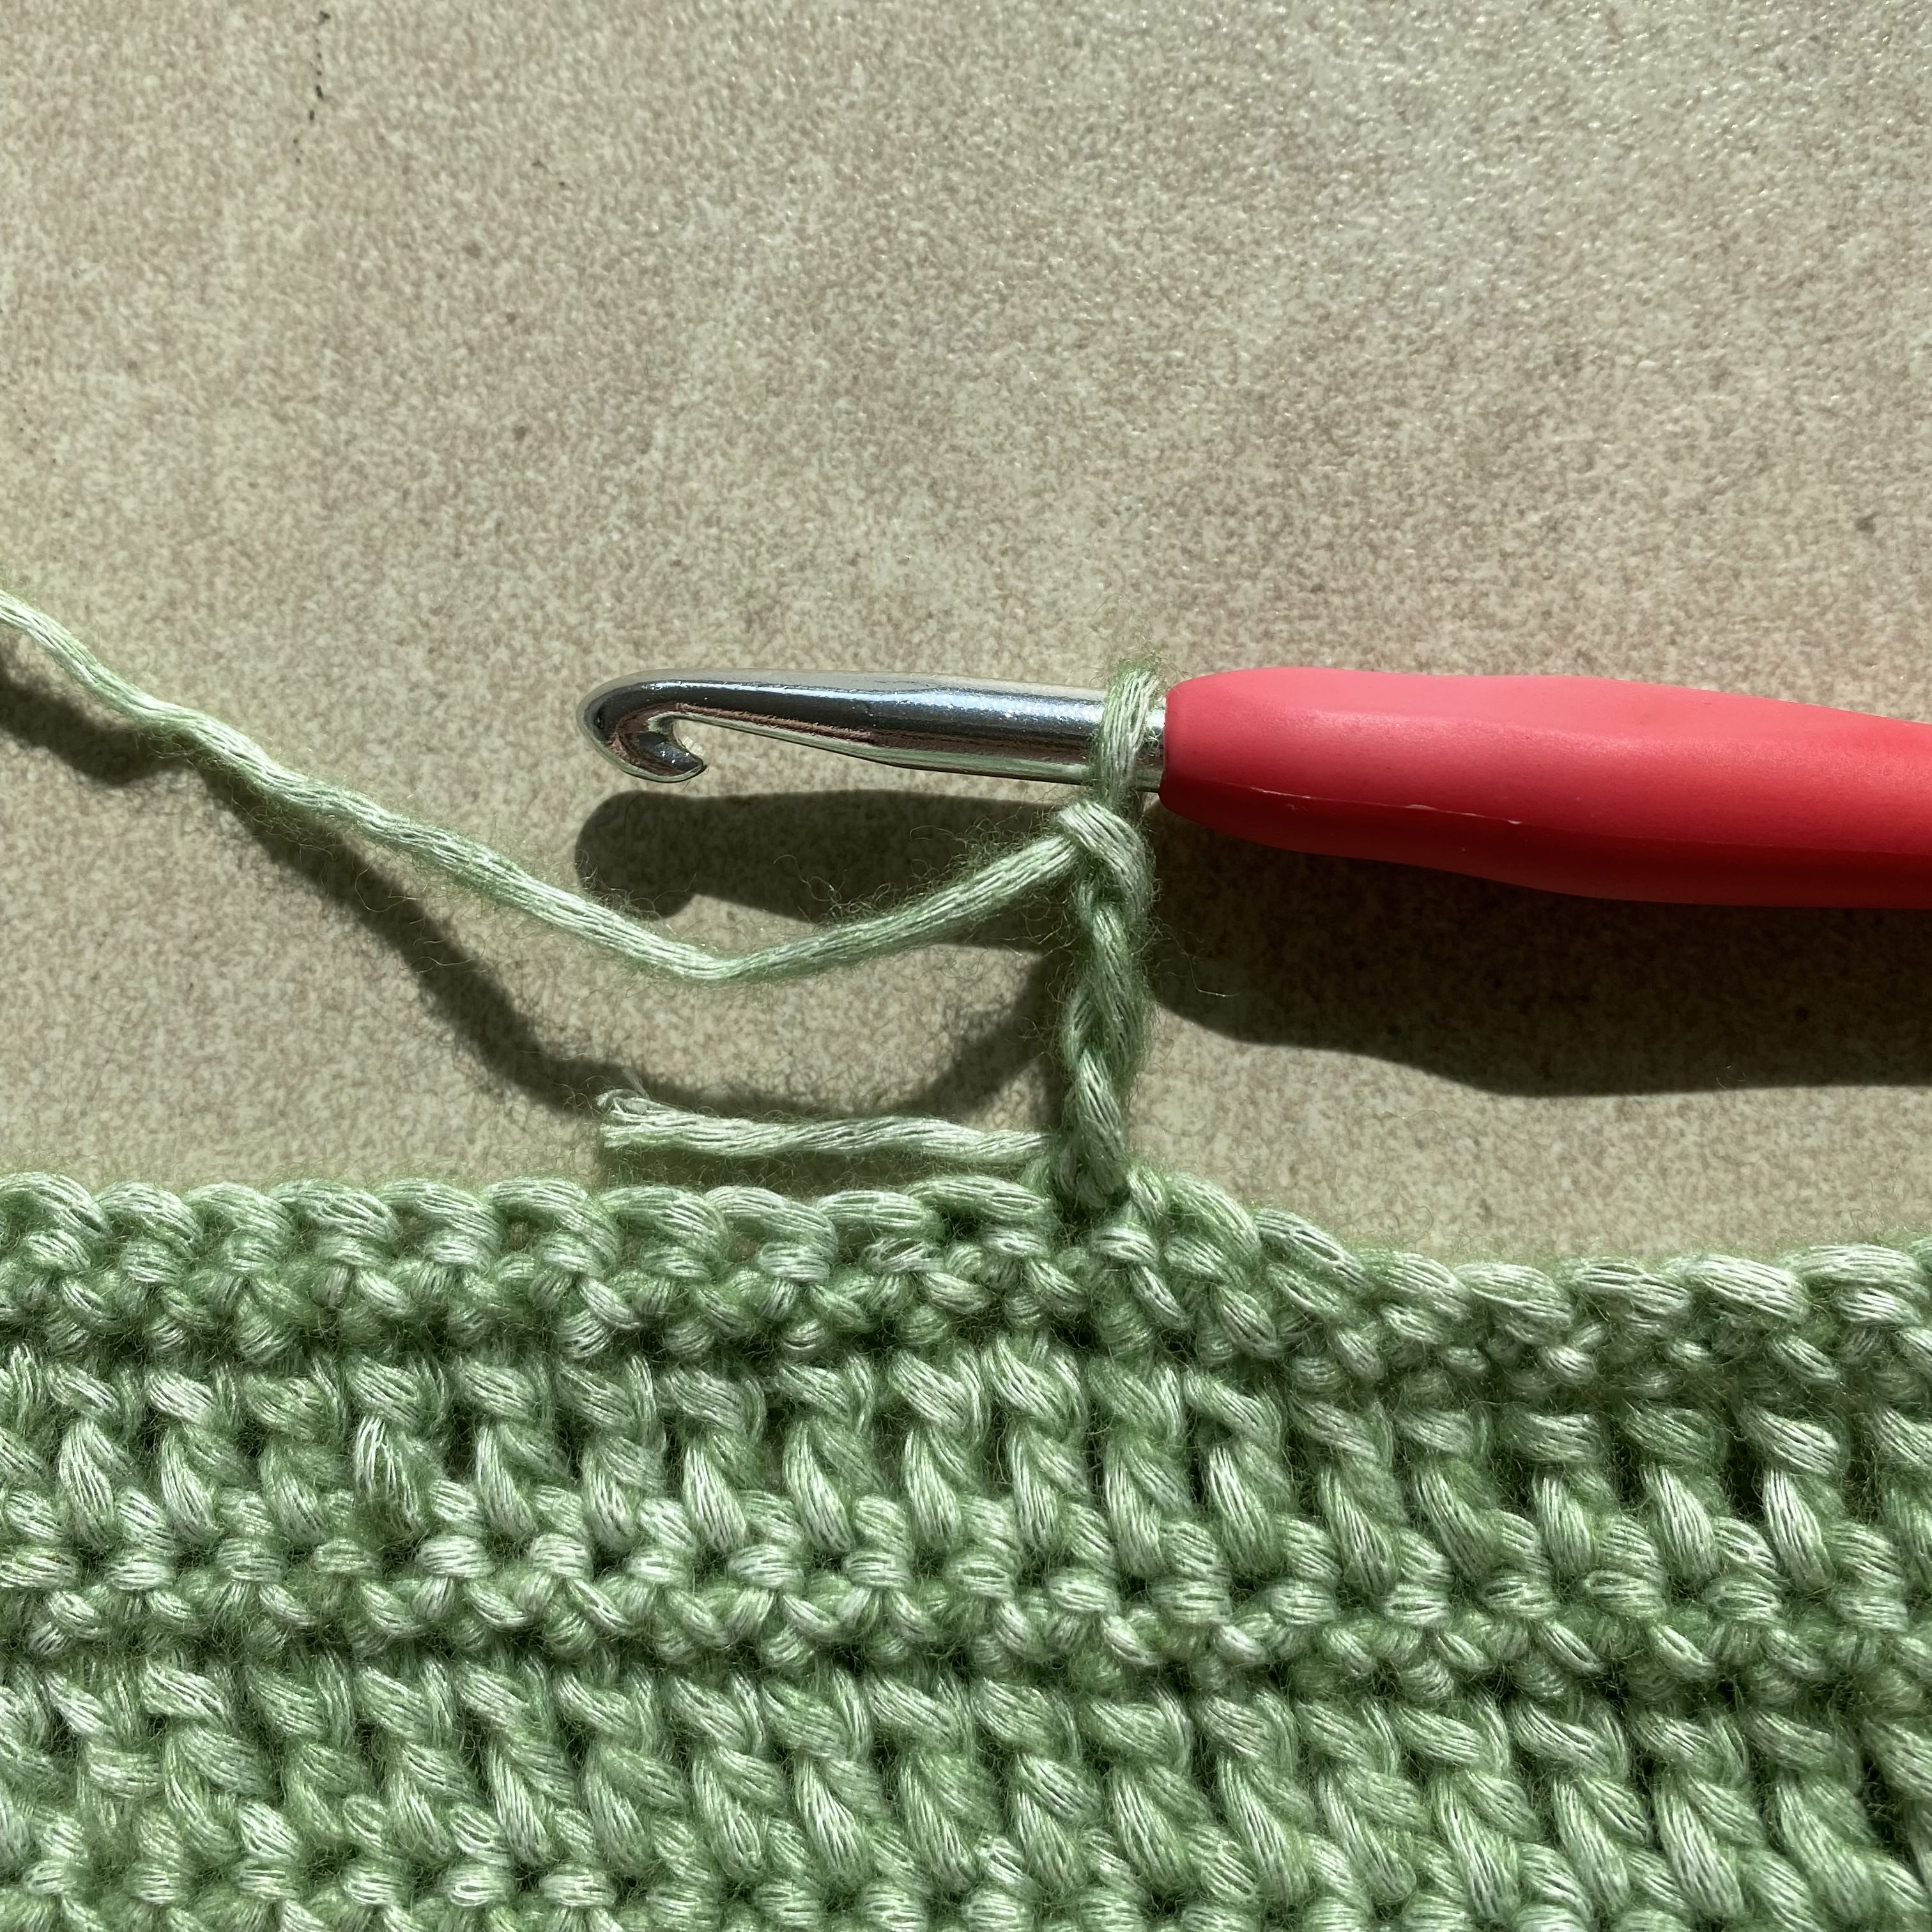
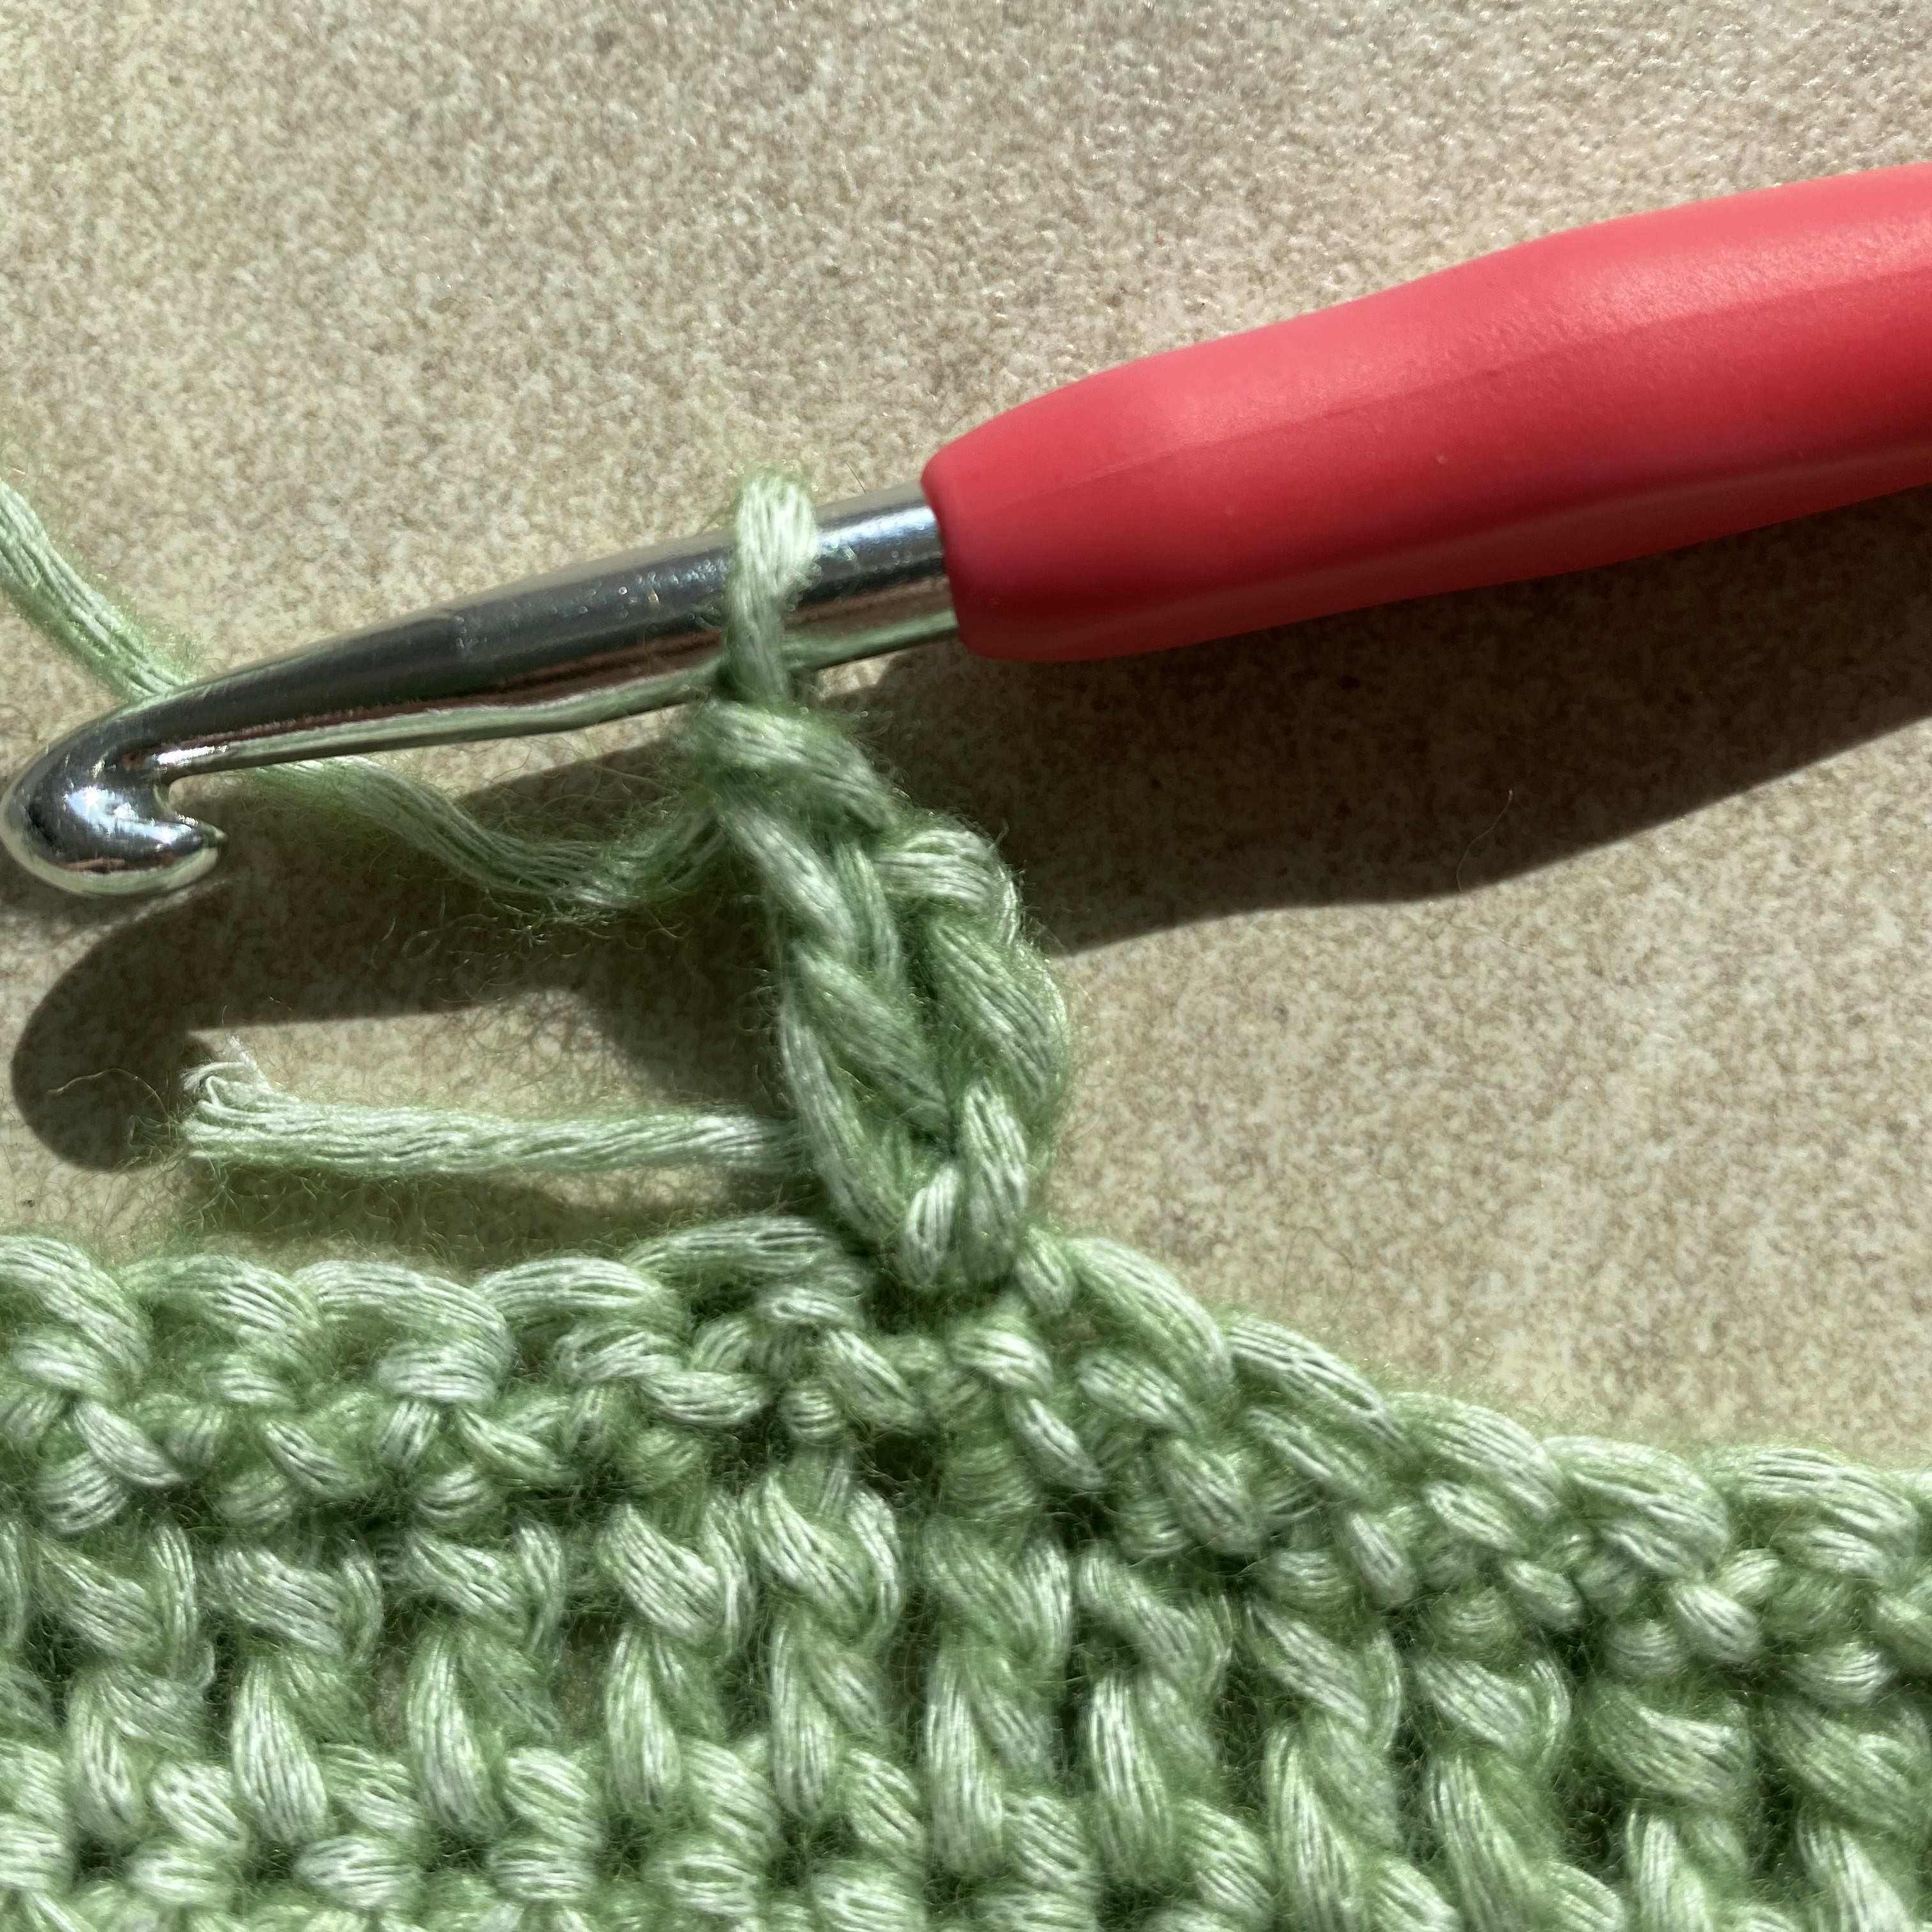
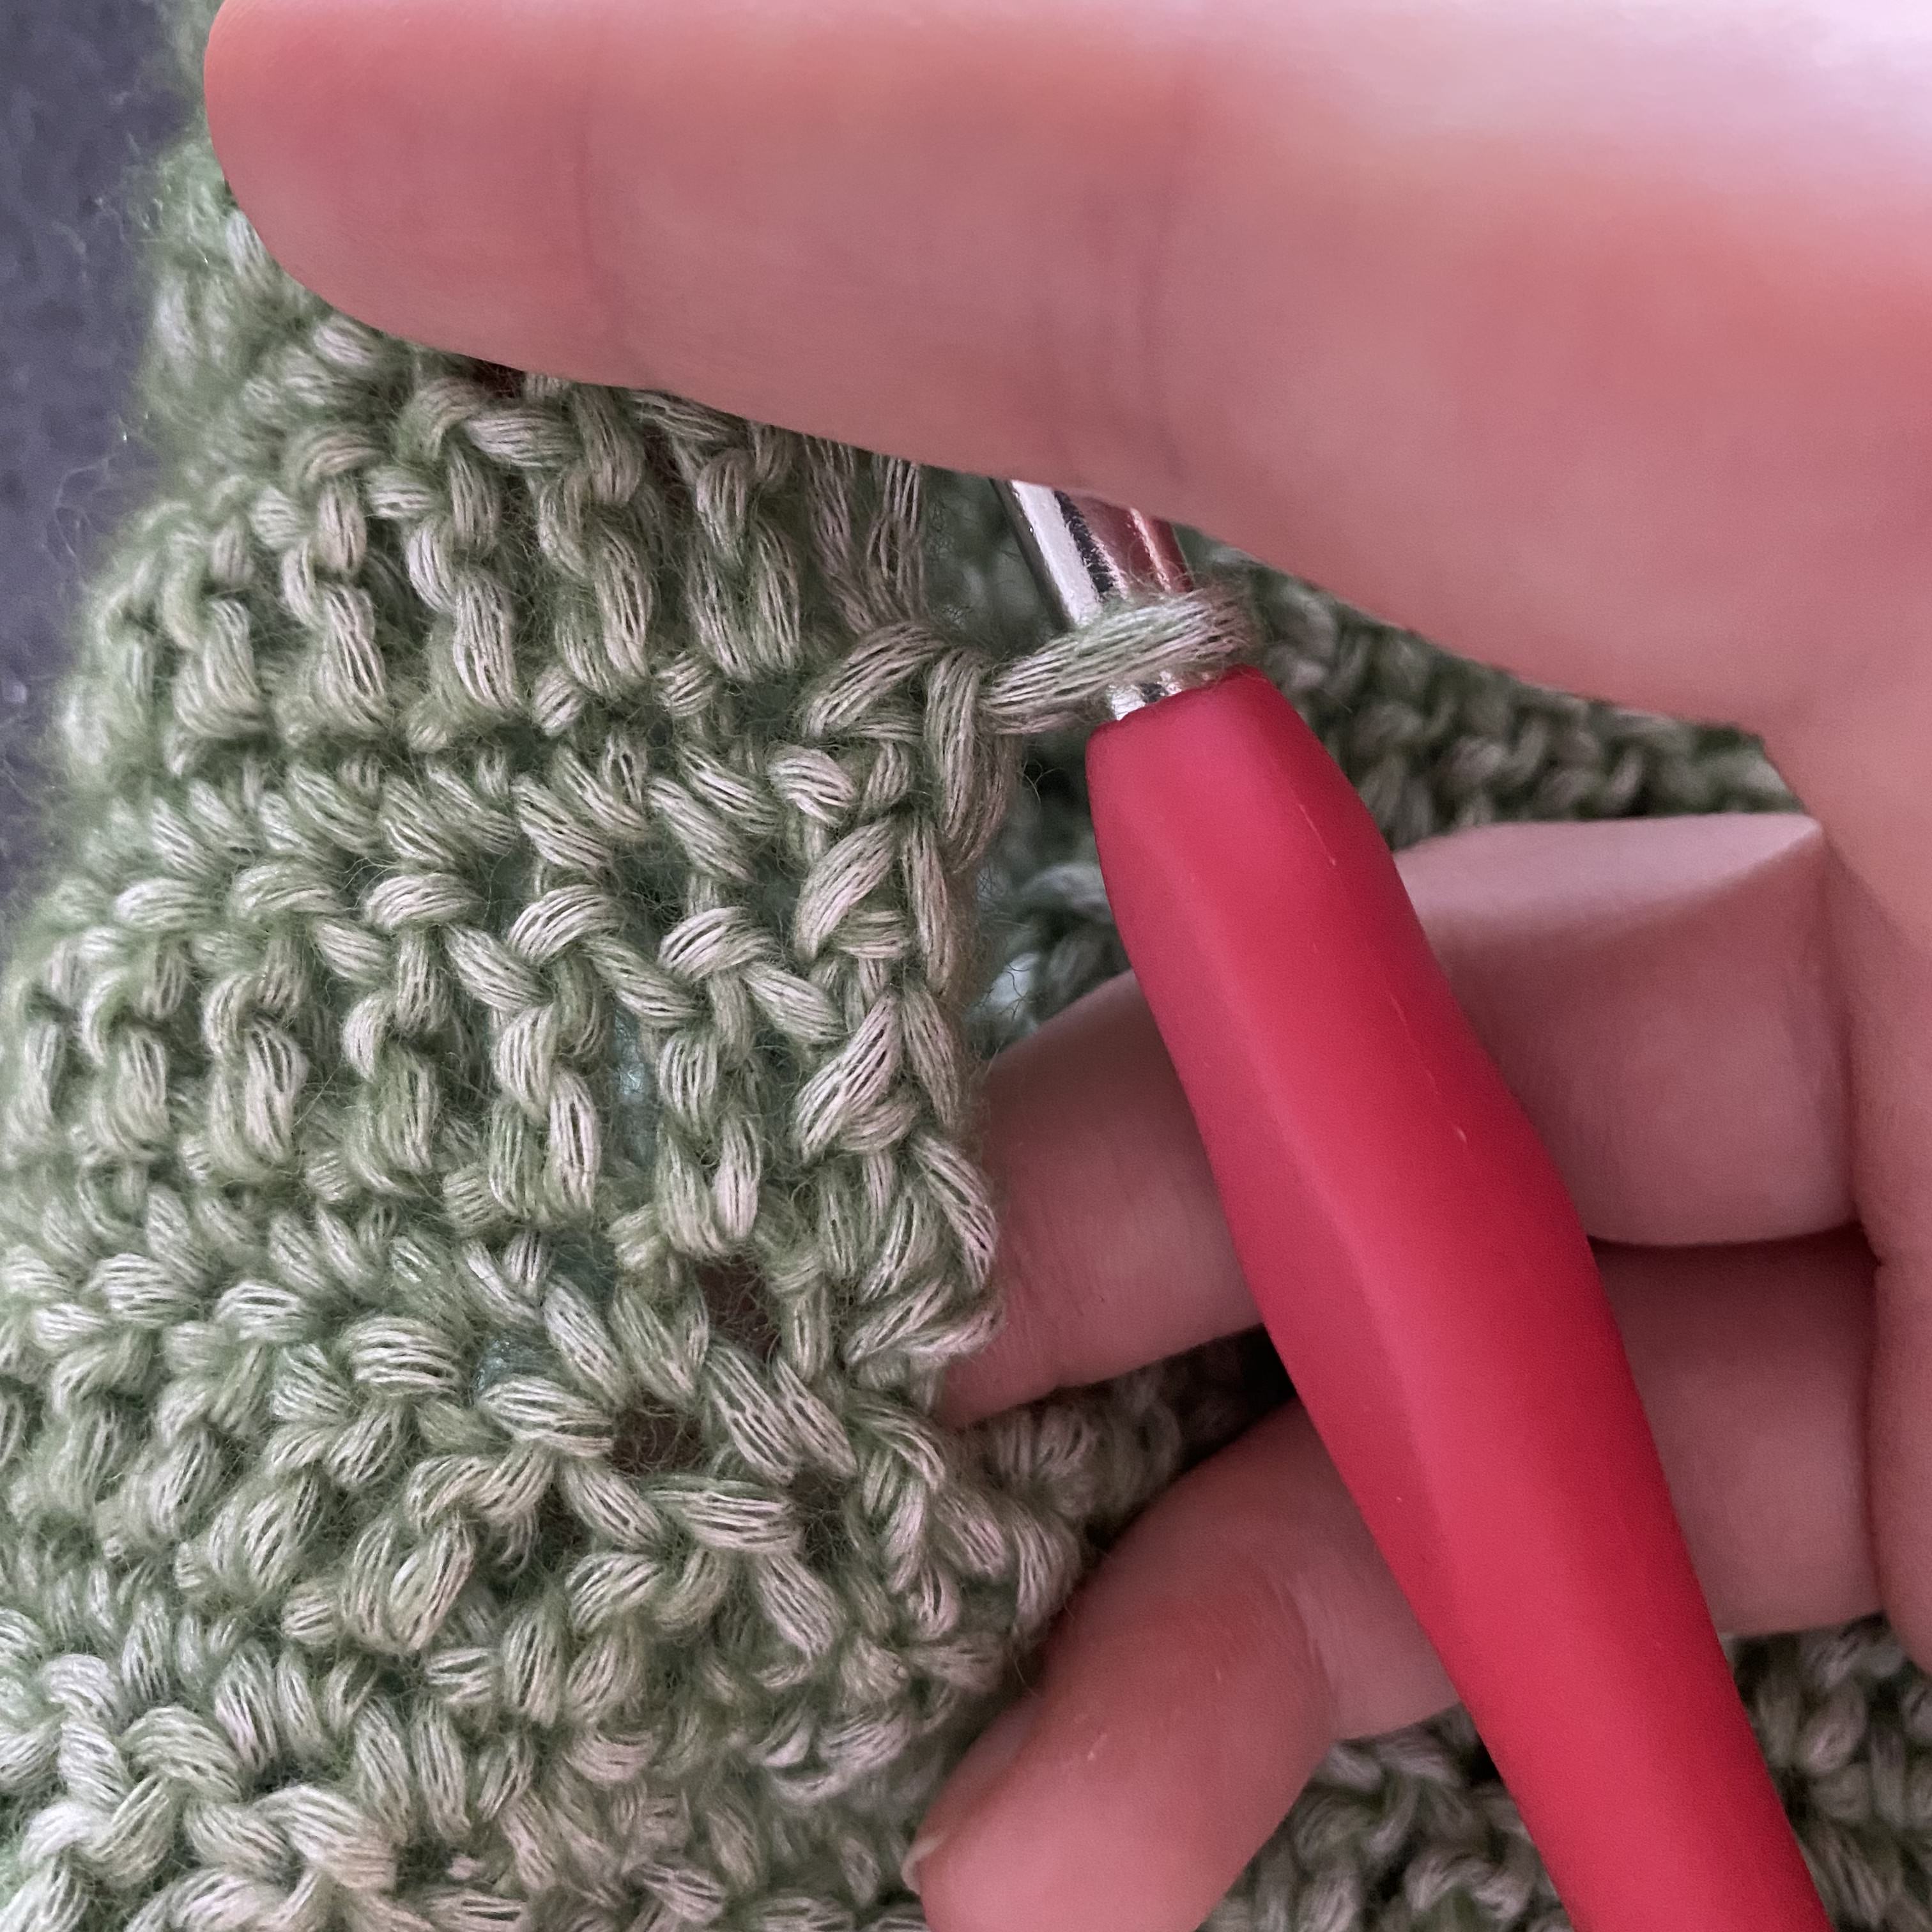
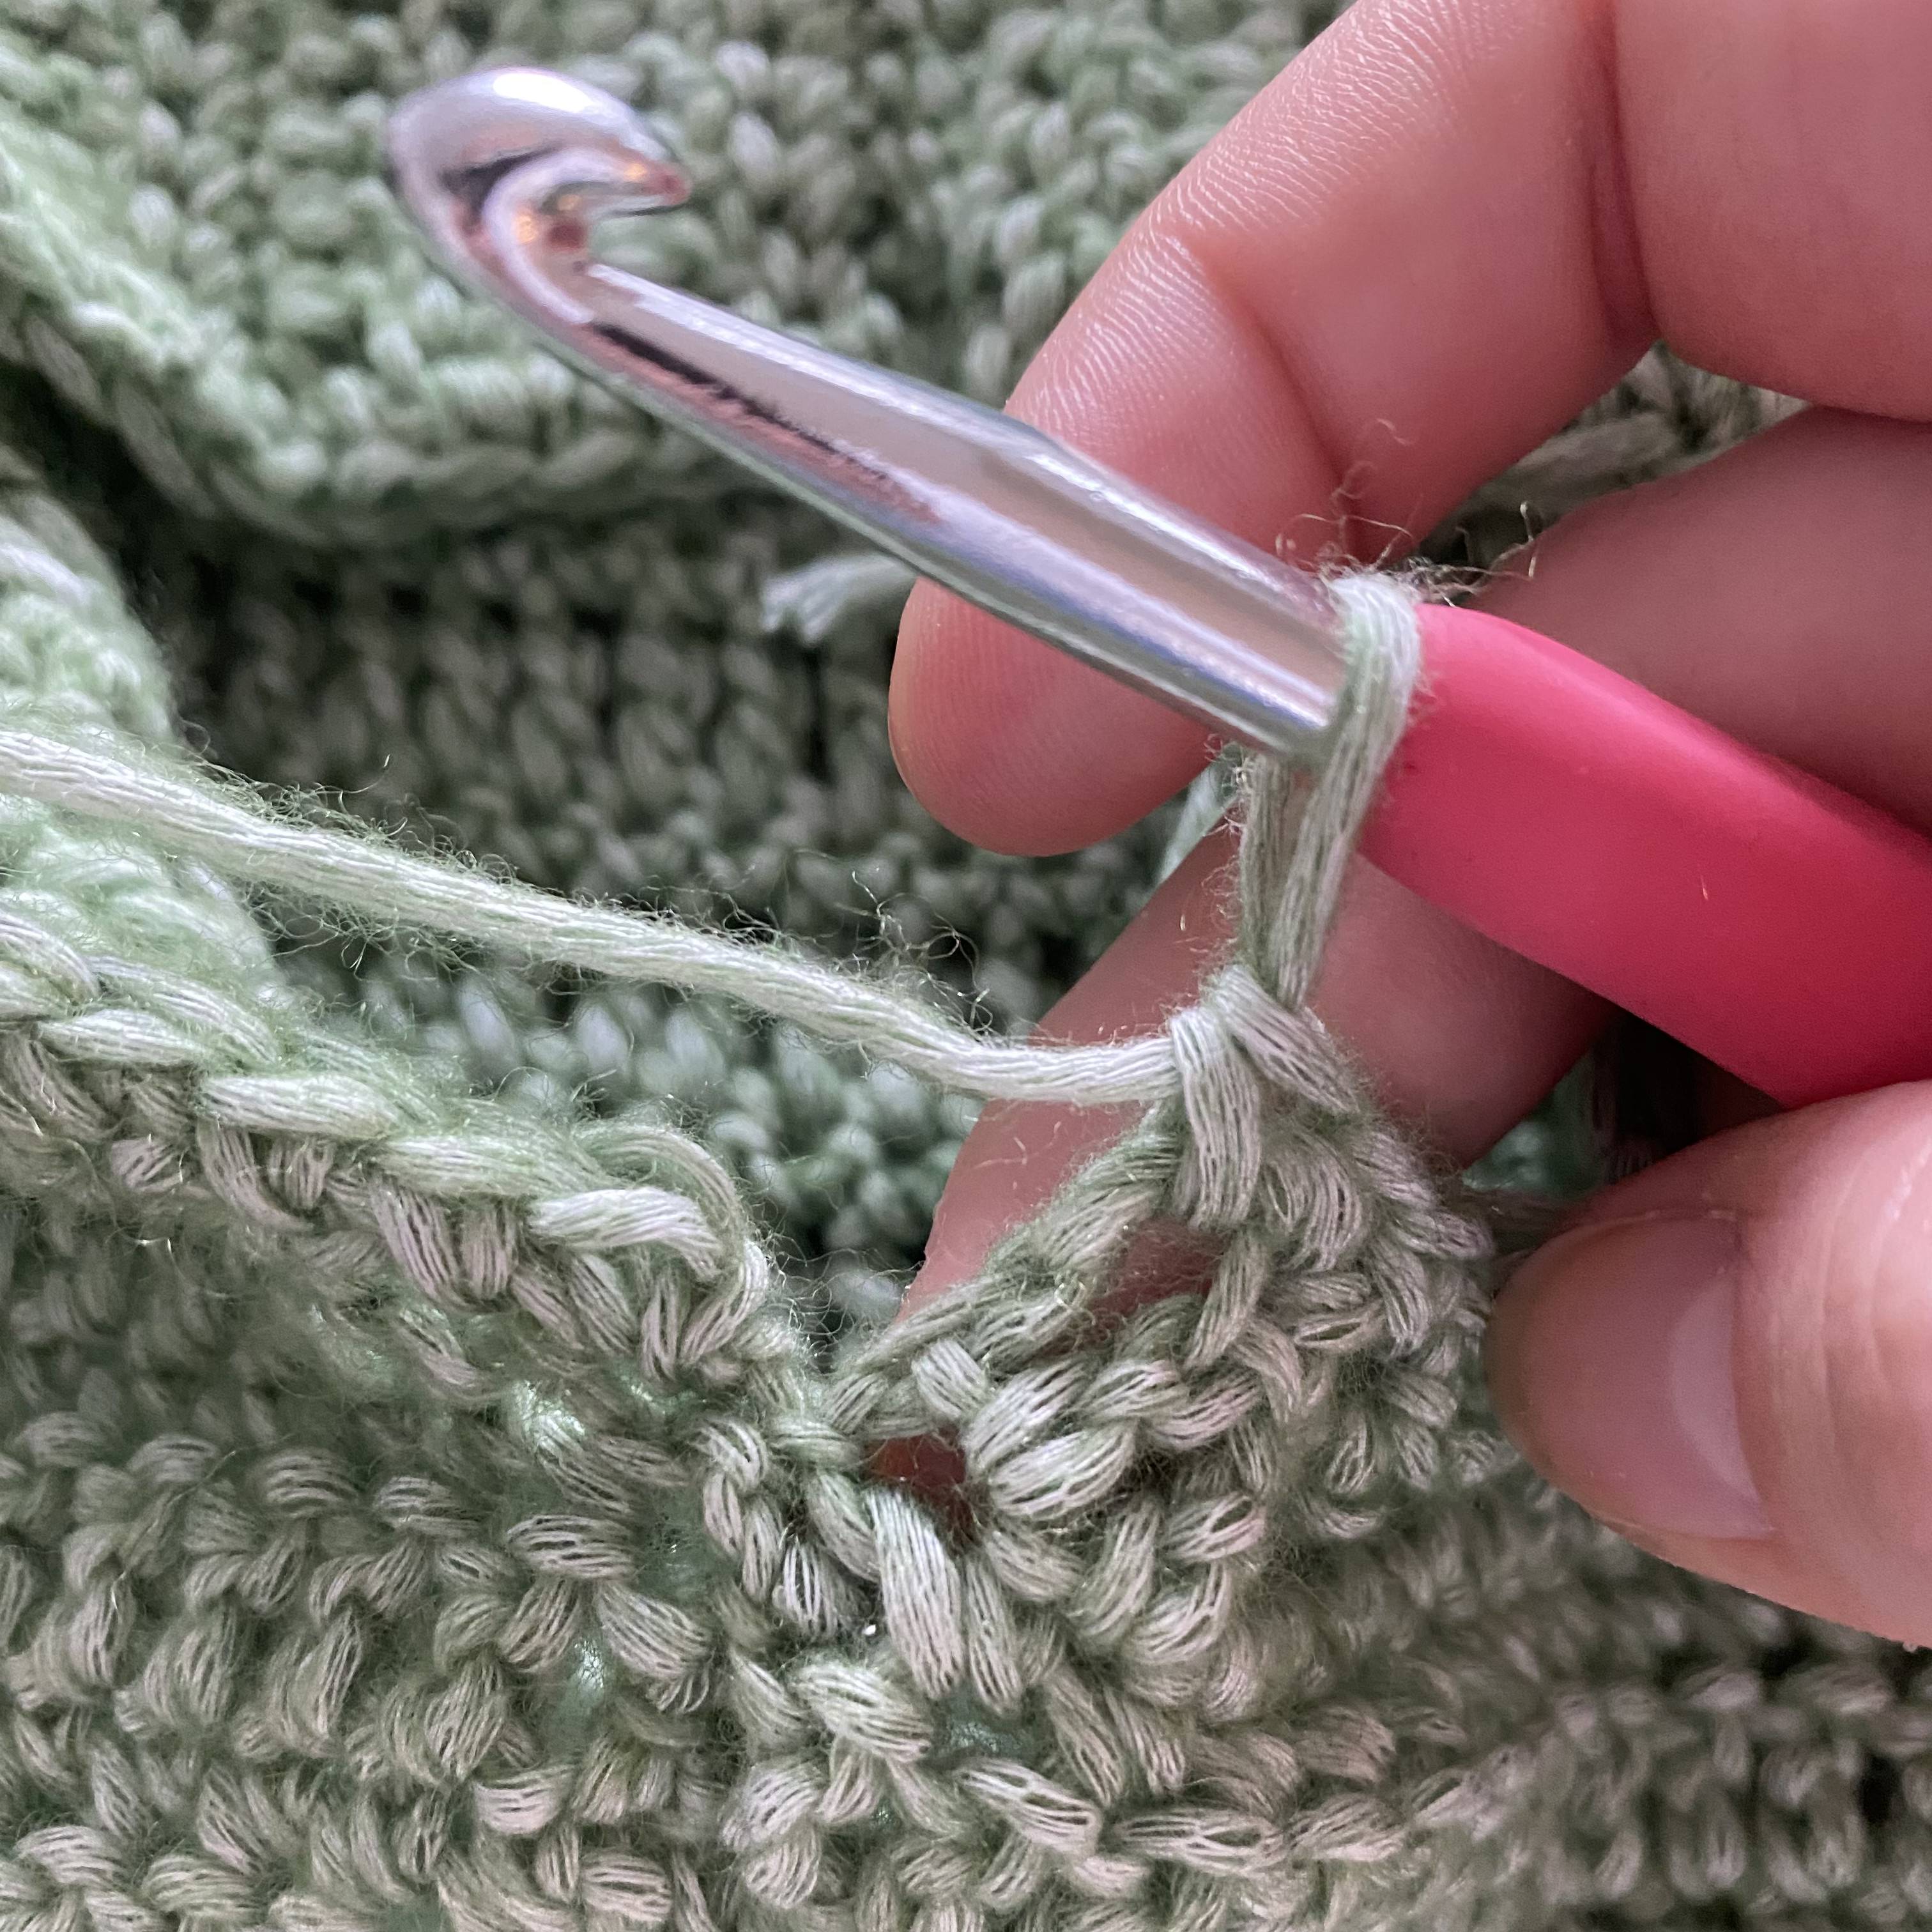
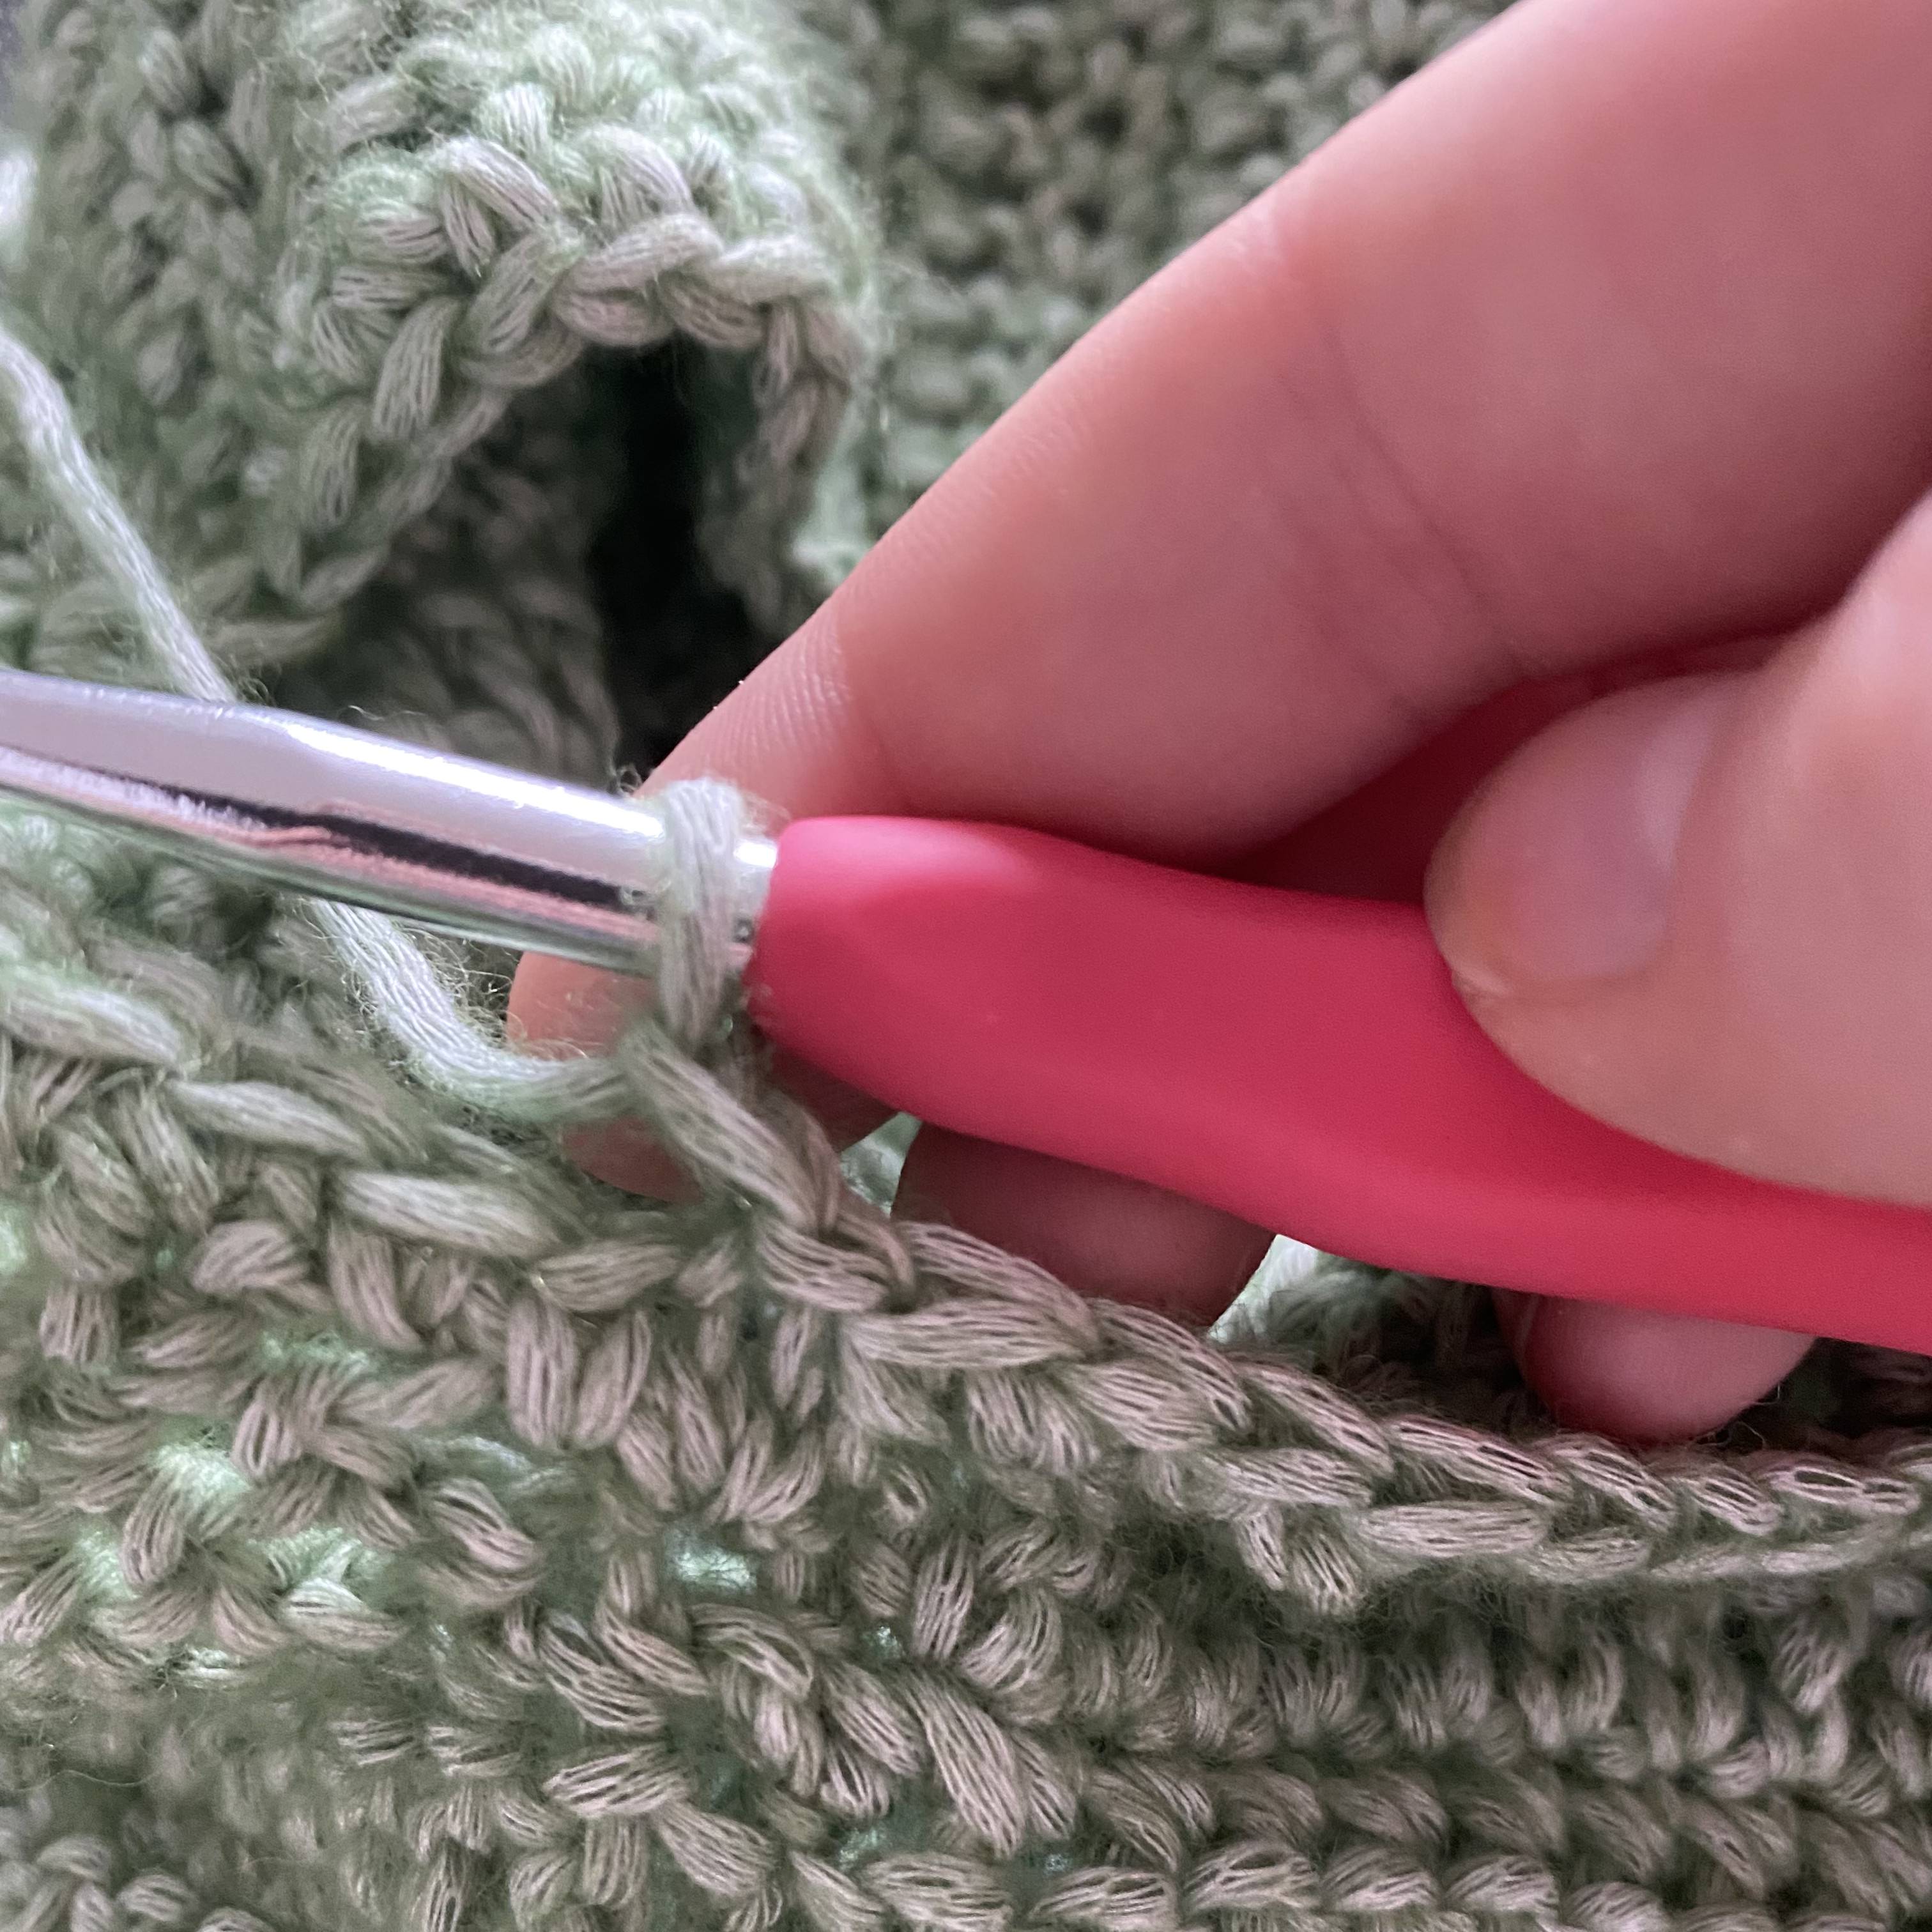
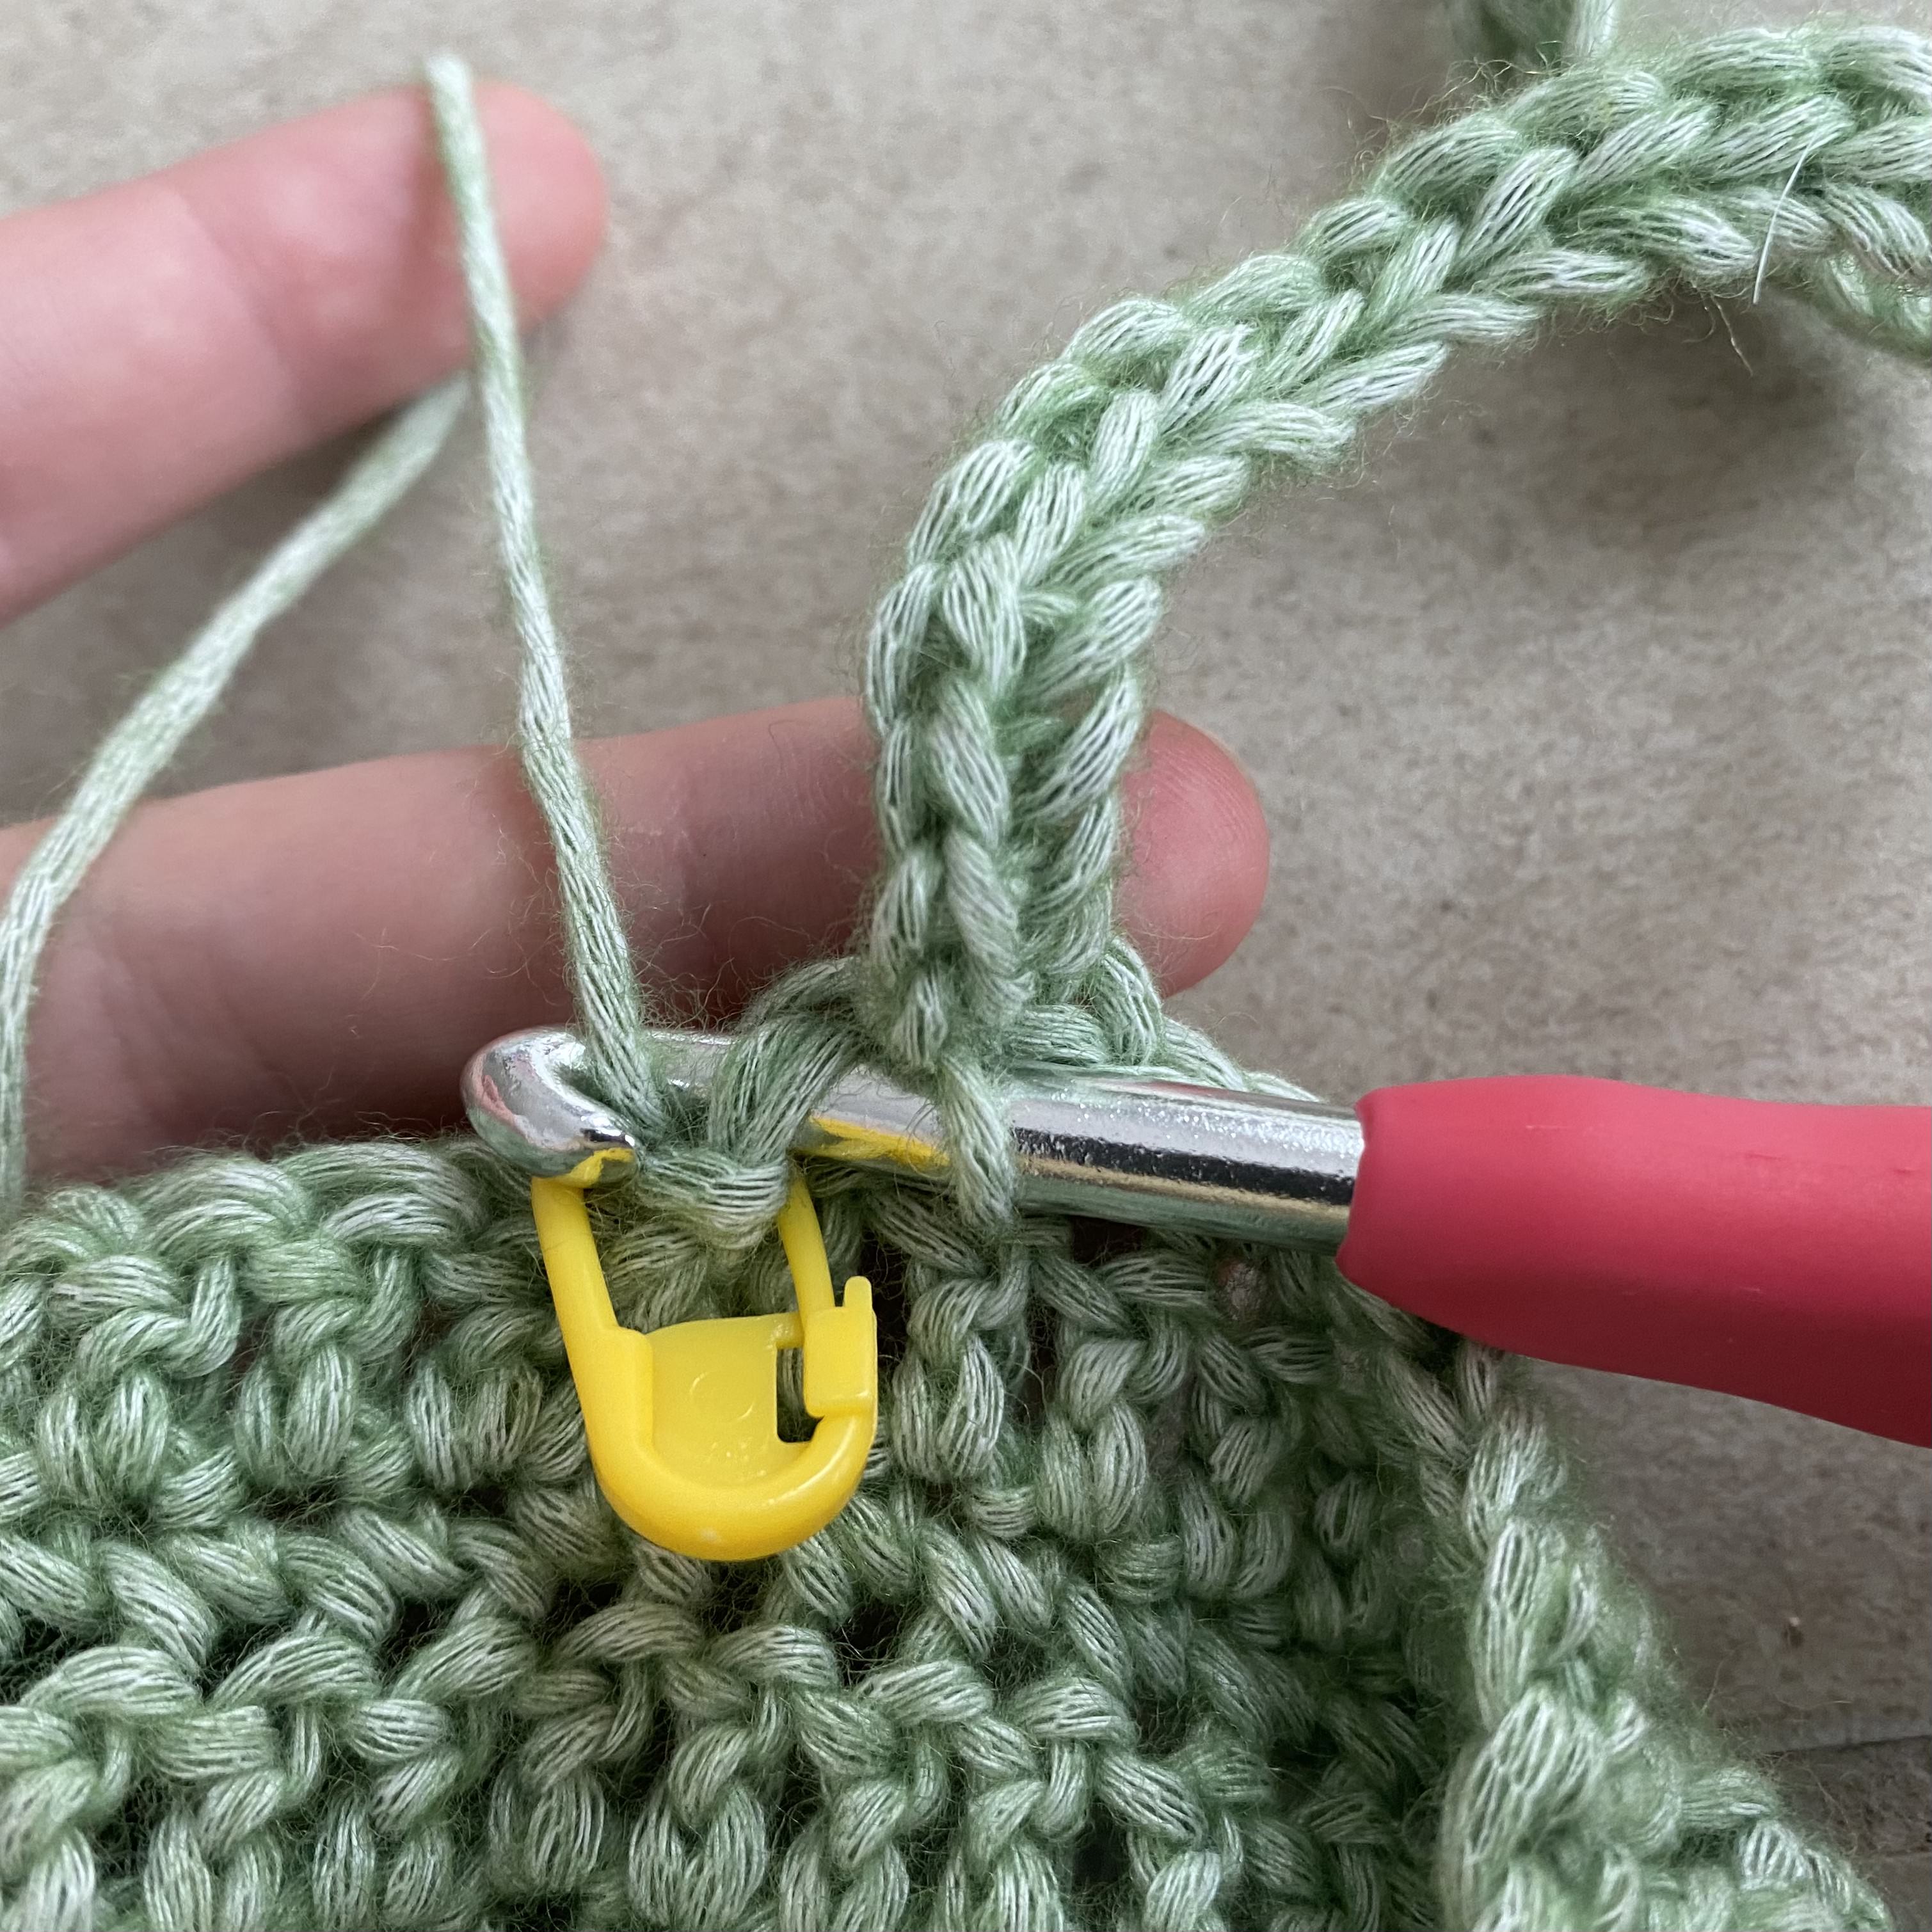
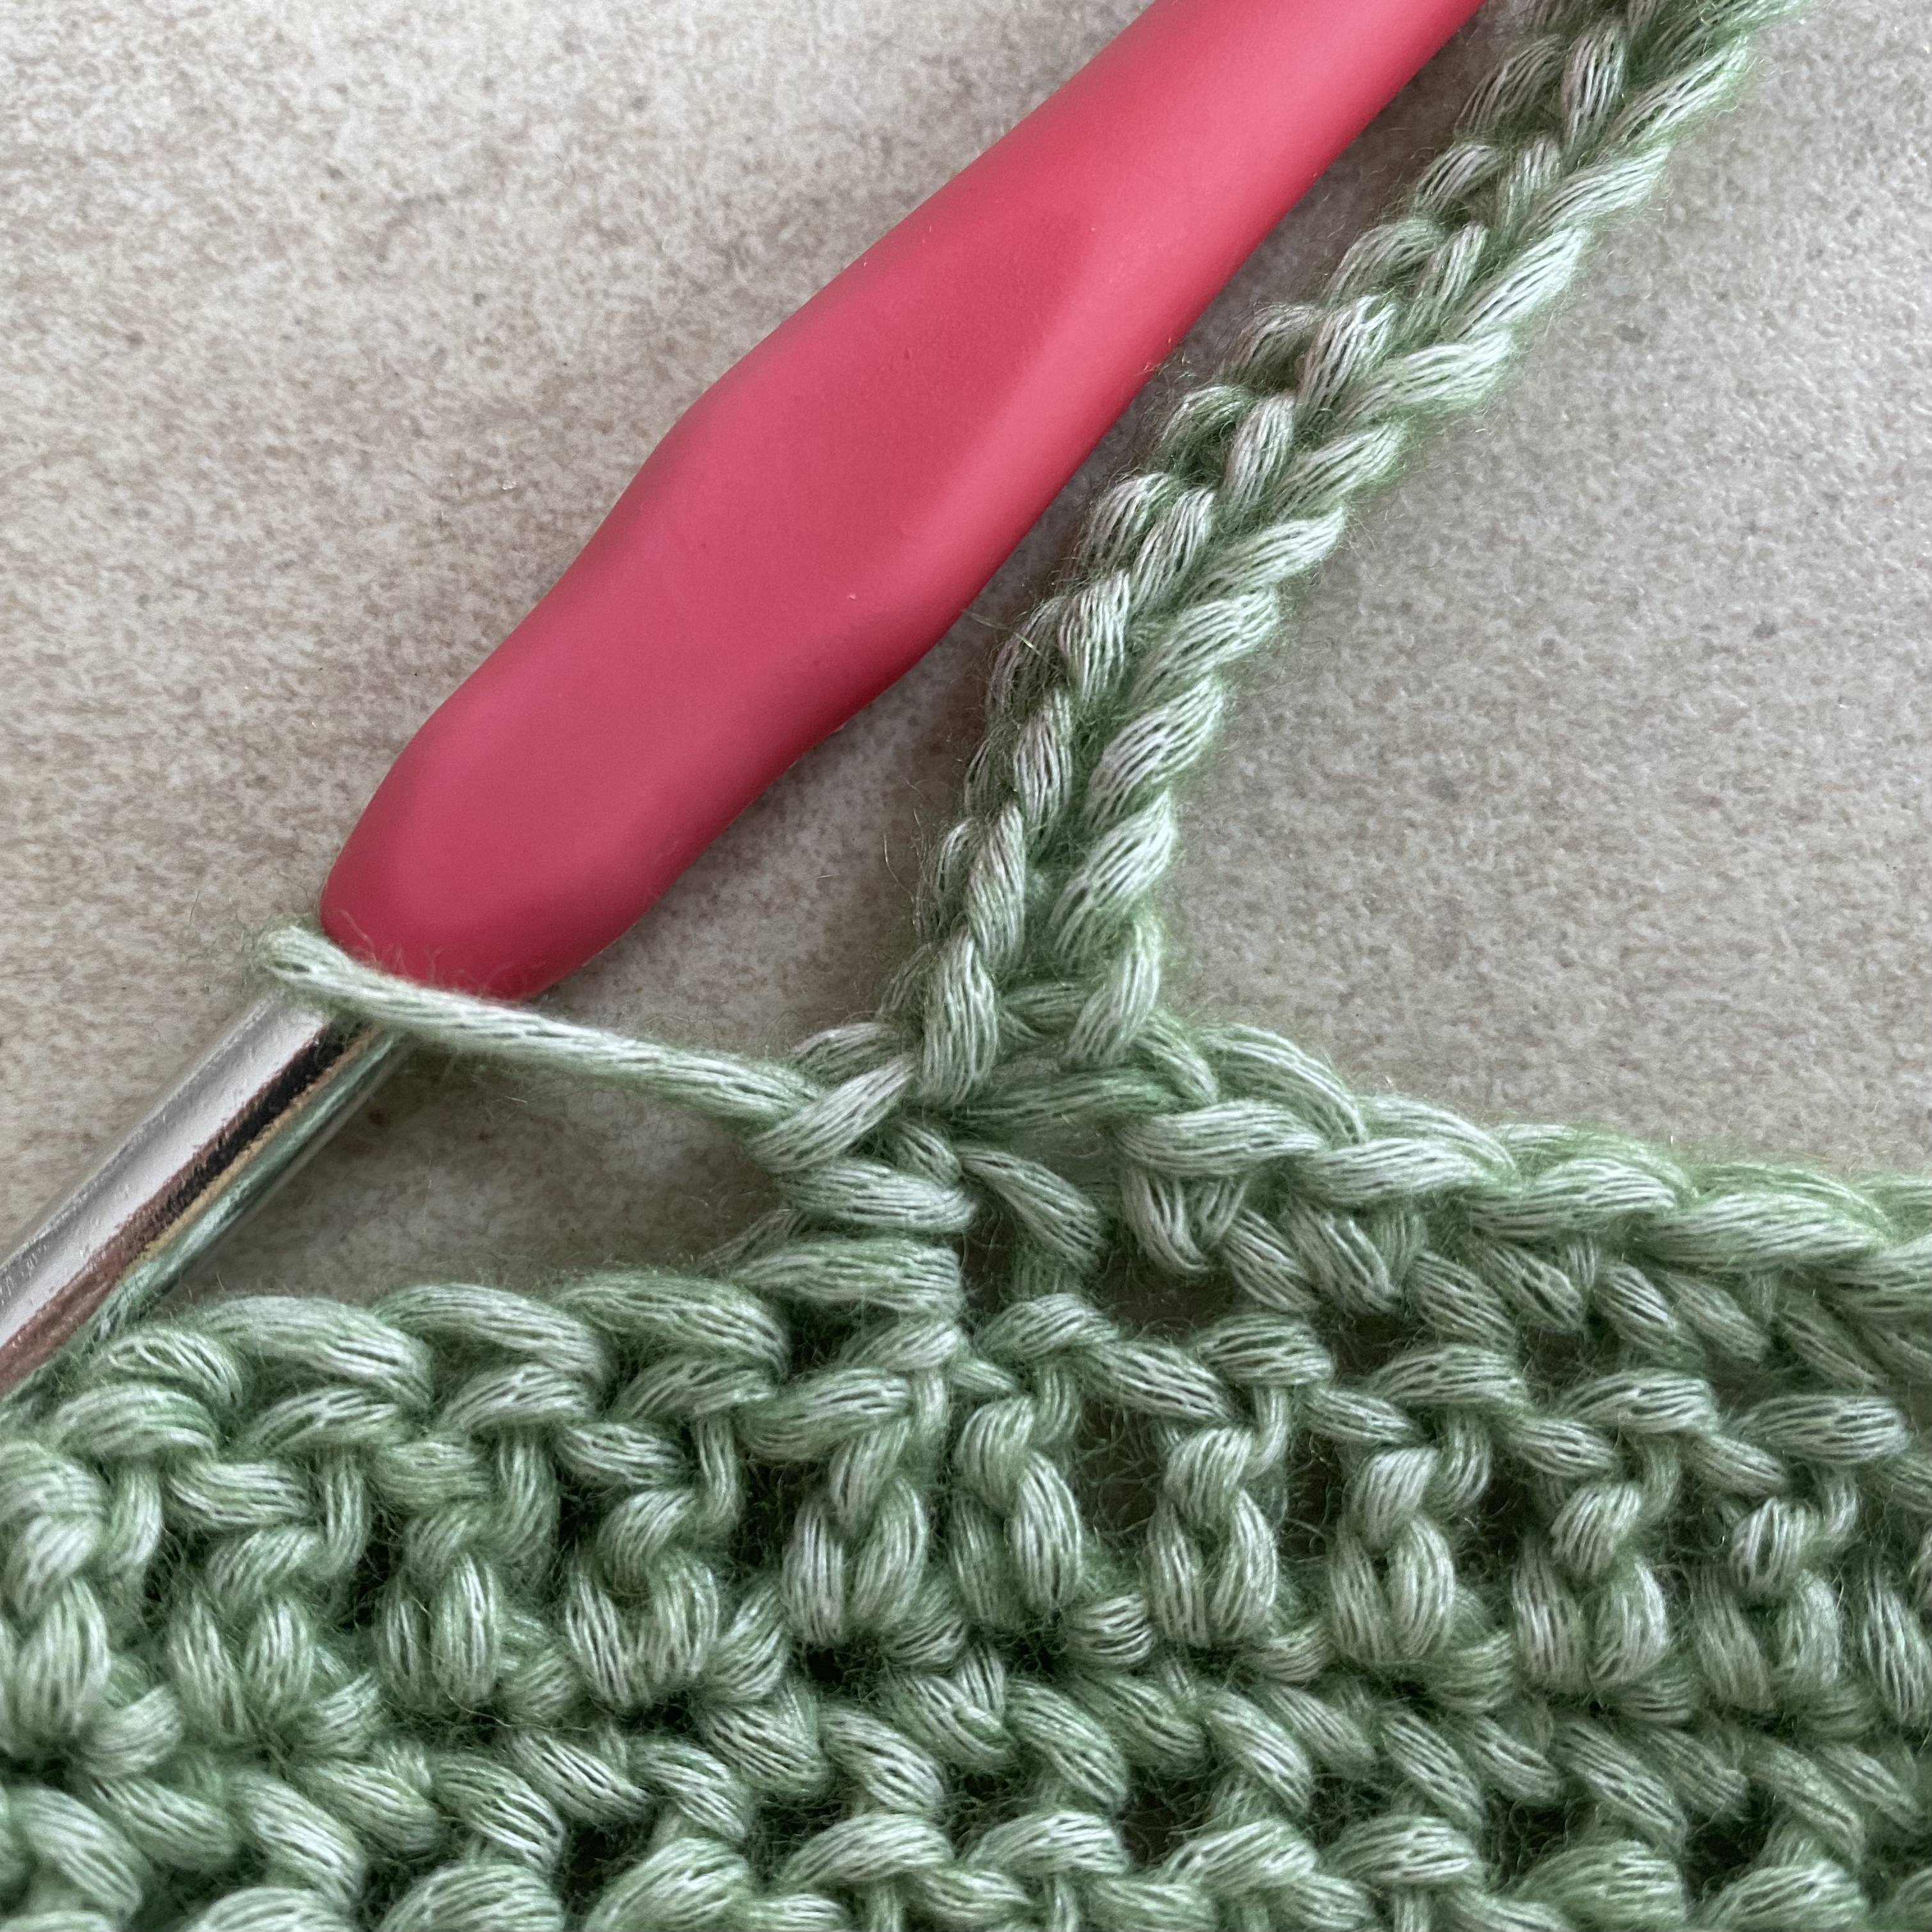
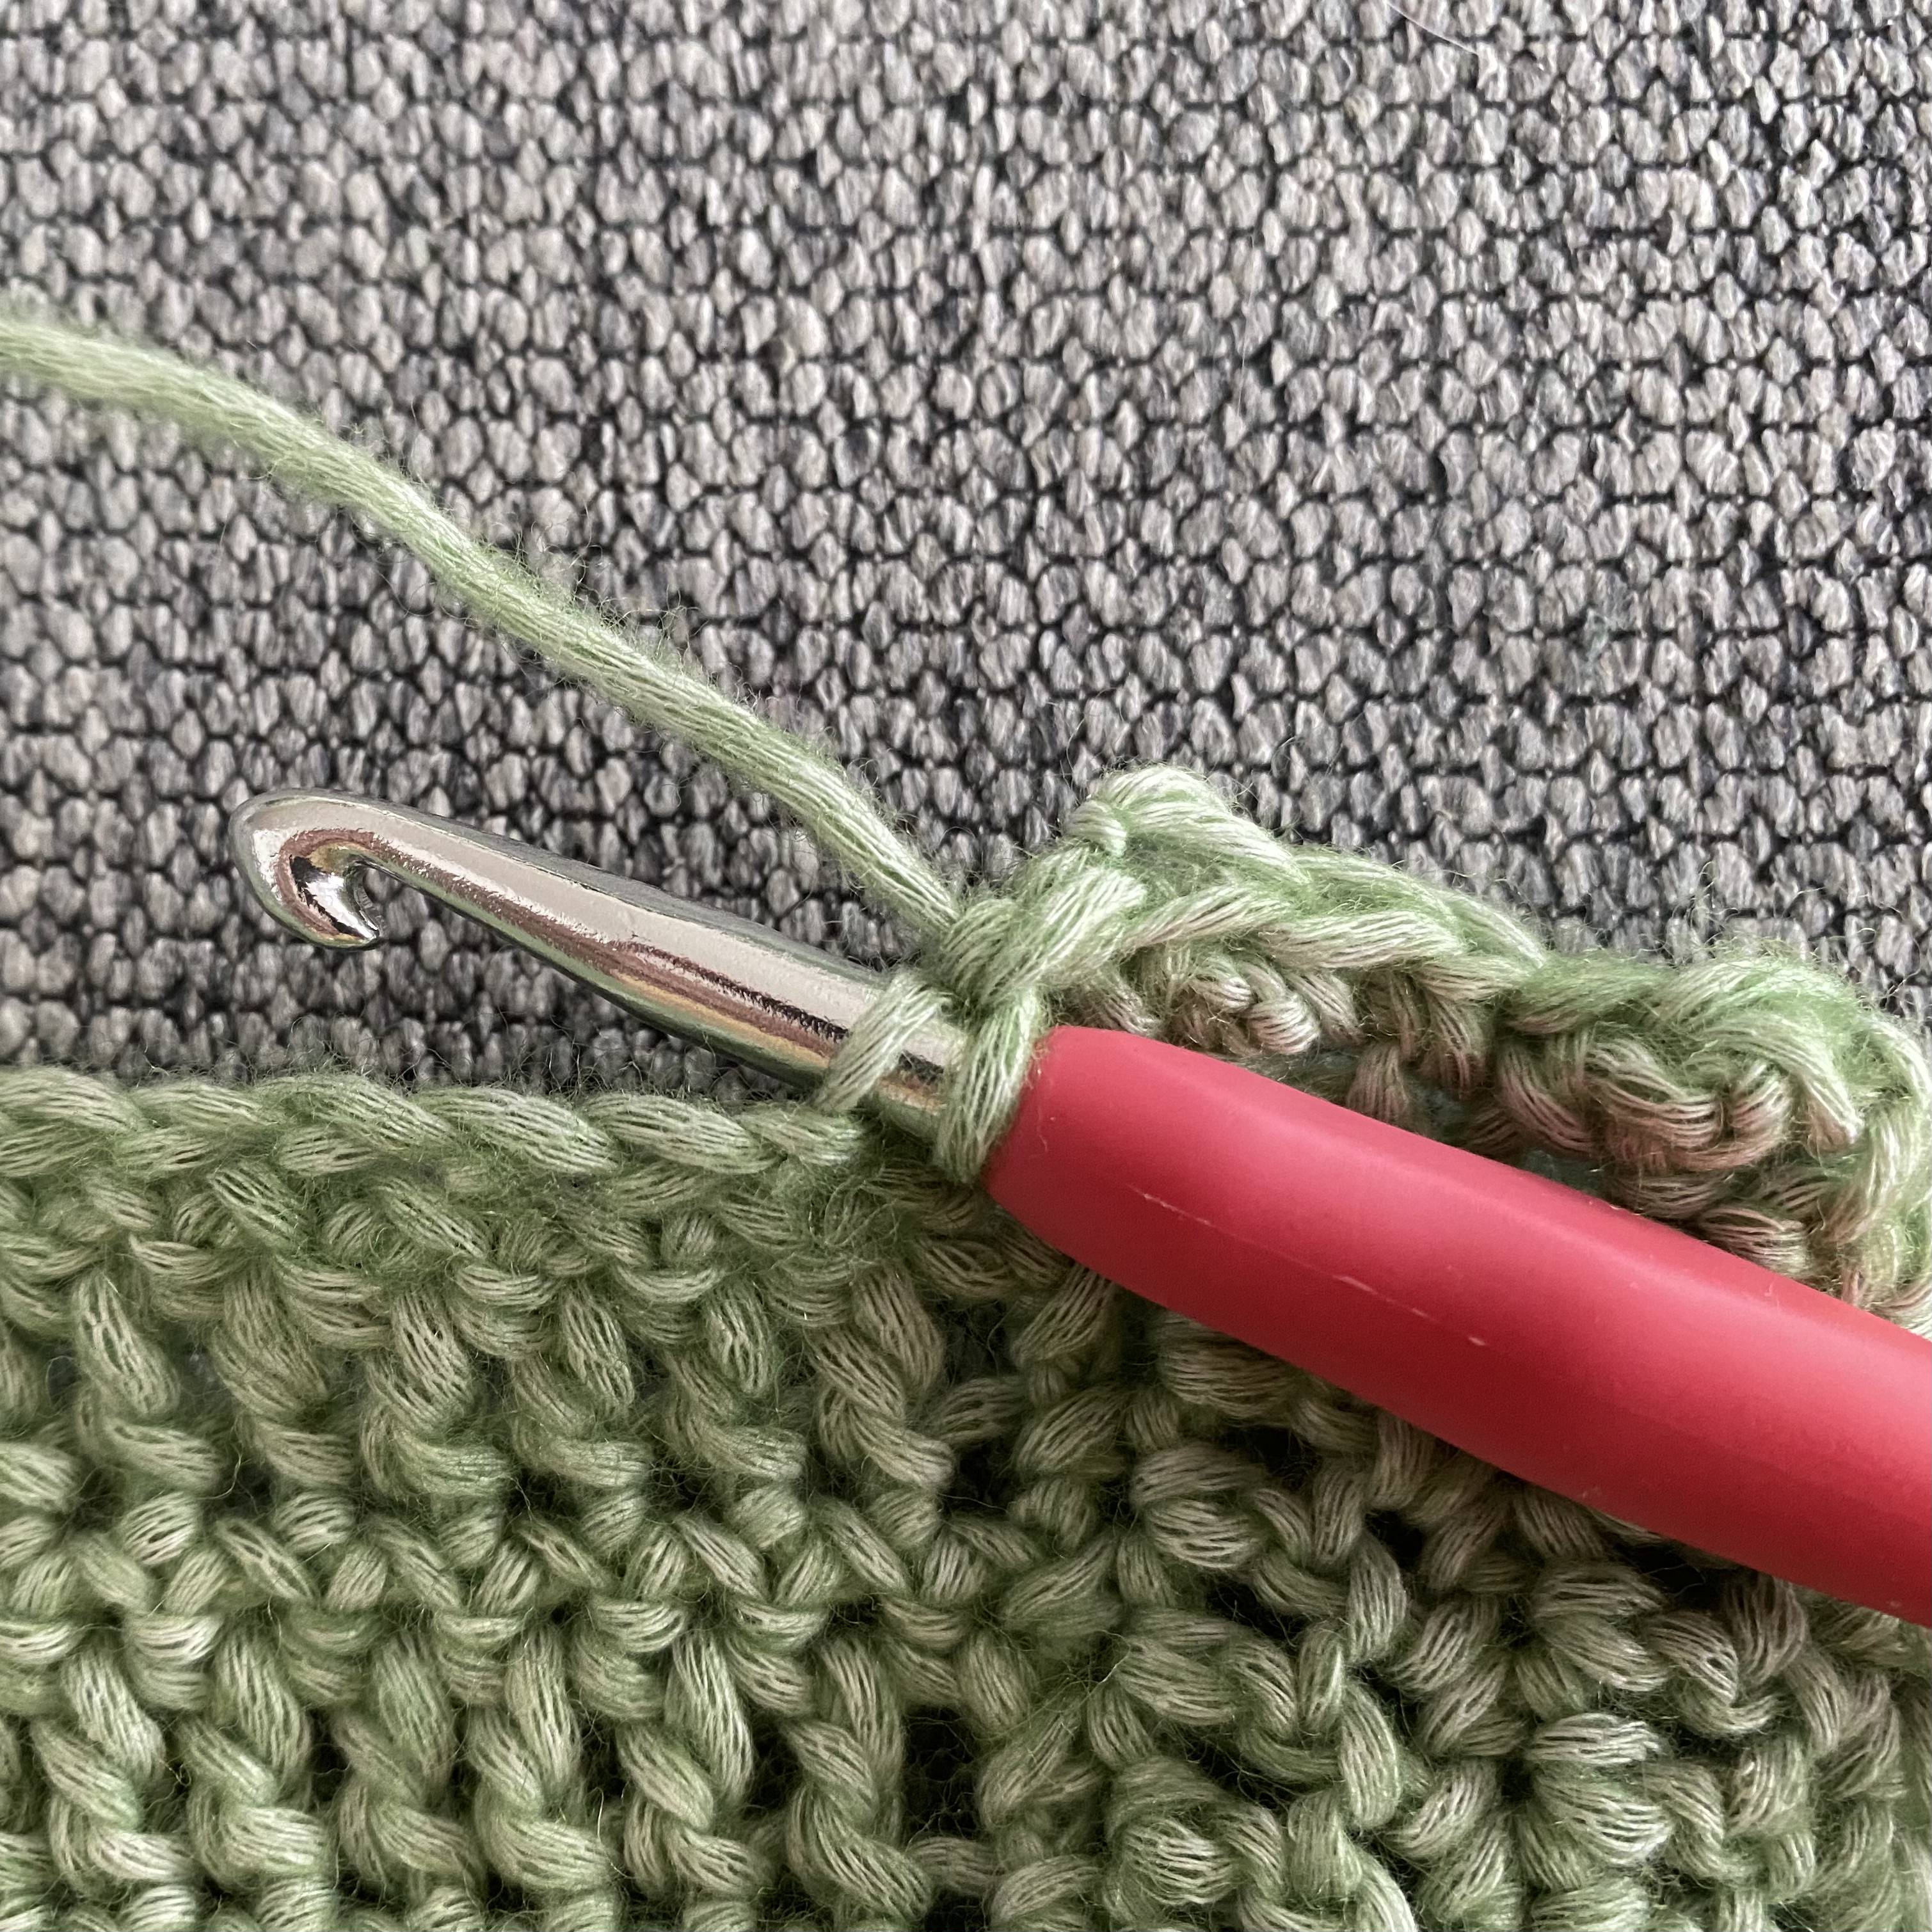
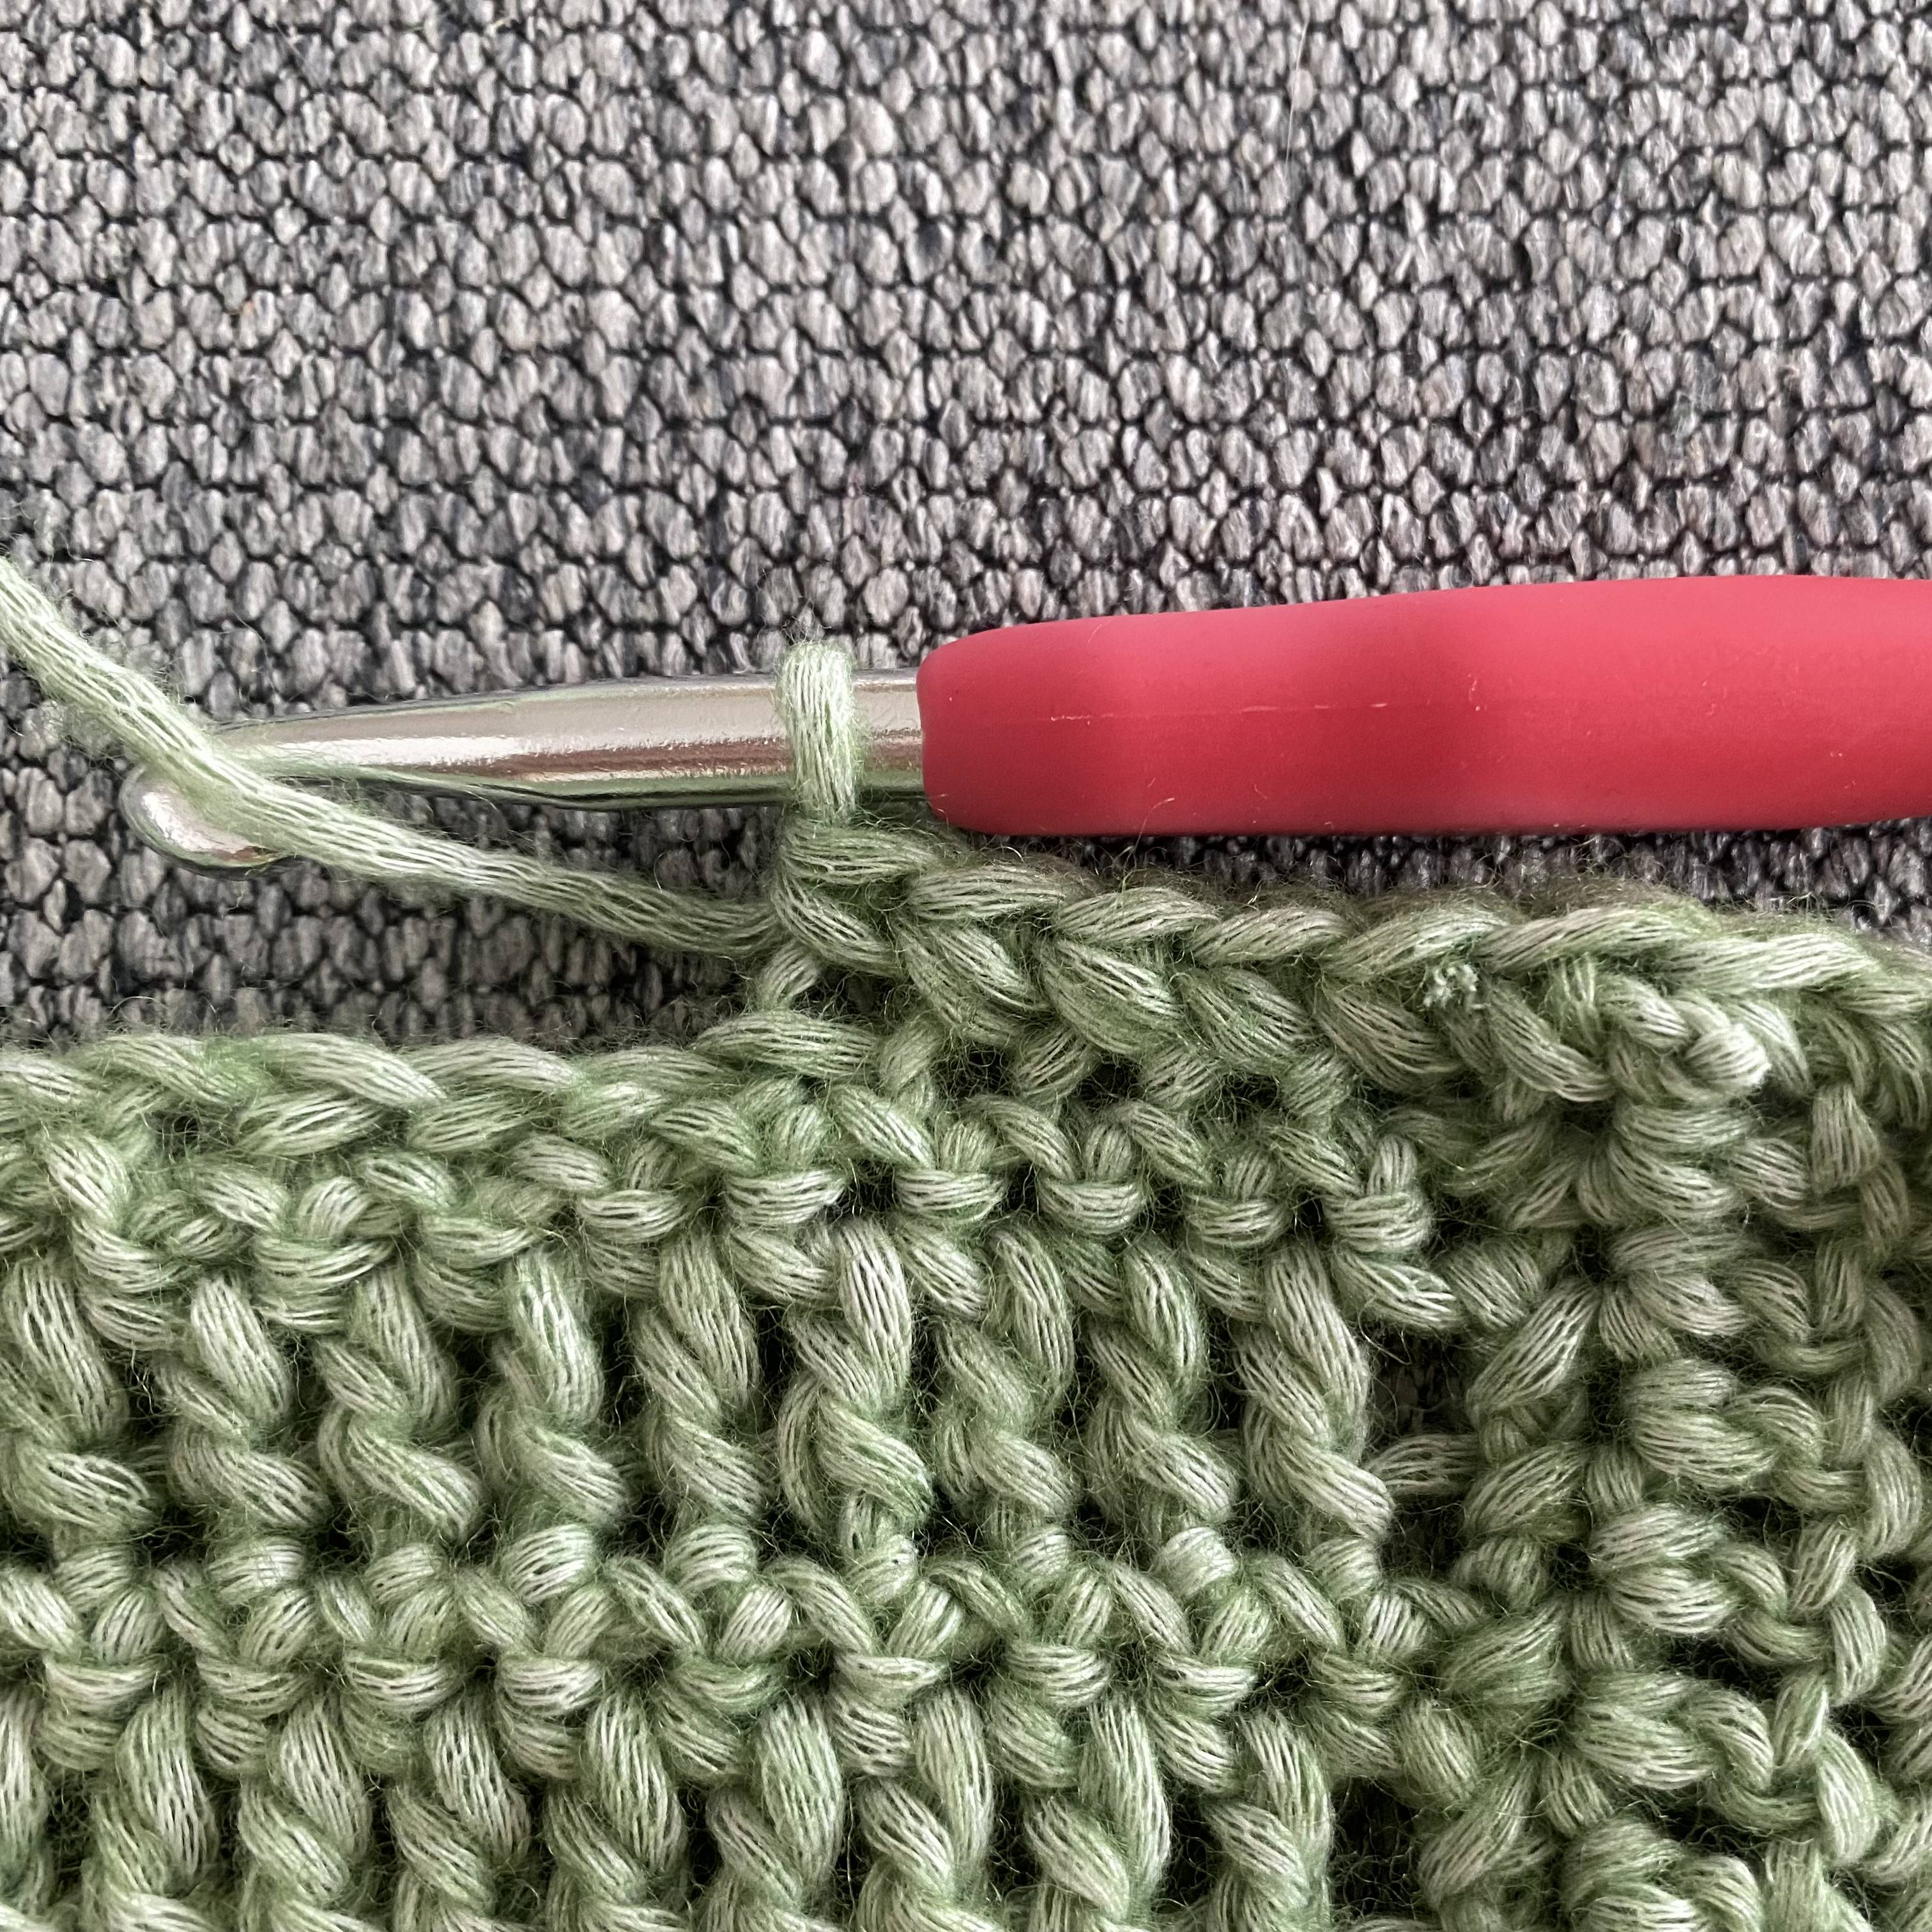
Row 27: Start with a decrease in the first 2 sts. It is very important that you do not skip a st, but decrease as in front piece A (look at the pictures). Then make 30 (24, 27, 33, 36) tr in every st. Finish with a ts and turn the piece.
Row 28: Make 1 dc in every st. Finish with a tstr and turn the piece
Row 29: Start with a decrease in the first 2 sts. Then make 29 (23, 26, 32, 35) tr in each st. Finish with a ts and turn the piece
Row 30: Make 1 dc in each st. Finish with a tstr and turn the piece
Row 31: Start with a dec in the first 2 sts. Then make 28 (22, 25, 31, 34) dc in each st. Finish with a ts and turn the piece
Row 32: Make 1 dc in each st. Finish with a tstr and turn the piece
Row 33: Start with a decrease in the first 2 sts. Then make 27 (21, 24, 30, 33) tr in each st. Finish with a ts and turn the piece
Row 34: Make 1 dc in each st. Finish with a tstr and turn the piece
Row 35: Start with a decrease in the first 2 sts. Then make 26 (20, 23, 29, 32) tr in each st. Finish with a ts and turn the piece
Row 36: Make 1 dc in each st. Finish with a tstr and turn the piece
Row 37: Start with a decrease in the first 2 sts. Then make 25 (19, 22, 28, 31) tr in each st. Finish with a ts and turn the piece
Row 38: Make 1 dc in each st. Finish with a tstr and turn the piece
Row 39: Start with a decrease in the first 2 sts. Then make 24 (18, 21, 27, 30) tr in each st. Finish with a ts and turn the piece
Row 40: Make 1 dc in each st. Finish with a tstr and turn the piece
Row 41: Start with a decrease in the first 2 sts. Then make 23 (17, 20, 26, 29) tr in each st. Finish with a ts and turn the piece
Row 42: Make 1 dc in each st. Finish with a tstr and turn the piece
Row 43: Start with a decrease in the first 2 sts. Then make 22 (16, 19, 25, 28) tr in each st. Finish with a ts and turn the piece
Row 44: Make 1 dc in each st. Finish with a tstr and turn the piece
Row 45: Start with a decrease in the first 2 sts. Then make 21 (15, 18, 24, 27) tr in each st. Finish with a ts and turn the piece
Row 46: Make 1 dc in each st. Cut the yarn and finish the piece
BACK PIECE
Row 1: Make 71 (59, 65, 77, 83) ch. Finish with a ts and turn the piece.
Row 2: Make 1 dc in blo of each st. Finish with a tstr and turn the piece
Row 3: Make 1 tr in each st. Finish with a ts and turn the piece
Row 4: Make 1 dc in each st. Finish with a tstr and turn the piece
Row 5-44: Repeat rows 3 and 4.
Row 45: Make 1 tr in the next 22 (16, 19, 25, 28) sts. Finish with a ts and turn the piece
Row 46: Make 1 dc in each st. Cut the yarn and finish the piece.
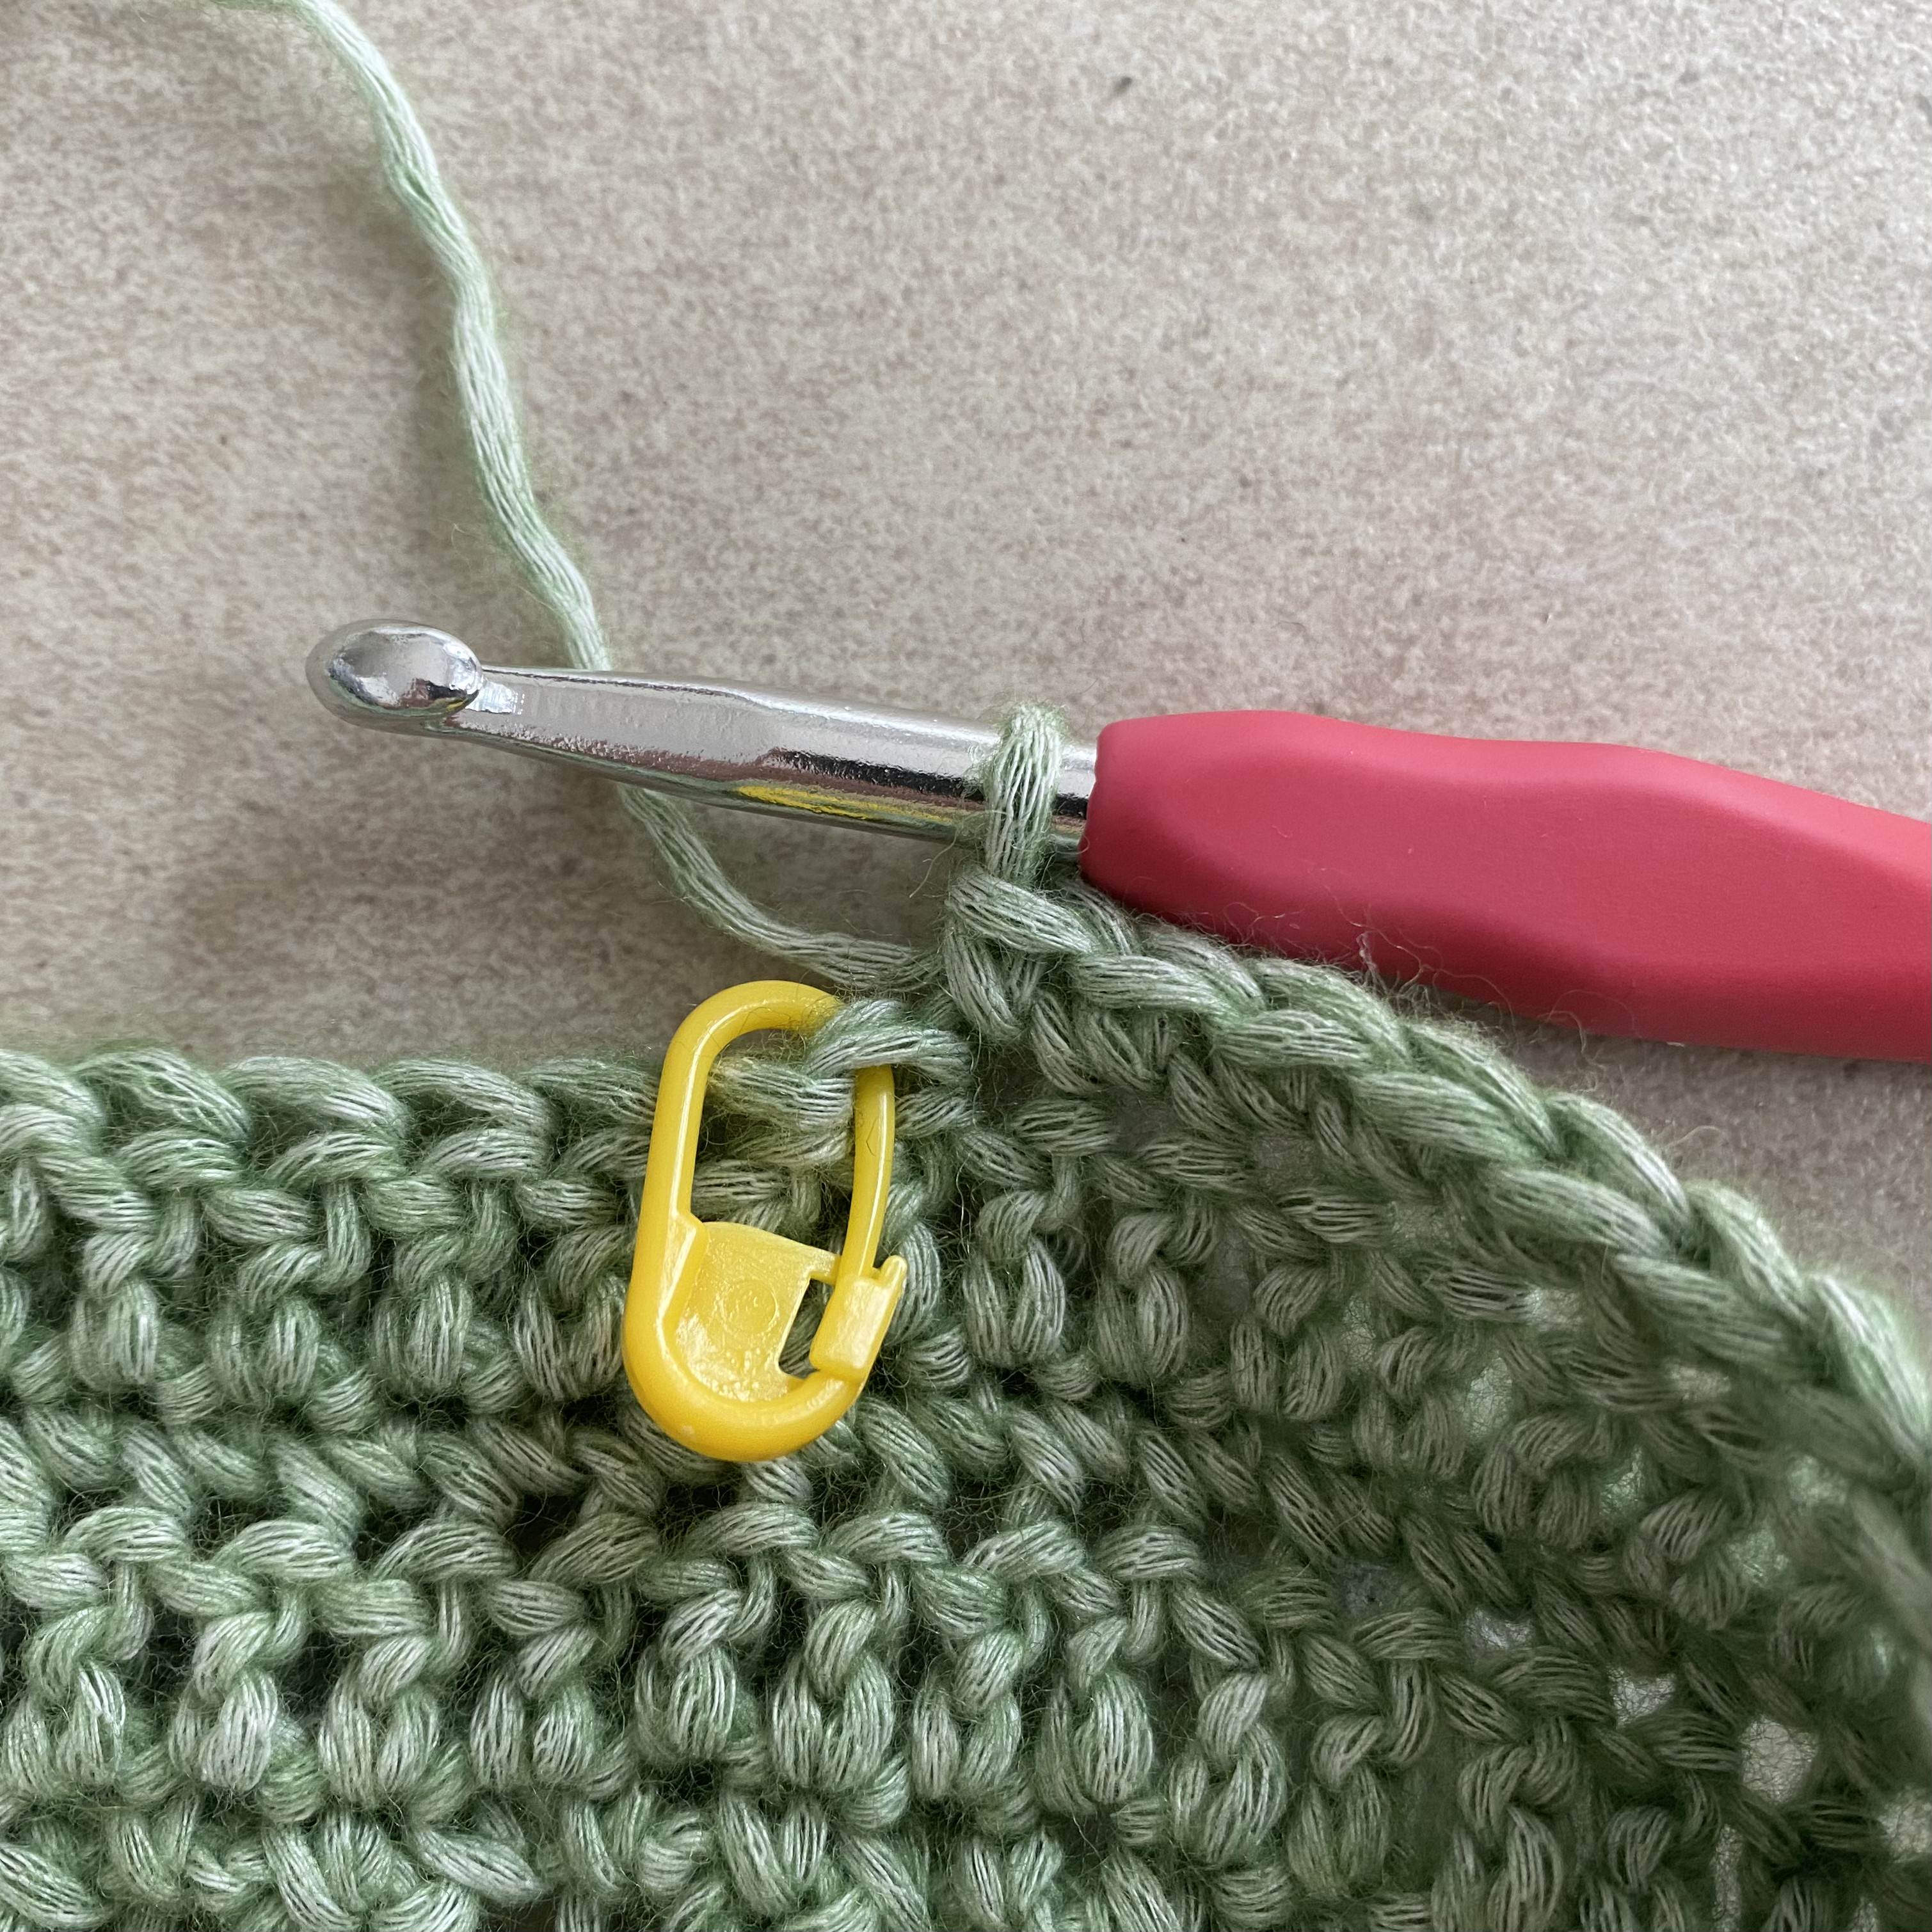
Now count 22 (16, 19, 25, 28) stitches in from the opposite side. If necessary, mark with a stitch marker. Now we will make row 45 + row 46 in this side as follows:
Row 45: Fasten the yarn in st number 22 (16, 19, 25, 28) and make a tstr and a tr in the same st. Now make a tr in each tr until you reach the end. Finish with a ts and turn the piece
Row 46: Make 1 dc in every st. Cut the yarn and finish piece
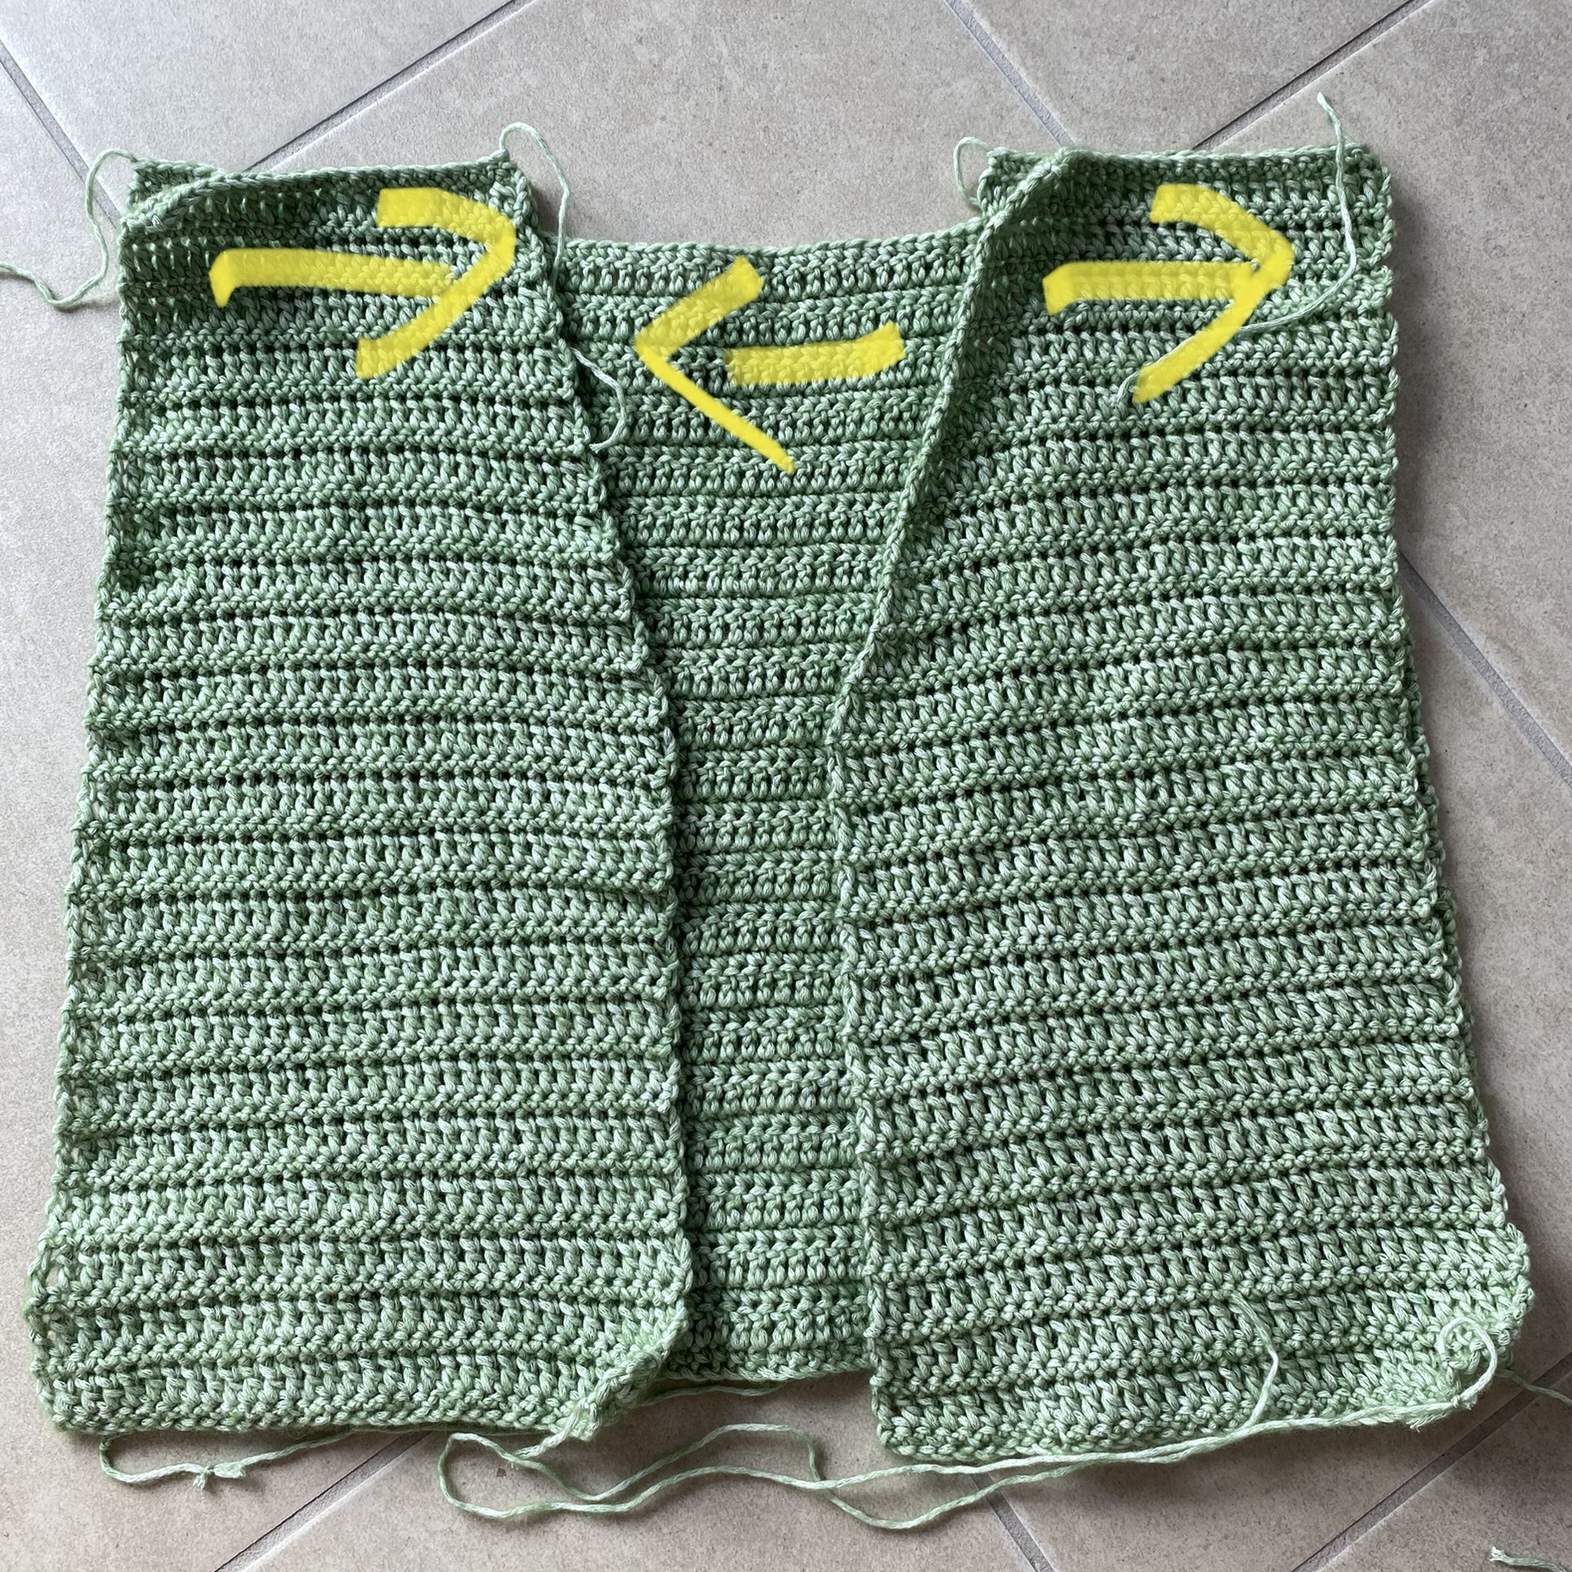
You can now place your back piece and your two front pieces together to make them look like the picture below, and then the sewing can begin.

SEW TOGETHER
Now sew the pieces together. Above the shoulders, sew the pieces together through the stitches. At the side, sew the pieces together up to and including row 22. If this does not fit, you can adjust how high you sew up to your own measurements. Be aware, however, that when you get to the pattern for the sleeves, this will have an effect that you will have to take into account.
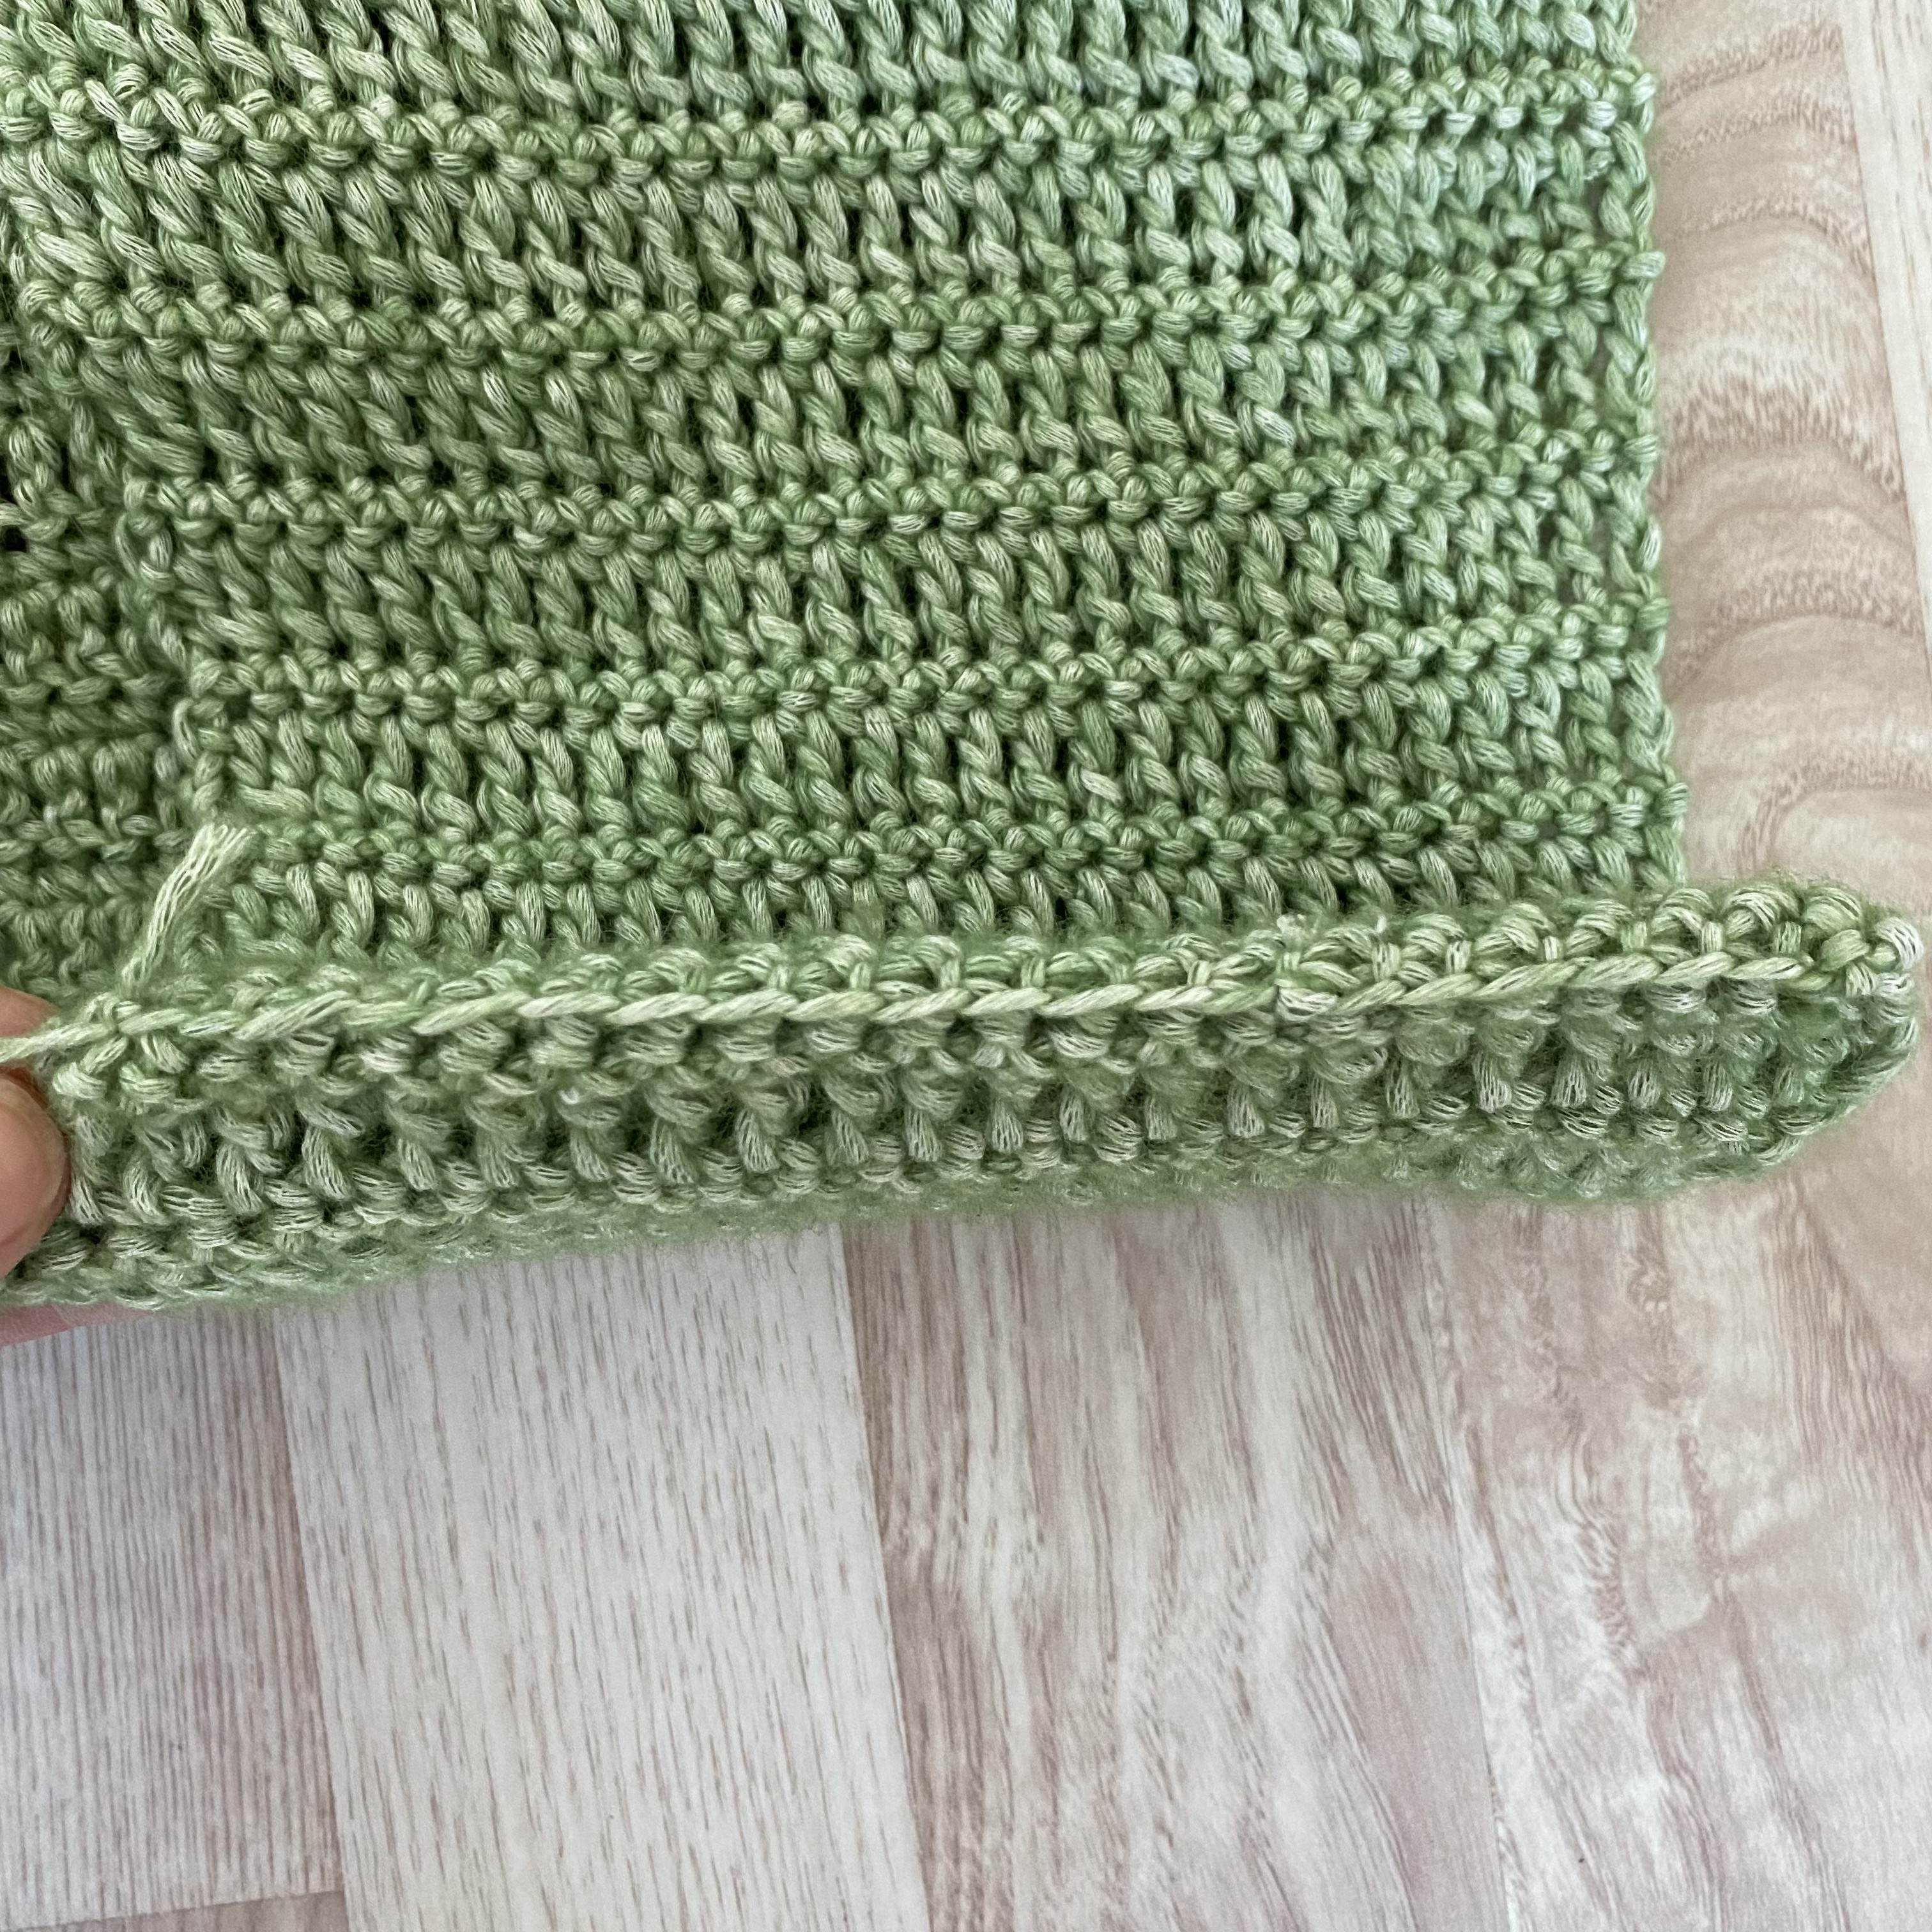
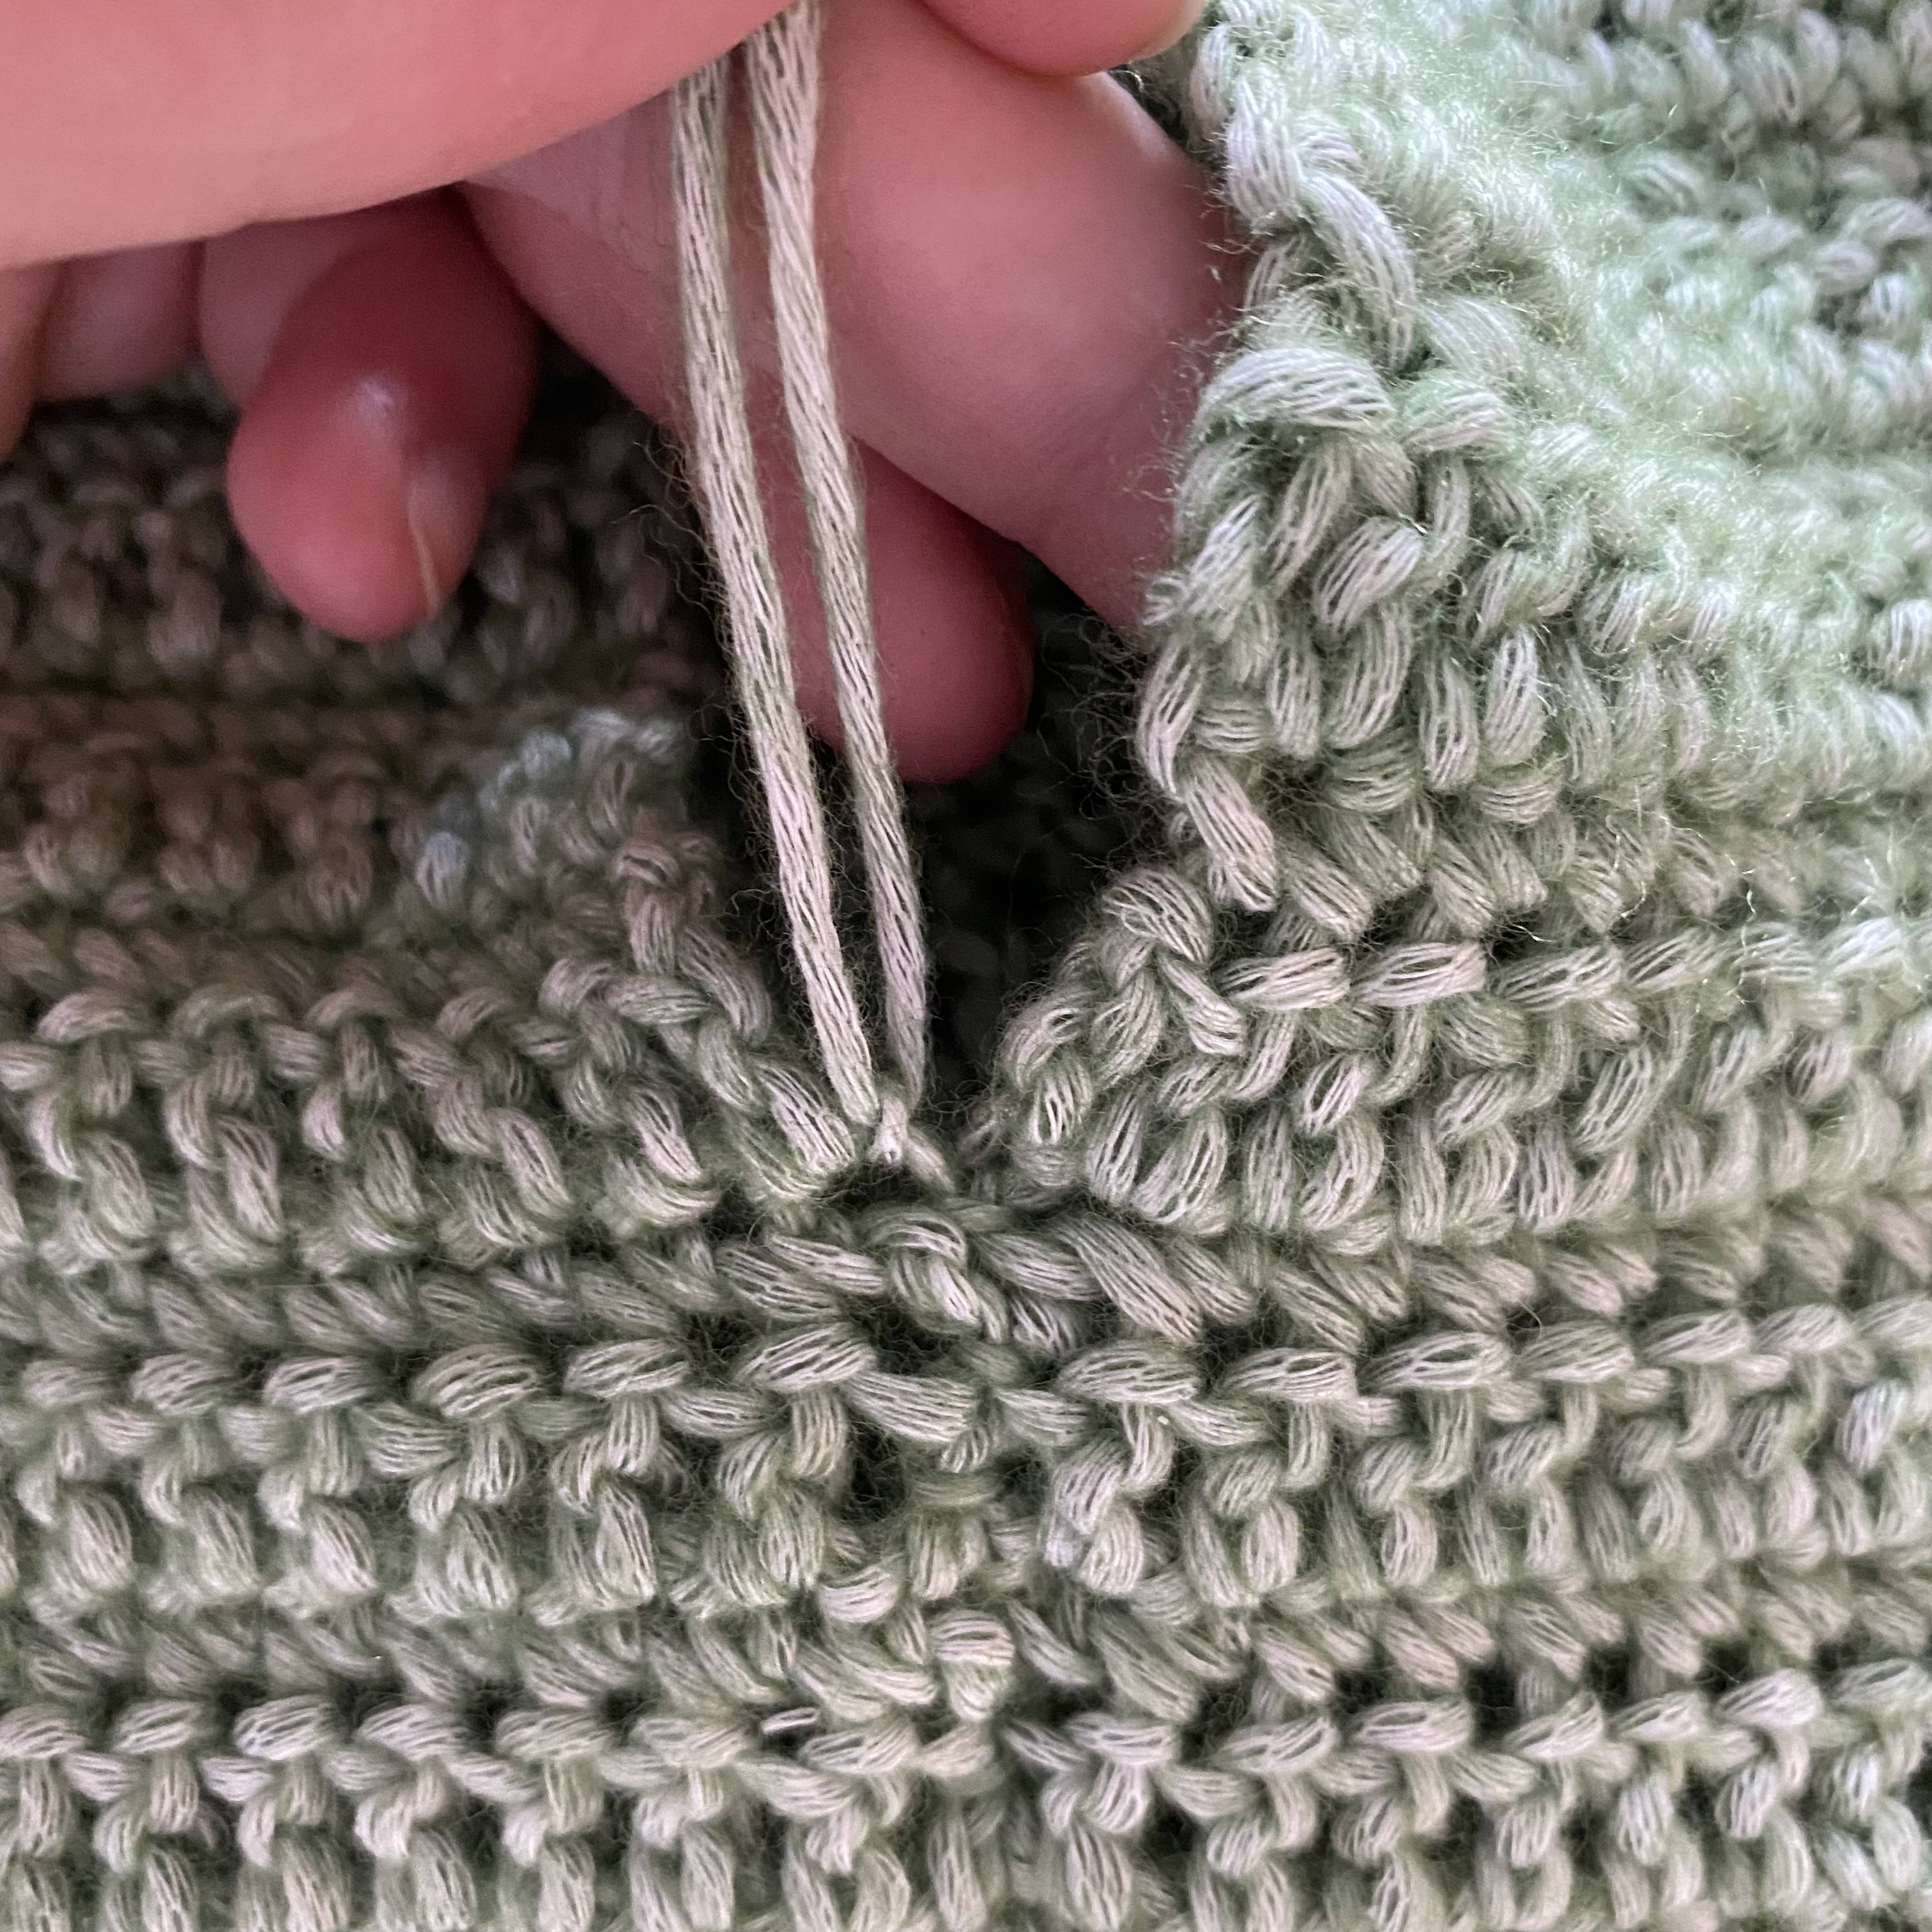
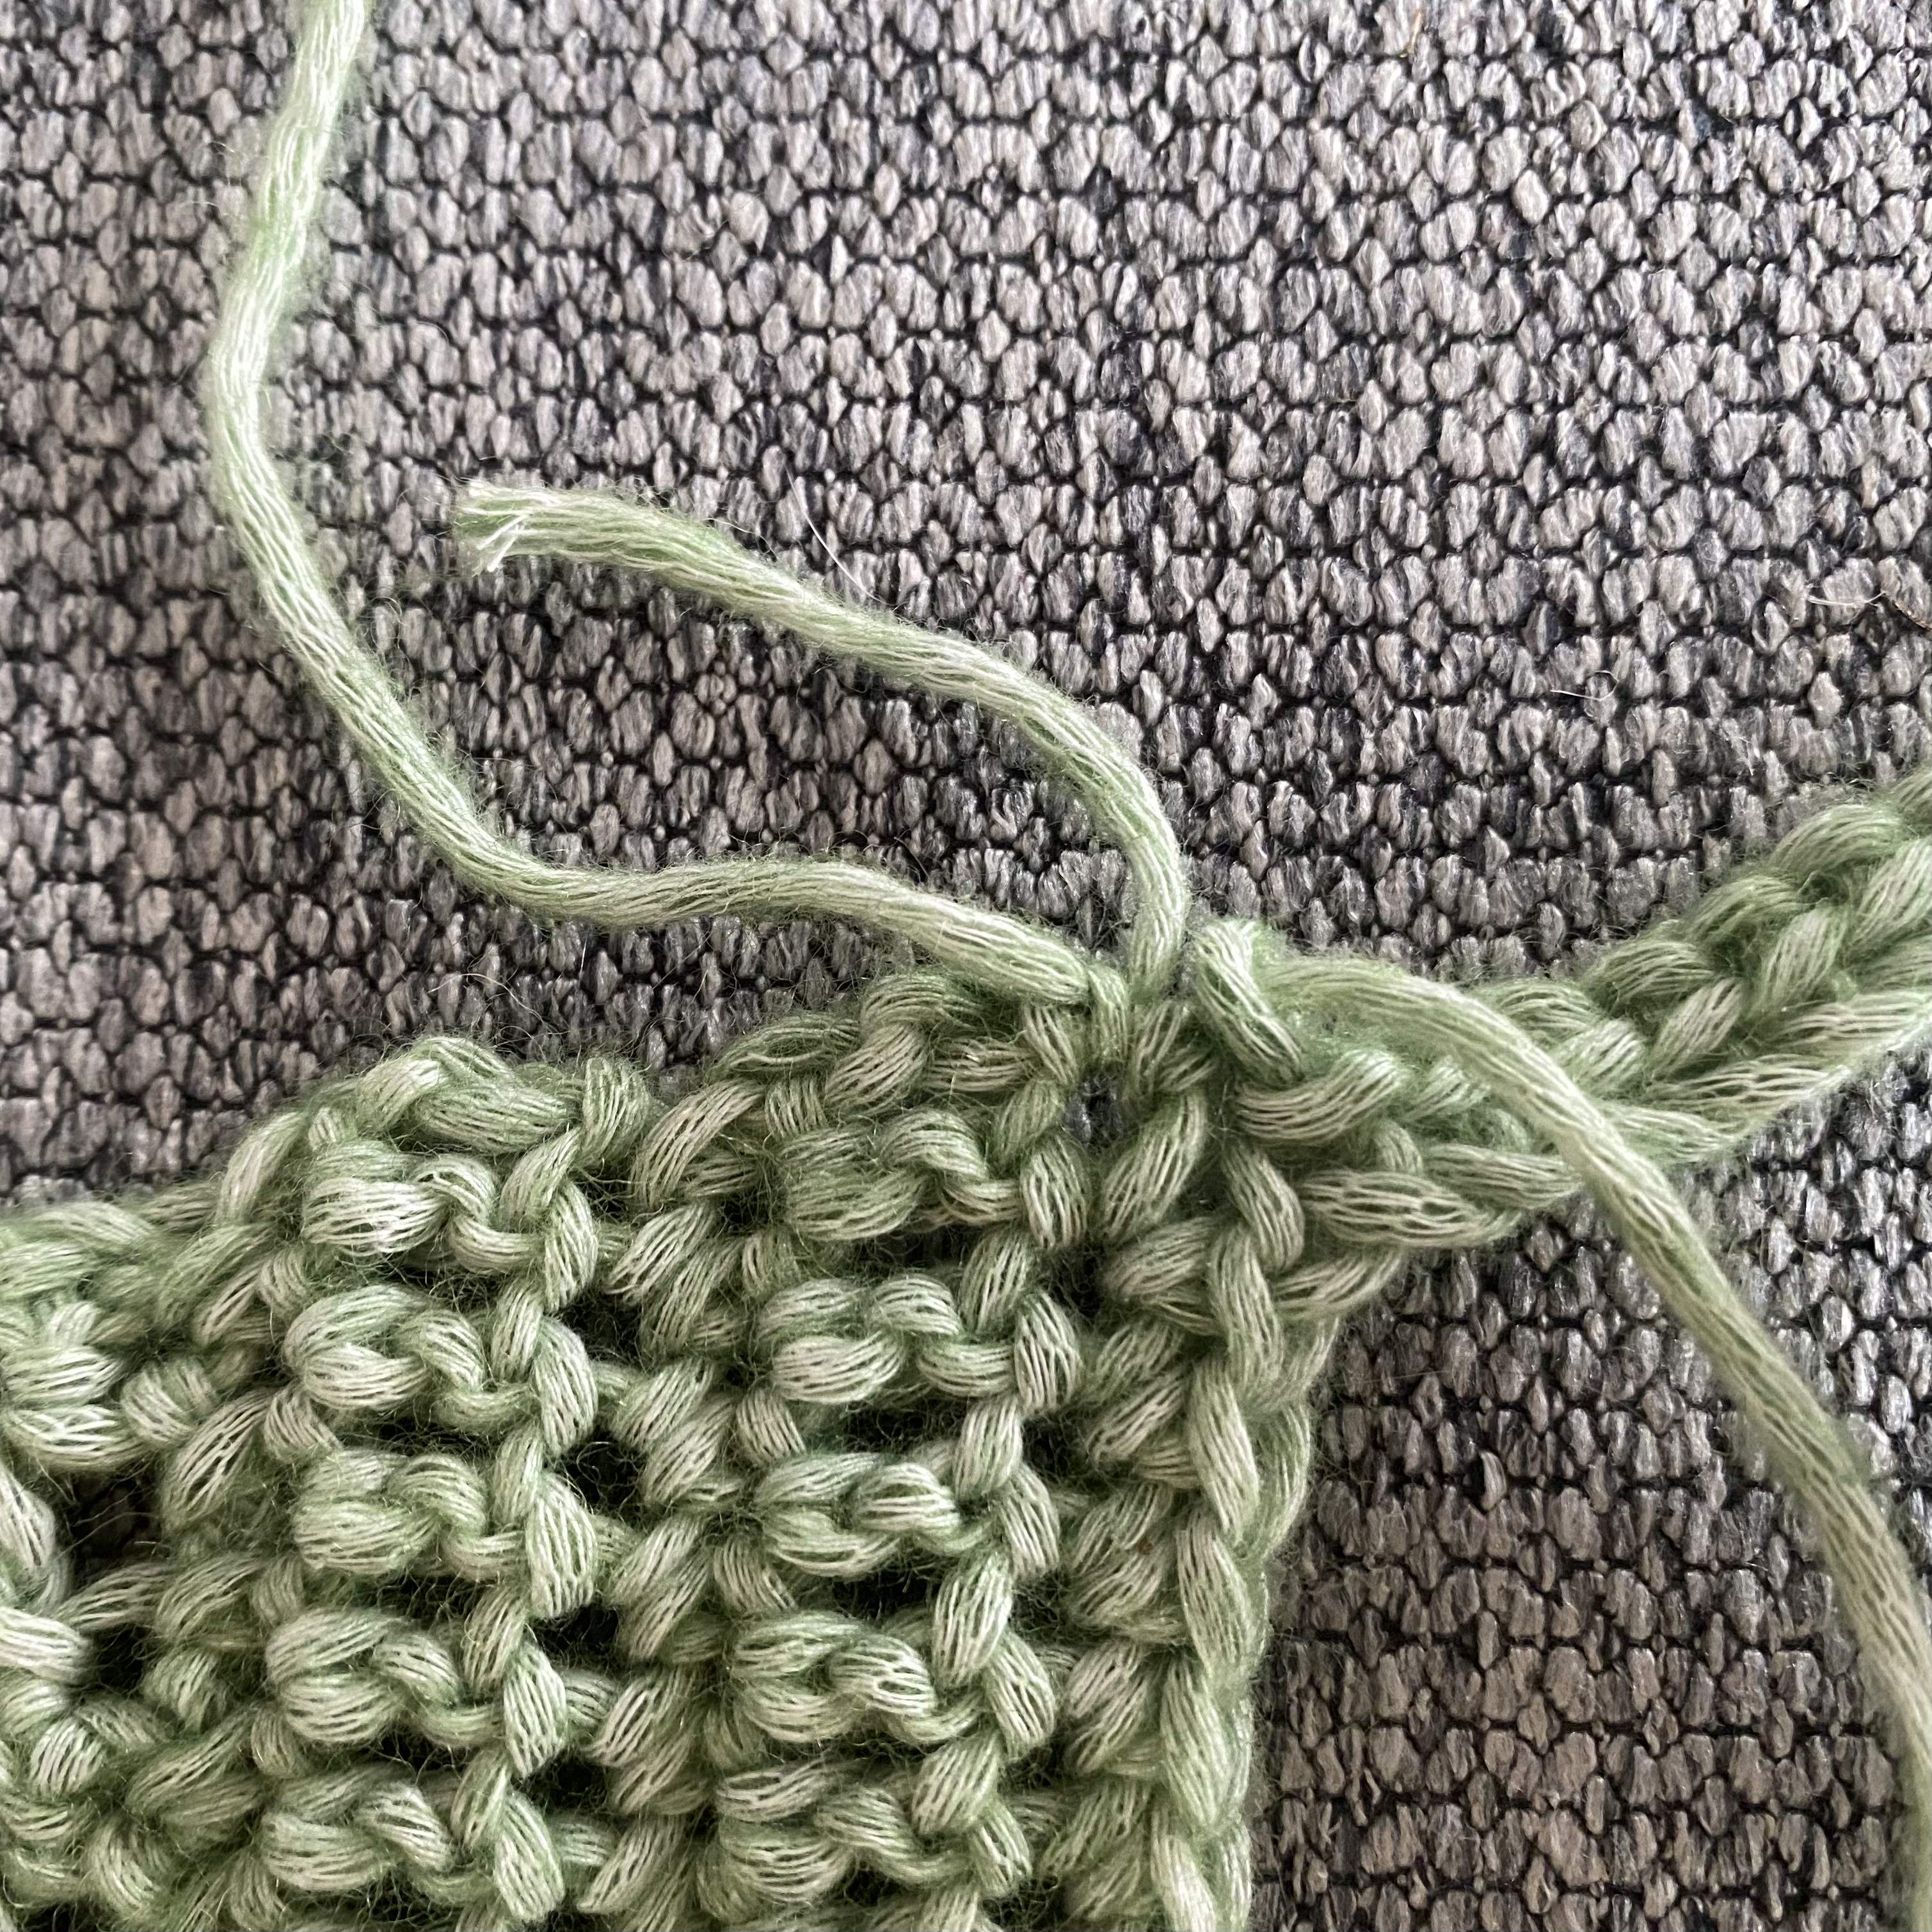
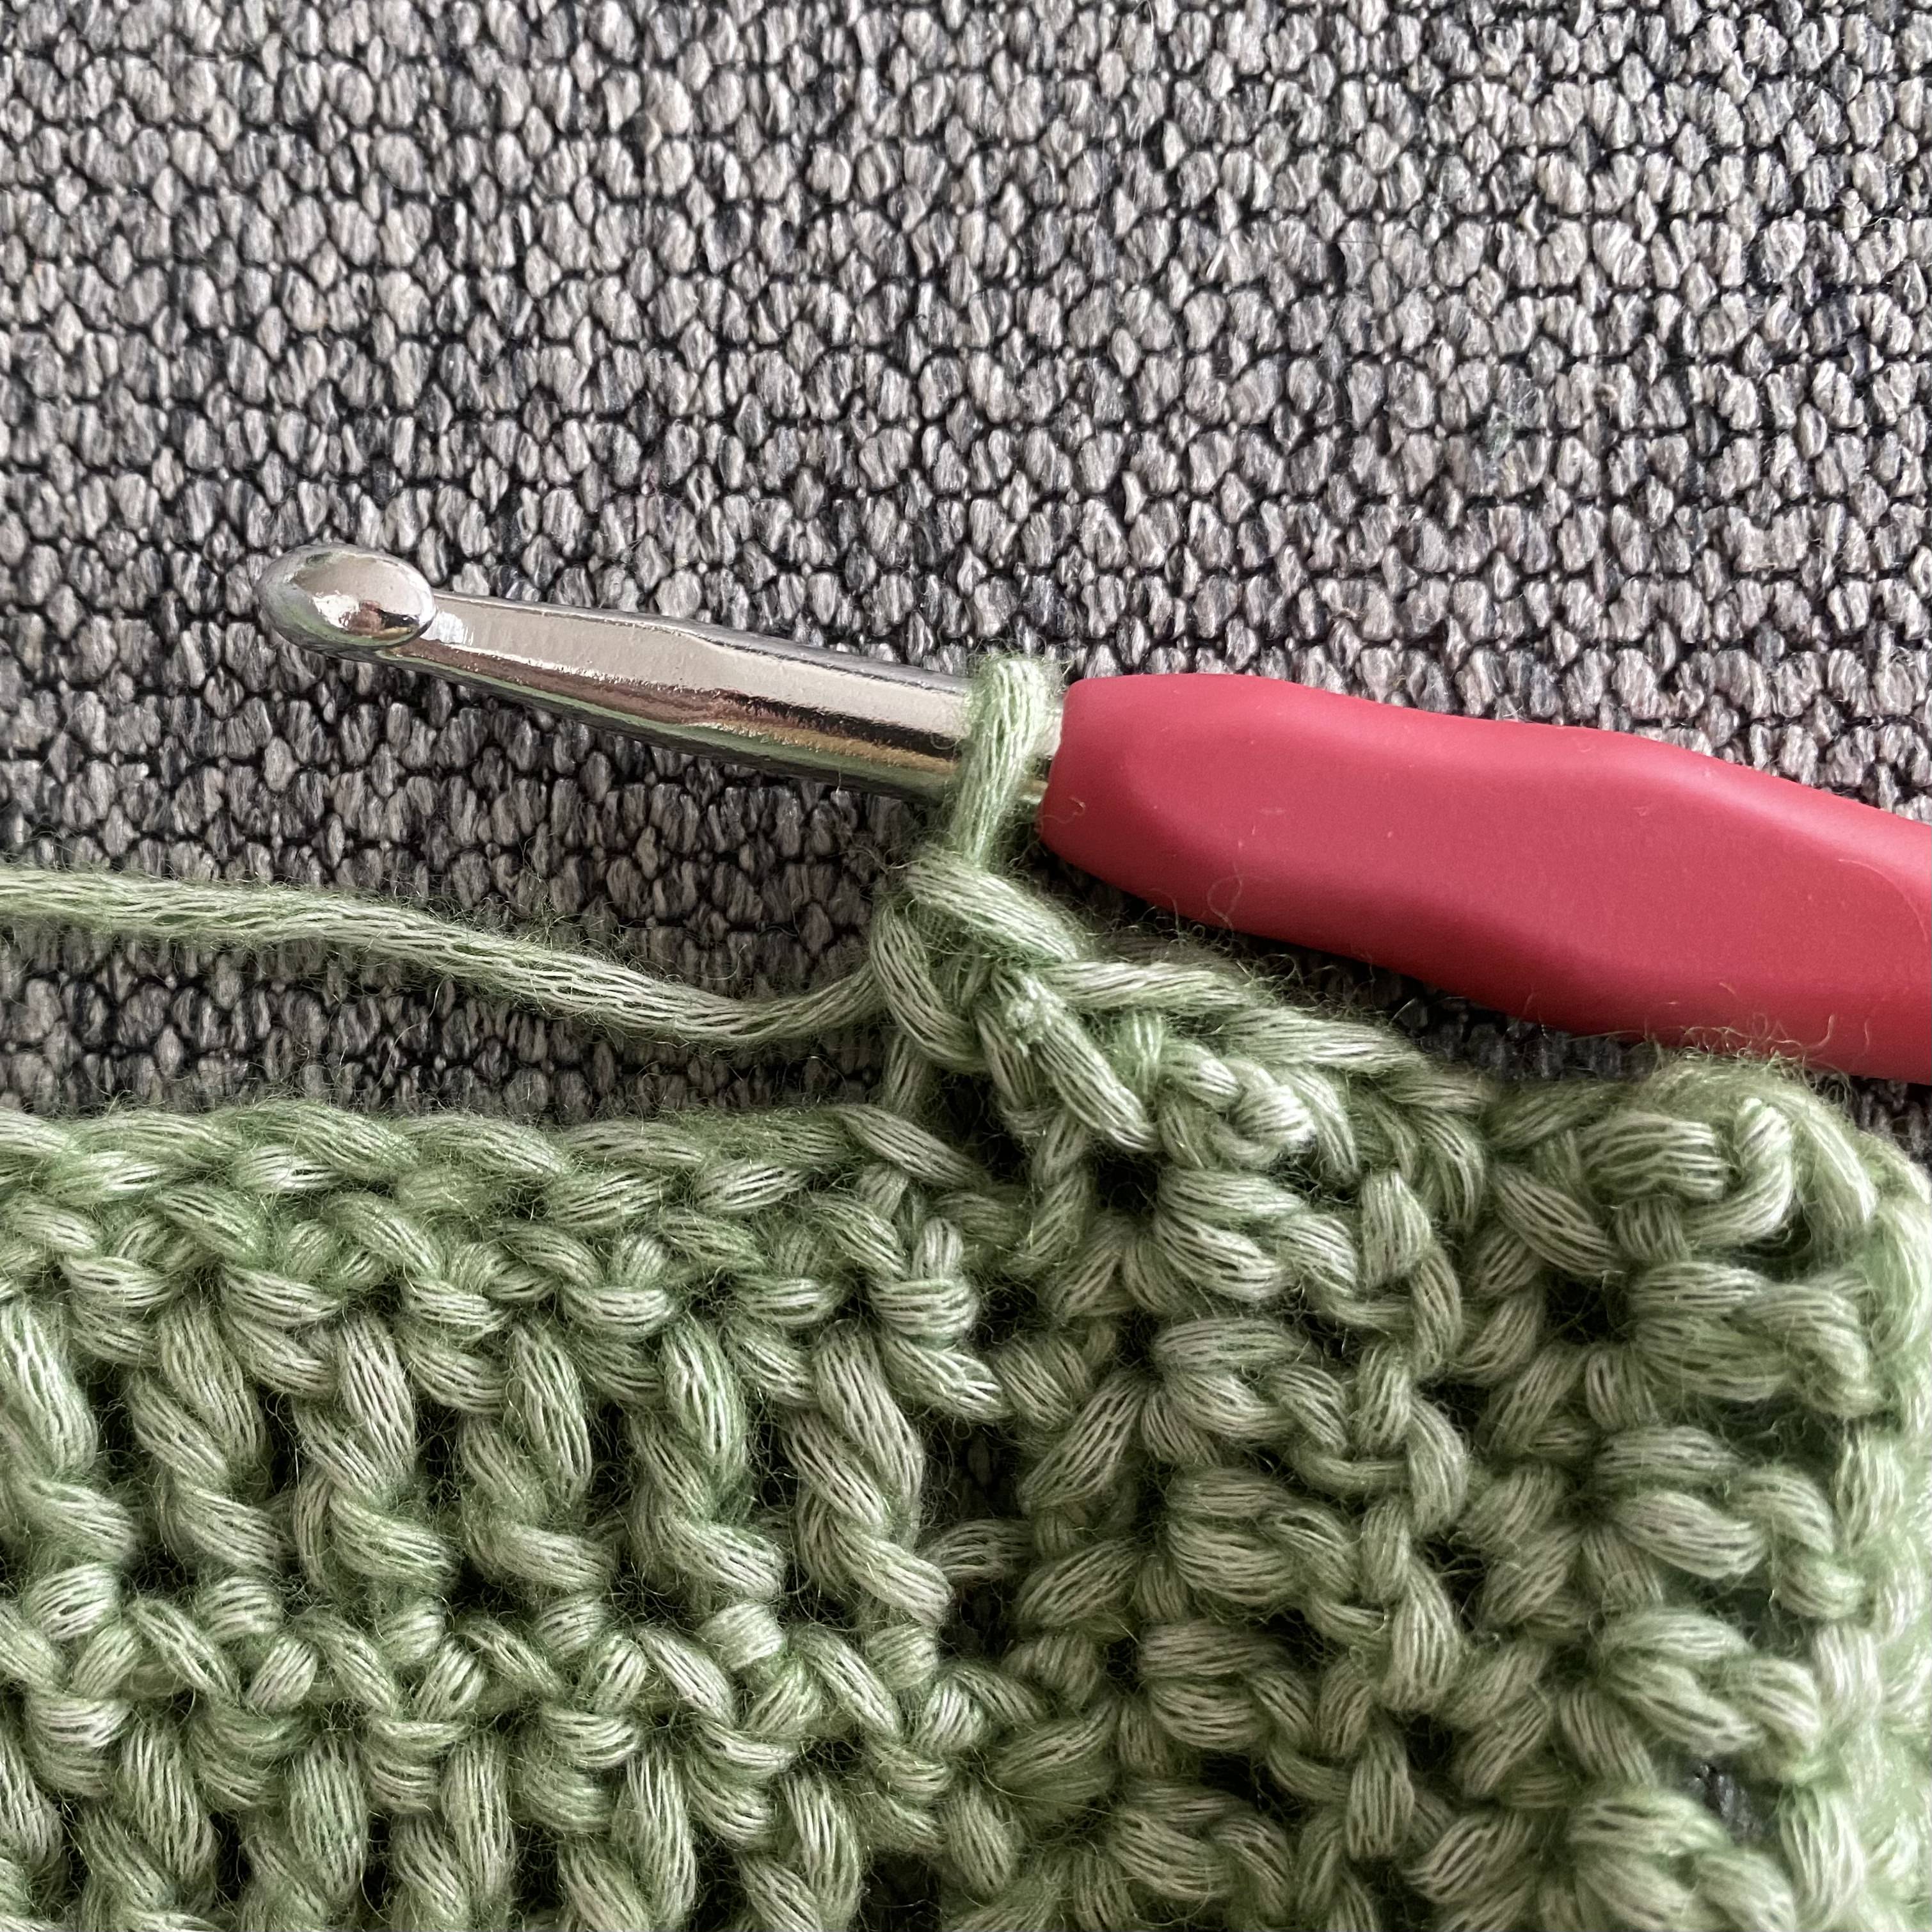
We use blanket stitches (see picture) to sew the pieces together as we think it gives a lighter and thinner finish, but you can use whichever method you prefer to sew the pieces together.
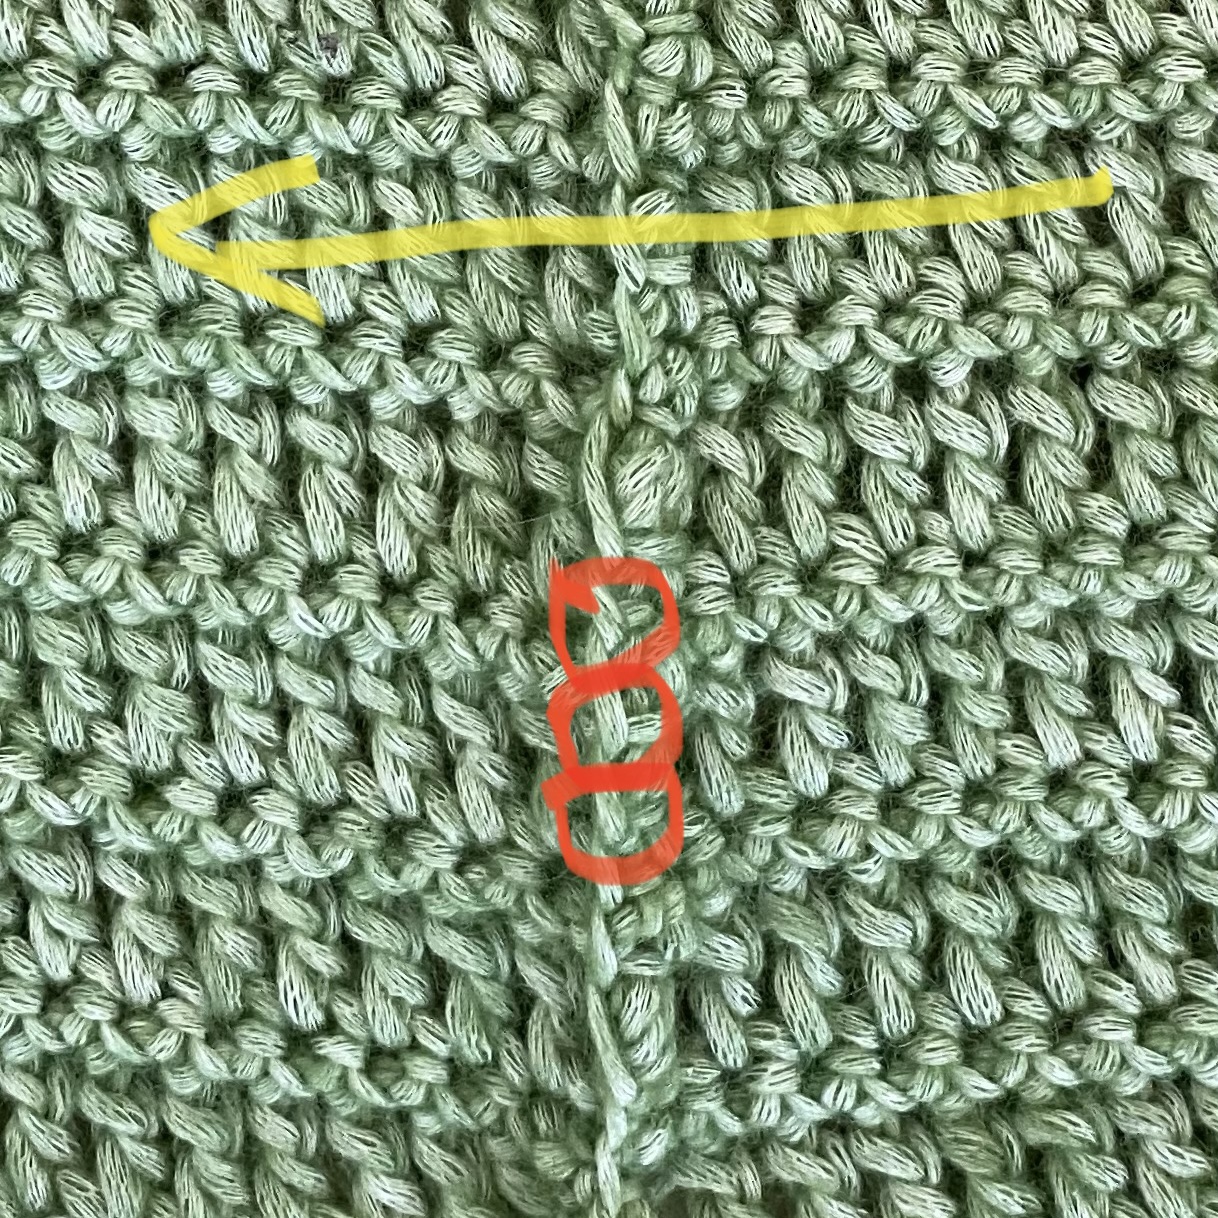
Make sure the stitches are facing the same way - it's easiest to see if you look at the top row of stitches - here the back piece should go to the left and the front pieces should go to the right, so the back piece should go opposite the front pieces (see picture).
Make sure that the stitching is not displaced (see pictures). We keep track of it by remembering that there are two stitches in a row with tr and one stitch in a row with dc
SLEEVES (THE PROCEDURE IS THE SAME FOR BOTH SLEEVES)
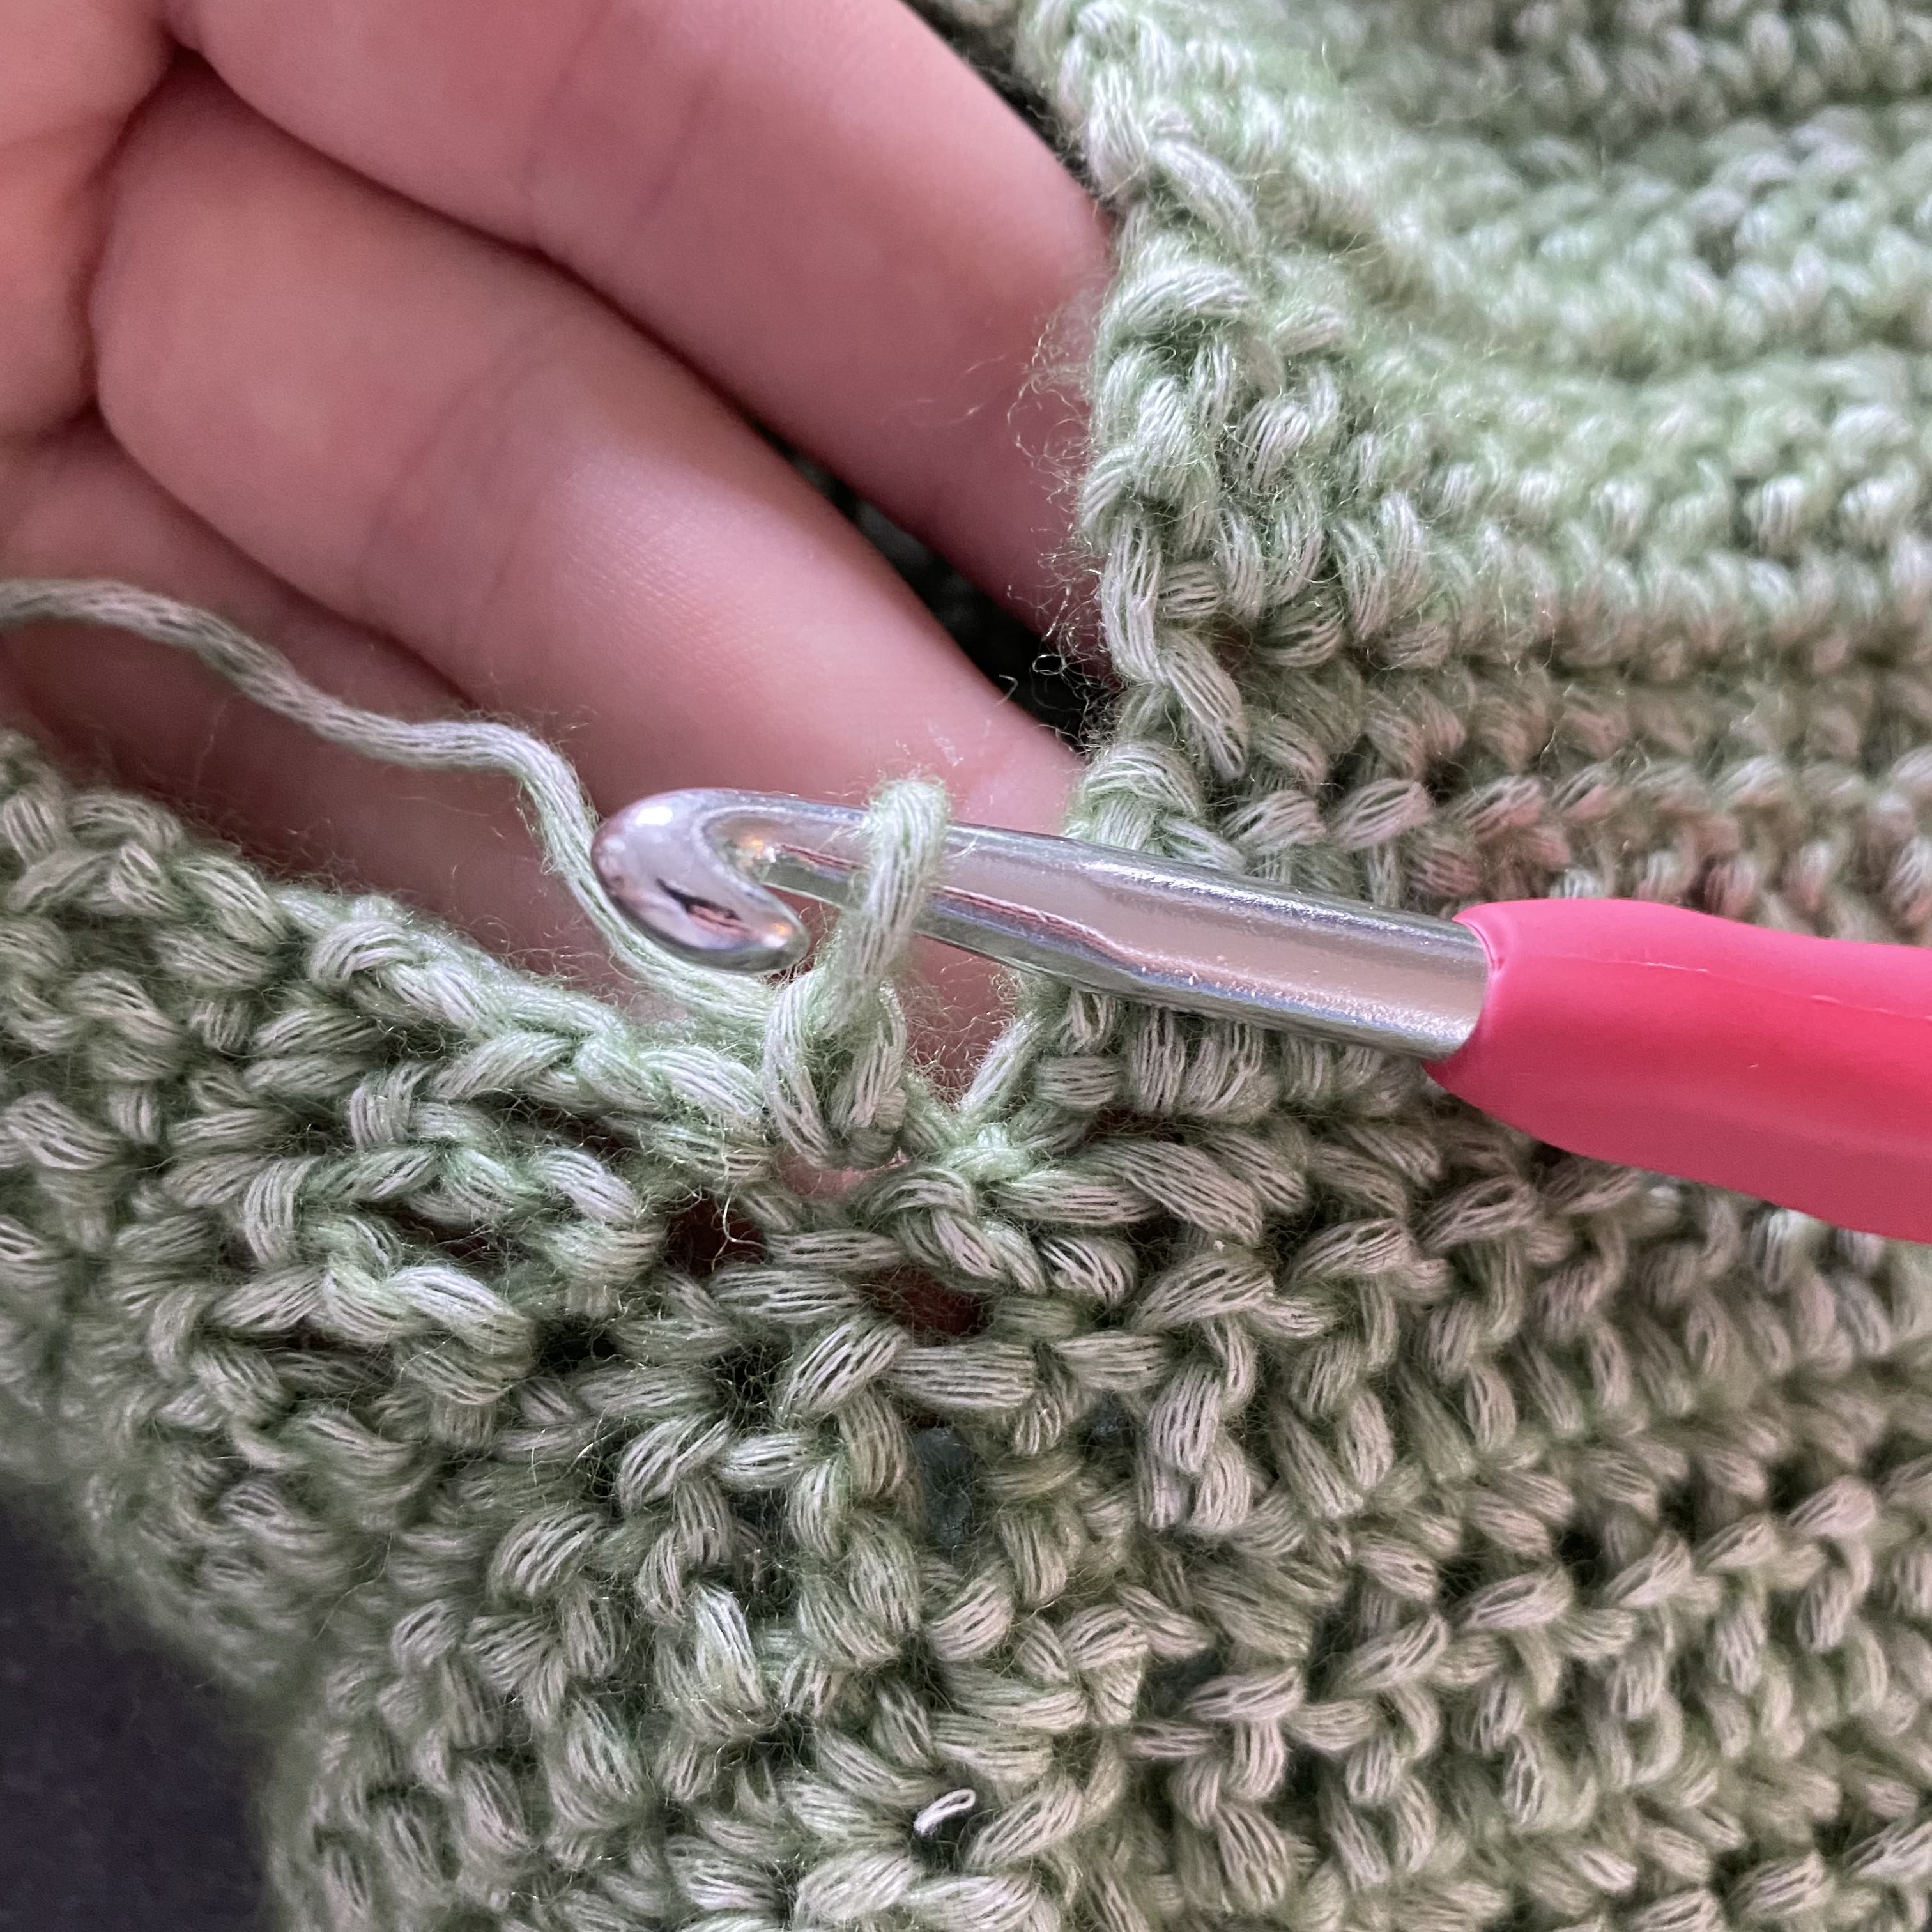
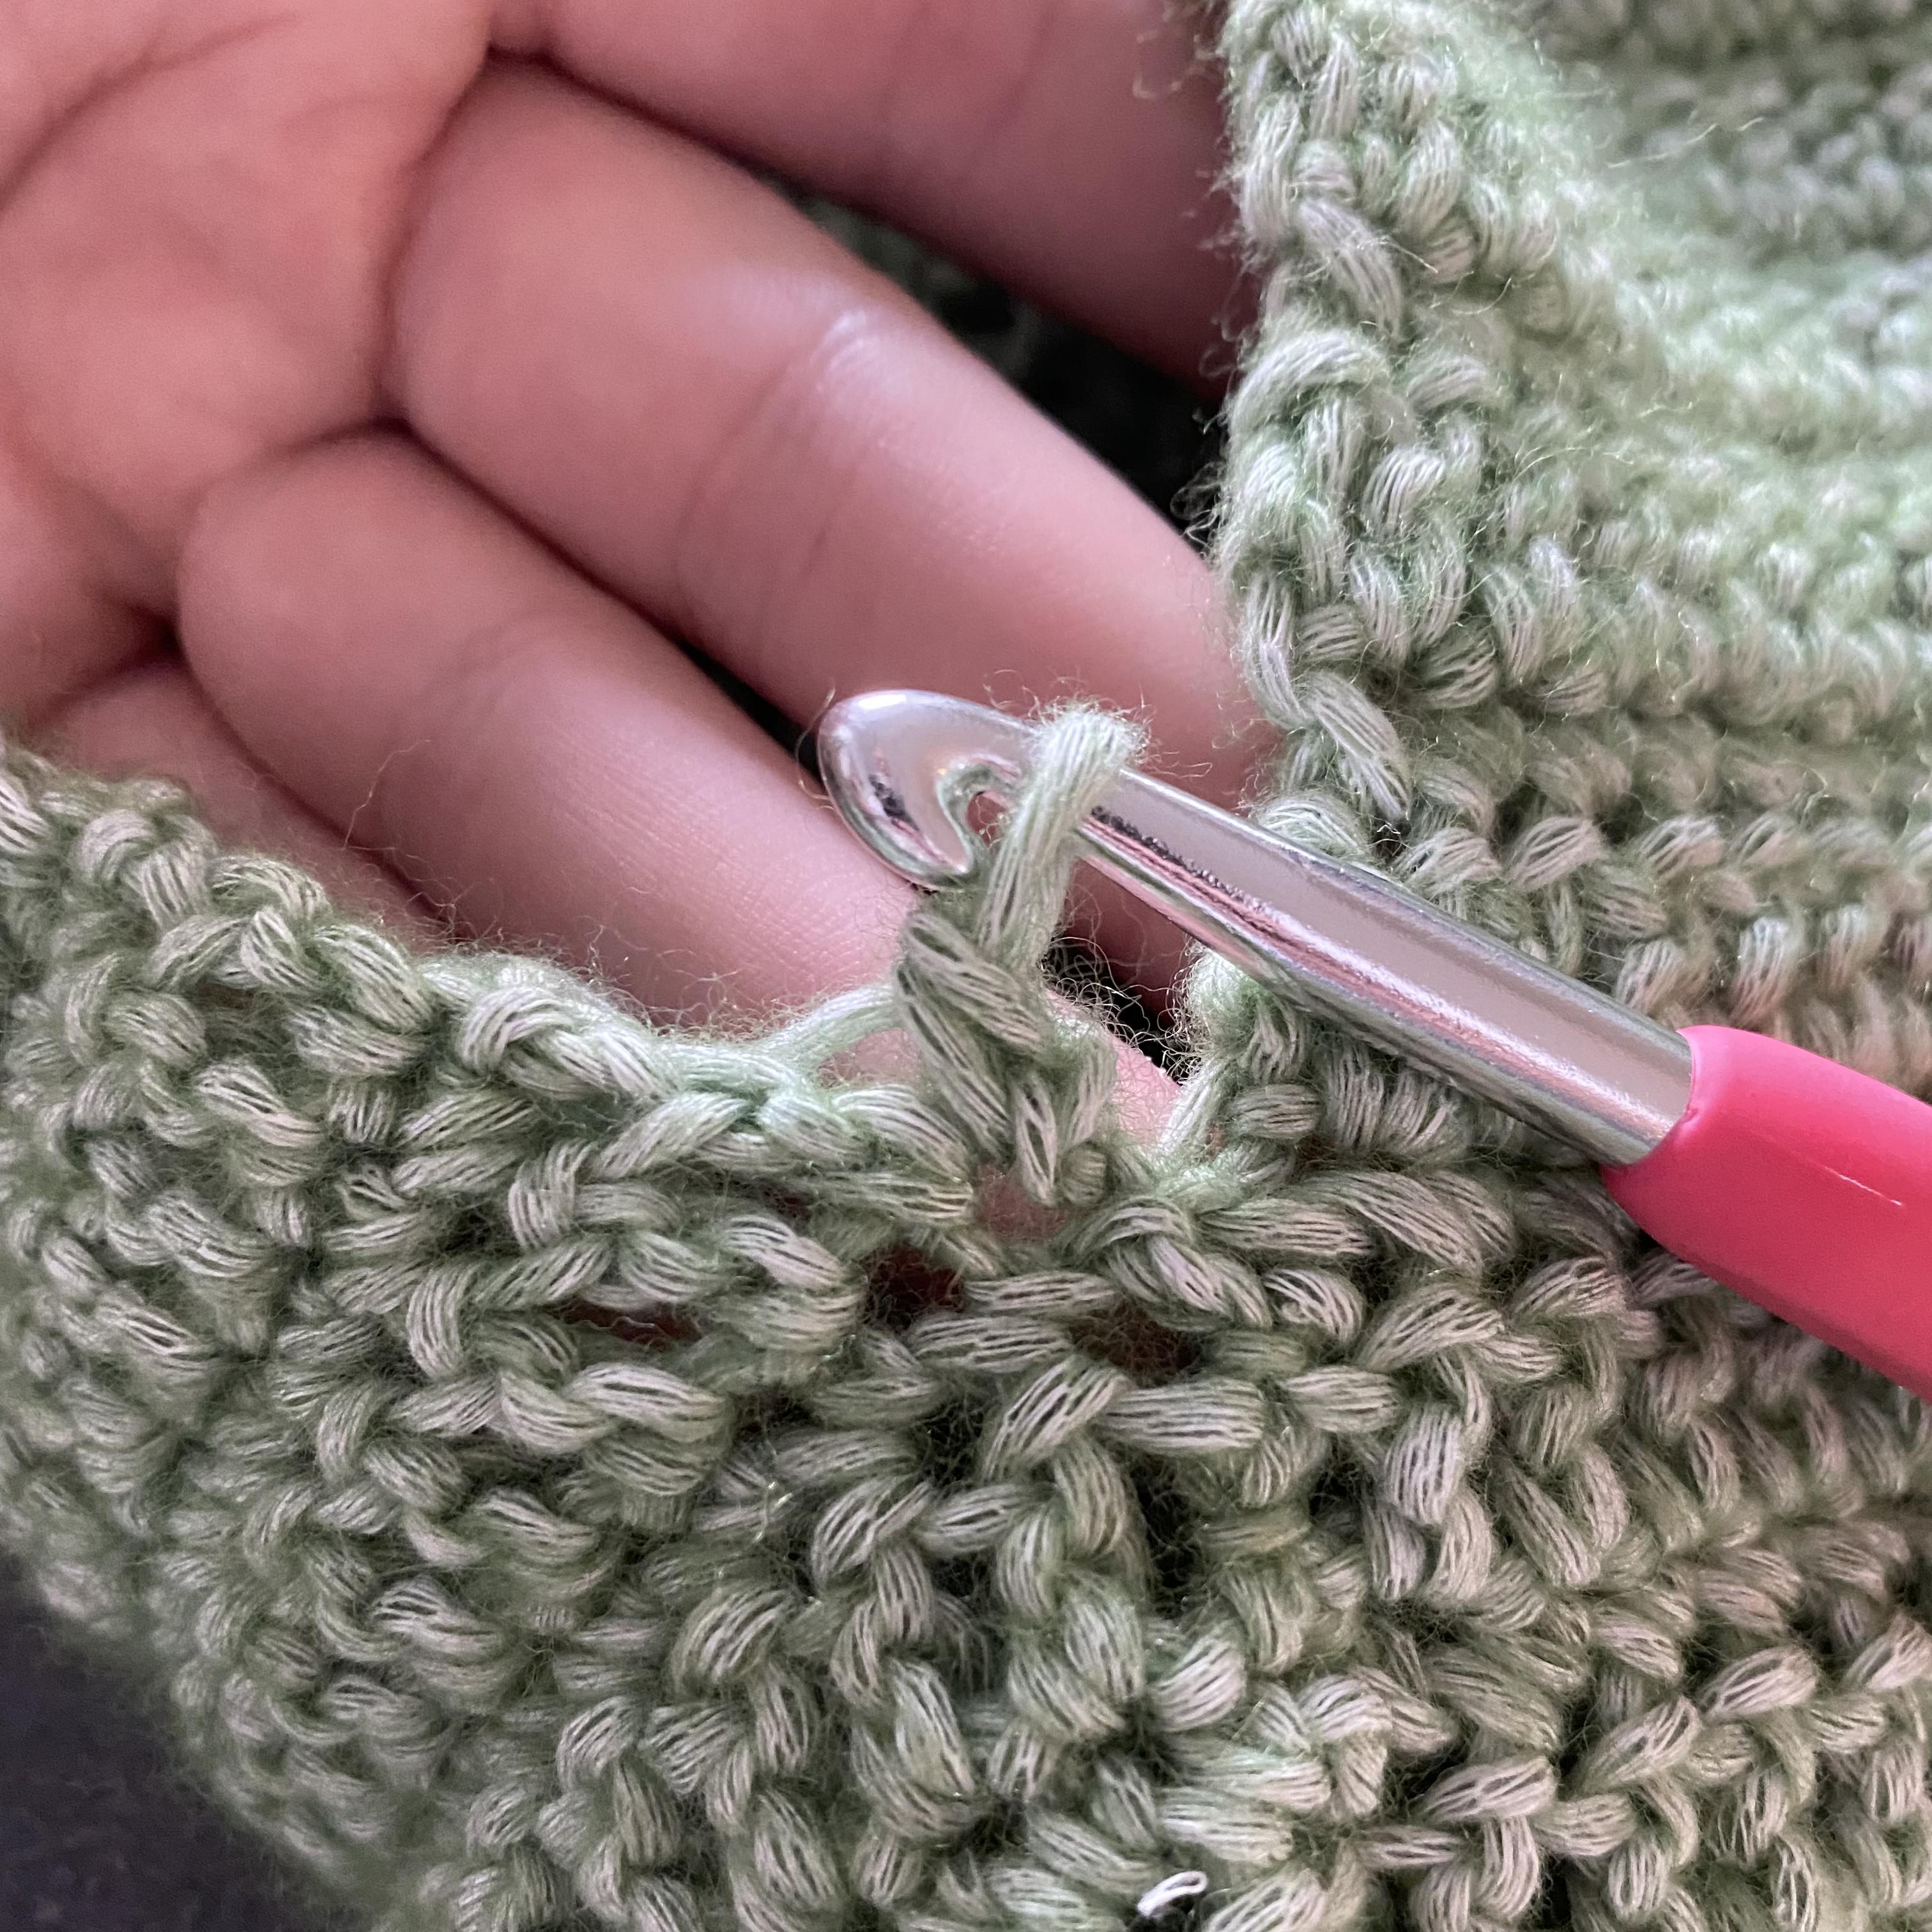
Fasten the yarn in the armholes of the sleeve and make a slip stitch followed by a dc in the same hole.
Row 1: Make a dc in each row all around the sleeve. As when you were sewing the sides together, there can be two dc in a row of tr and one dc in a row of dc. Leave the last st free and make a slip stitch in the first st of the row instead. Finish with a ts and turn the piece
Row 2: Make 1 dc in the next 7 sts. Then make 1 htr in the next 10 sts. Now make 1 tr in the next 10 sts. Now make 1 dtr in the next 20 sts. Then make 1 tr in the next 10 sts. Then make 1 htr in the next 10 sts. Finally make 1 dc in the next 6 sts. Lastly, make one slip stitch in the first st of the row. Finish with a ts and turn the piece
Row 3: Make 1 dc in every st except the last one. Instead, make a slip stitch in the first st of the row. Finish with a ts and turn the piece.
Row 4: Make 1 dc in the next 7 sts. Then make 1 htr in the next 10 sts. Now make 1 tr in the next 10 sts. Now make 1 dtr in the next 20 sts. Then make 1 tr in the next 10 sts. Then make 1 htr in the next 10 sts.
Finally make 1 dc in the next 6 sts. Finally make a slip stitch in the first st of the row. Finish with a ts and turn the piece
Row 5-14: Repeat row 3 and row 4
Row 15: On this row there should only be decreases. With the exception of the first and last decreases, each decrease should contain 3 sts. Start with 1 regular decrease where 2 sts become 1 st. Then make 24 decreases where 3 sts become 1 st. Finally make 1 regular decrease where 2 sts become 1 st.
Row 16: Make 3 dc in each of the next 3 sts. Then make 4 htr in each of the next 5 sts. Now make 5 tr in each of the next 10 sts. Then make 4 htr in each of the 5 sts. Now make 3 dc in each of the next two sts. Make 2 dc in the last st and then a slip stitch in the first st of the row. Cut the yarn and finish the piece
Now repeat this part for the opposite sleeve.
Tip: If tighter or looser sleeves are desired, simply make more or fewer decreases. Remember to do this on only one row, as the pattern is made from only one row of decreases.
Note that the row of decreases will become looser when the last row (row of increases) is worked.
EDGE WITH CORDS
Fasten yarn in left corner of front piece B and make a slip stitch followed by a dc in the same hole.
Row 1: Make 1 dc in each row until you reach the right corner of front piece A. Finish with a tstr and turn the piece. As when you were sewing the sides together, there can be two dc in a tr row and one dc in a dc row
Row 2: Make 1 tr in every st. Finish with a ts and turn the piece
Row 3: Make 1 dc in each st. Finish with a tstr and turn the piece
Row 4: Make 1 tr in every st. Now cast on 40 ch. Finish with a ts and turn the piece.
Insert a stitch marker in the 1st, 18th and 36th stitch measured up from the bottom in each side. This is the same for all sizes
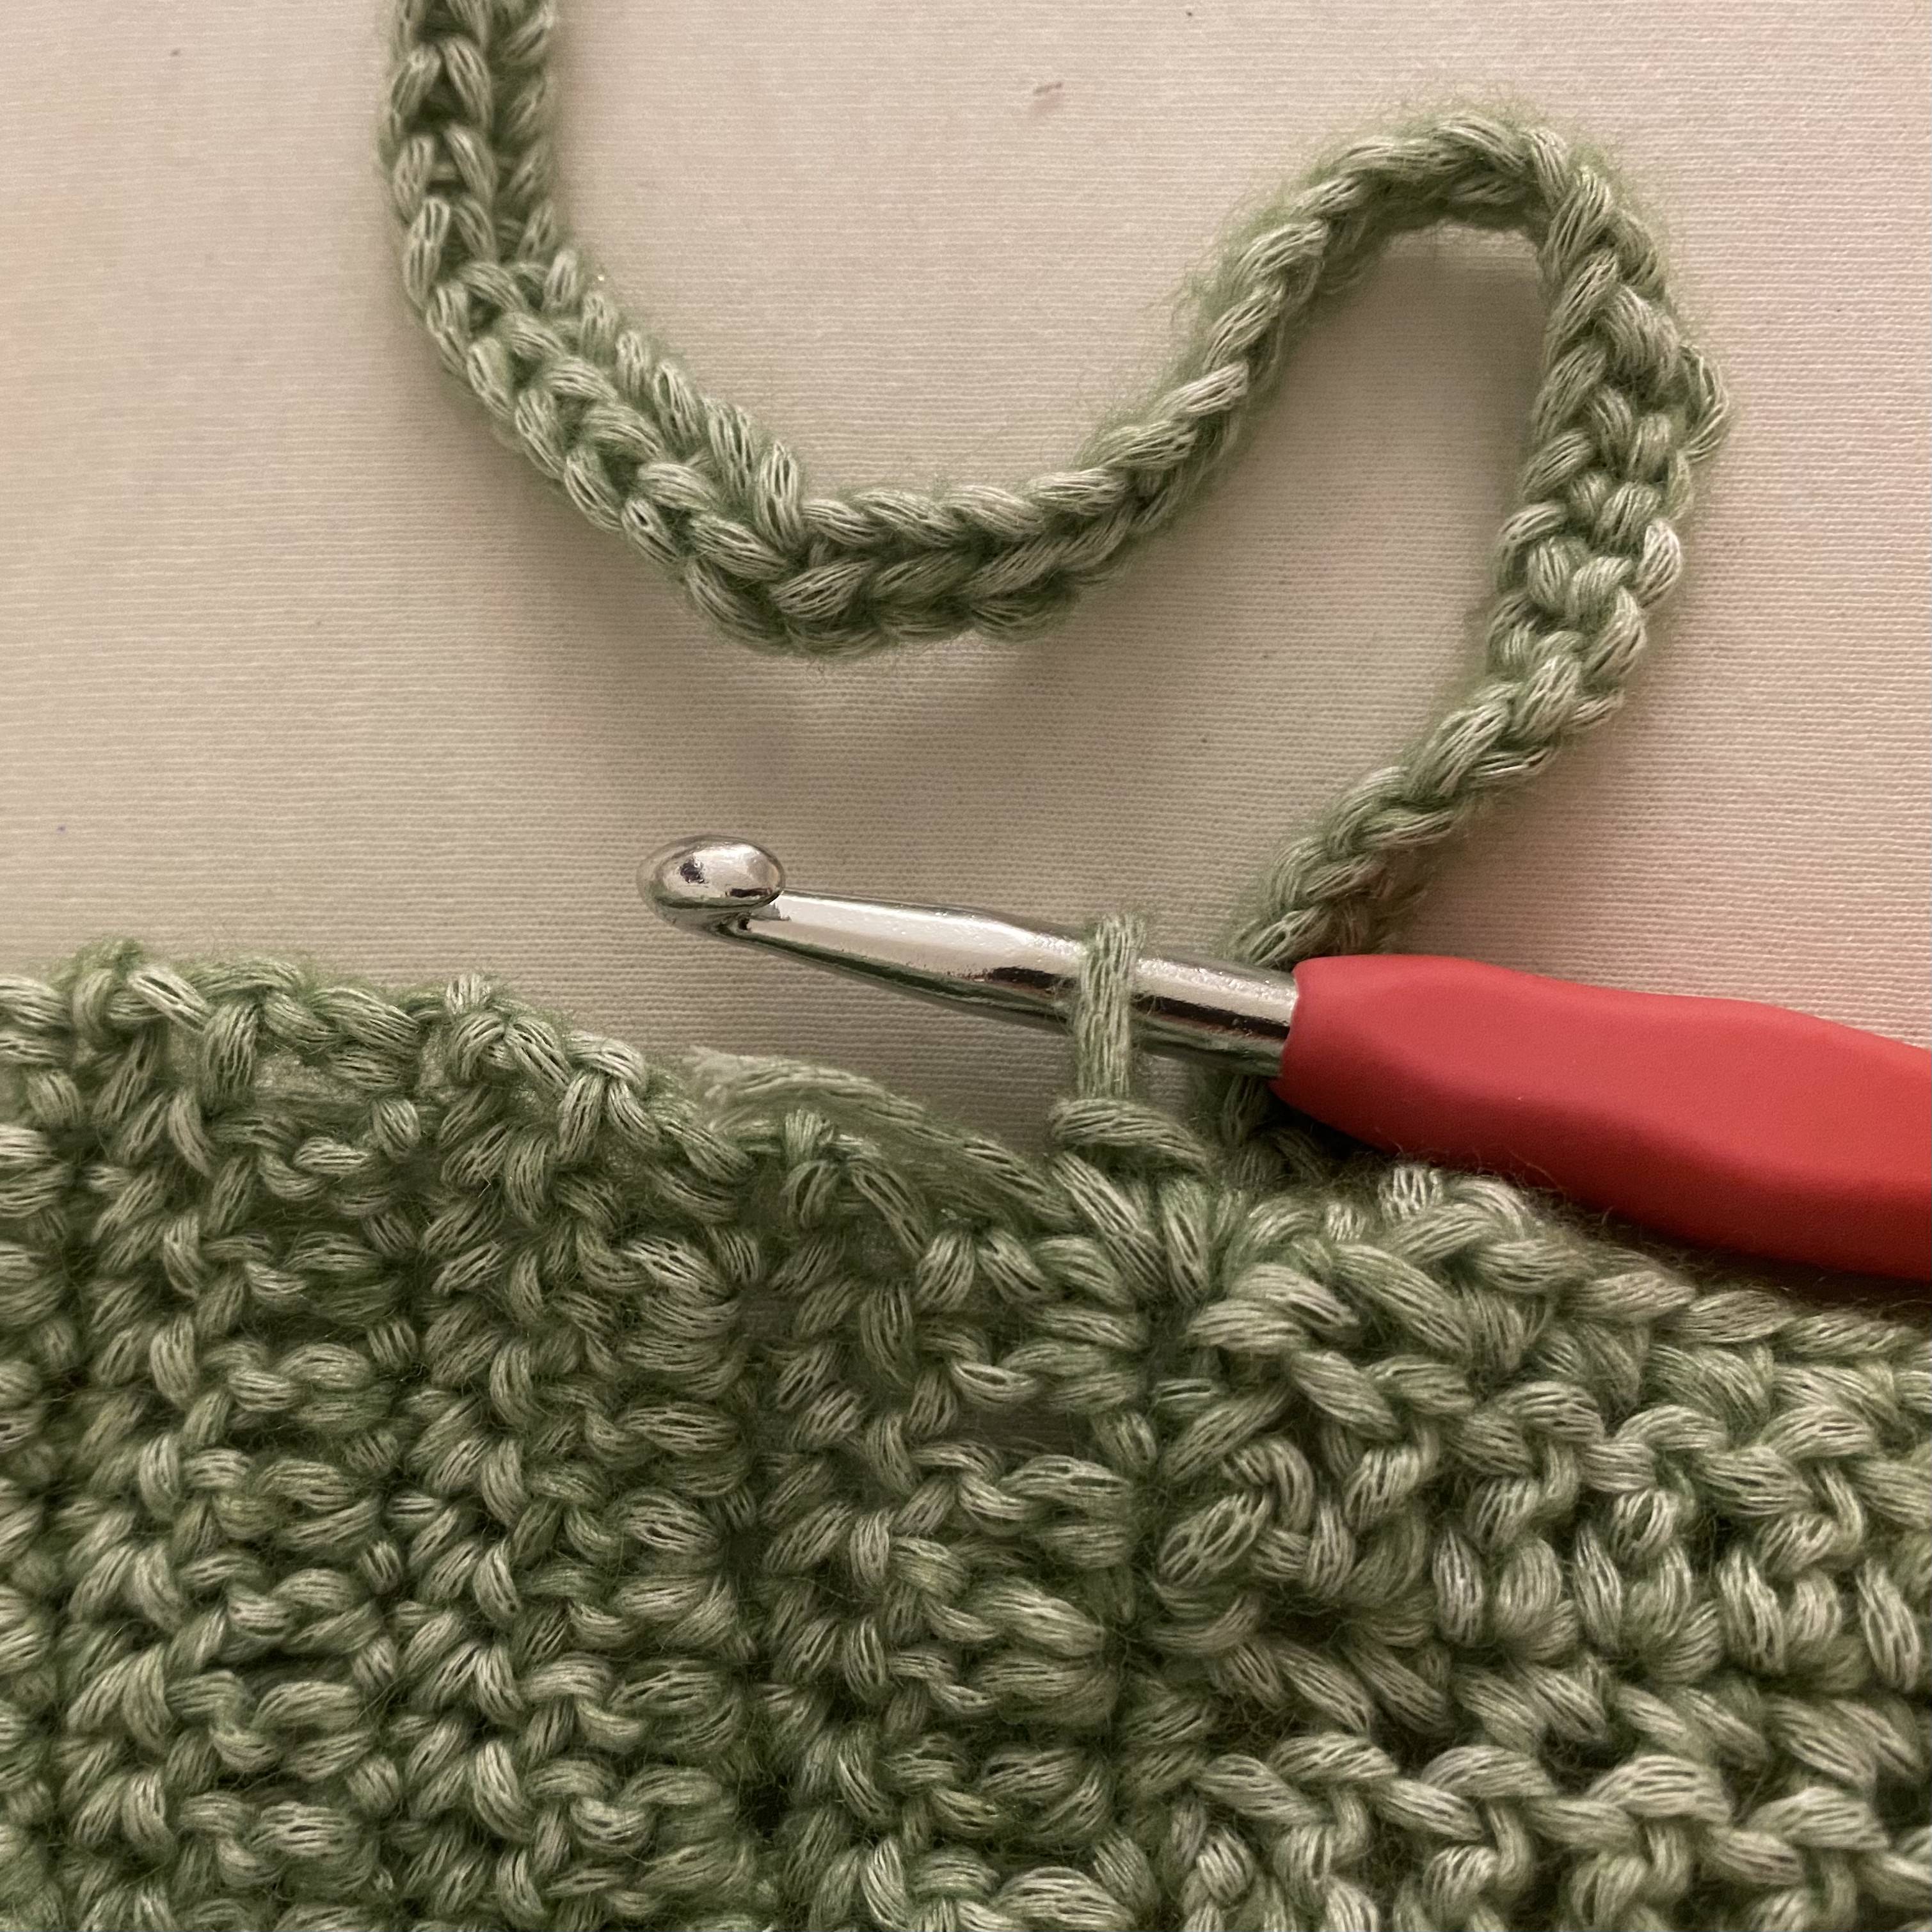
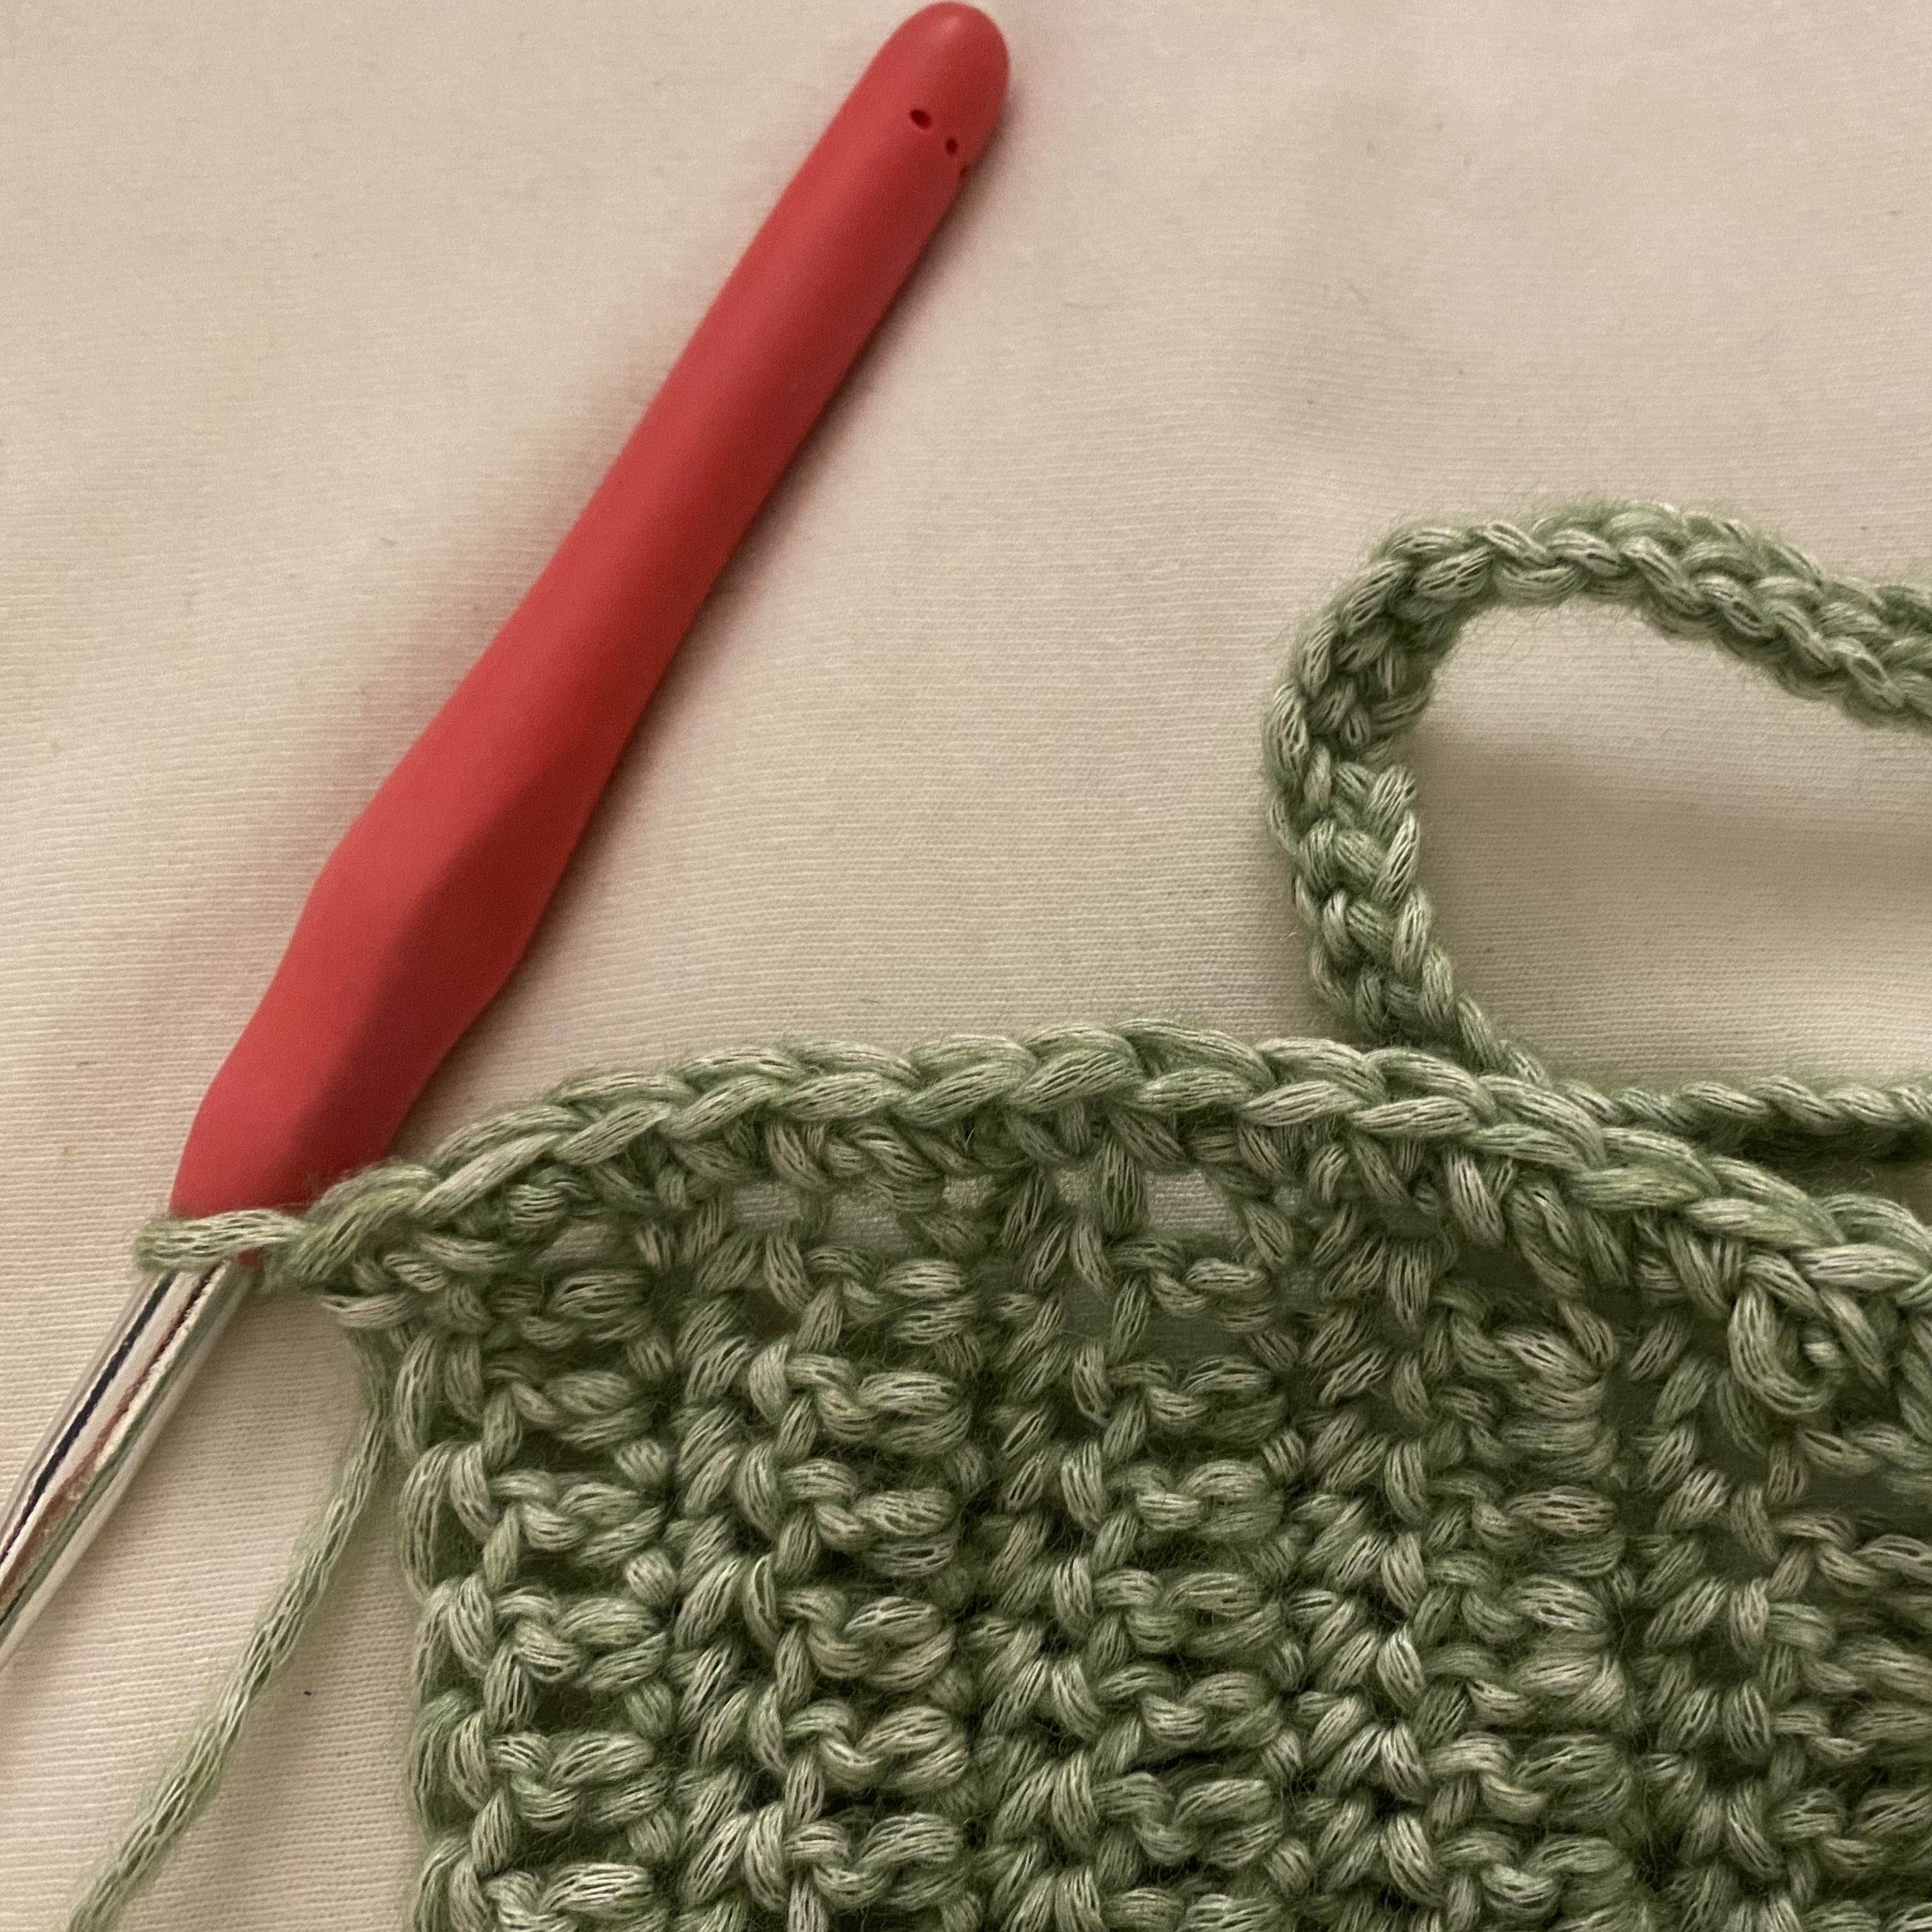
Row 5 - the six cords:
- Cord 1: Make a slip stitch in the blo of the 40 ch. Now make a dc in the st with a stitch marker and every st up to and including the stitch just before the next stitch marker.
- Cord 2-5: Cast on 40 ch + a ts and turn the piece. Make a slip stitch in the blo of the 40 ch and continue with a dc in the st with a stitch marker and every st up to and including the stitch just before the next stitch marker.
- Cord 6: Cast on 40 ch + a ts and turn piece. Make a slip stitch in the blo of the 40 ch and continue with a dc in the st with the stitch marker. Cut the yarn and finish the piece.

If you want longer cords, just add more ch.
BRAID AT THE BOTTOM OF THE TOP
Fasten the yarn to the bottom of the top at cord 6 and make a slip stitch followed by a dc in the same hole
Row 1: Make a dc in every stitch row and when you get to the bottom of front piece A, continue to make a dc in every st. There should now be 149 (125, 137, 161, 173) sts on that row. Finish with a tstr and turn the piece
Row 2: Start with 2 tr in first st. Then make 1 tr in next st. Continue this way throughout the whole row. There should now be 224 (188, 206, 242, 260) sts on this row. Finish with a ts and turn the piece
Row 3: Make a dc in every st. Finish with a tstr and turn the piece
Row 4: Start with 2 tr in first st. Then make 1 tr in next st. Continue this way throughout the whole row. There should now be 336 (282, 309, 363, 390) sts on the row. Finish with a ts and turn the piece
Row 5: Make a dc in every st. Finish with a tstr and turn the piece
Row 6: Make a tr in every st. Finish with a ts and turn the piece
Row 7-10: Repeat rows 5 and 6, but instead of making a ts and turning the piece on row 10, cut the yarn and finish the piece
Row 11: Now fasten the yarn in the first st you made in the first row of the braid. Make a slip stitch followed by a dc in the same hole. Now make a dc in every st all the way around the braid. When you have made a dc in the last st you made in the first row of the braid, cut the yarn and finish the piece.
Now simply sew in all loose threads and you are done with your work. Congratulations on your new beautiful May Top
Designed by: @ibenlindeskov on Instagram (Iben Lindeskov)
 Österreich
  Belgique
  Bosna i Hercegovina
  България
  Κύπρος
  Česká republika
  Danmark
  Eesti
Eesti  Føroyar
  Suomi
Suomi  France
  Deutschland
  Ελλάδα
  Kalaallit Nunaat
  Magyarország
  Ísland
  Ireland
  Italia
  Latvija
  Liechtenstein
  Lietuva
  Lëtzebuerg
  Malta
Malta  Isle of Man
  Nederland
  Norge
Norge  Polska
  Portugal
  România
  Slovensko
  Slovenija
  España
  Sverige
  Schweiz
  Ukraїna
  United Kingdom